Preparation
What you will need to prepare before implementing 1E CMDB Connect in your network. Typically, these are tasks that may take some time to organize, depending on how your organization works. A more complete checklist of tasks is provided in Requirements.
Preparation for Basic Authentication
Below, given are the steps to be followed to configure your ServiceNow instance for Basic Authentication:
-
Installing 1E
-
Installing and configuring 1E Core
-
Adding a 1E user account for 1E CMDB Connect
Installing 1E
For information on installing 1E (on-premises), refer to Planning for 1E 8.1.
Installing and configuring 1E Core for Basic Authentication
Refer to the 1E Platform on-premises (9.x) page for more details on preparing the 1E Core application. In that documentation, you will need to follow the instructions for the following:
-
Disable 1E Two-factor Authentication.
-
Check your 1E License.
-
Enable basic authentication for the Consumer node of the 1E website.
-
Add the 1EServiceNowCore Consumer.
-
Bypass approval for the 1EServiceNowCore Consumer in the 1E database.
Adding a 1E user account for 1E CMDB Connect
To configure a 1E user:
-
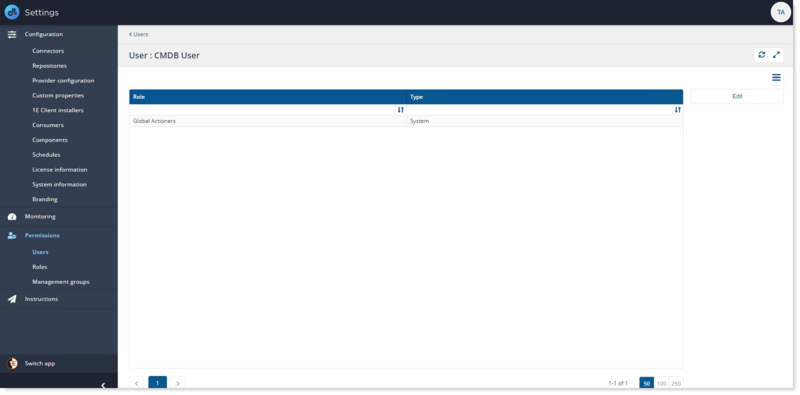
Logon to the Settingsapp using a 1E user account that at least has thePermission Administratorrole.
-
Navigate toPermissions→Users
-
Click on theAddbutton available on the right side.
-
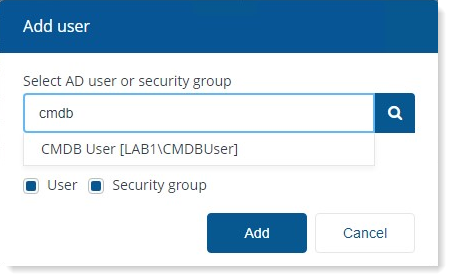
A pop-up window opens up as shown in the picture.
-
In the Select AD user field type the name, or part of the name, for the Active Directory user or security group that you want to add. A list of matching names will be retrieved from Active Directory and displayed as you type, these are filtered so that users or groups that have already been added do not appear.
Here in our example, user has typed in cmdb to this 1E has returned CMDB User [LAB\CMDBUser].
-
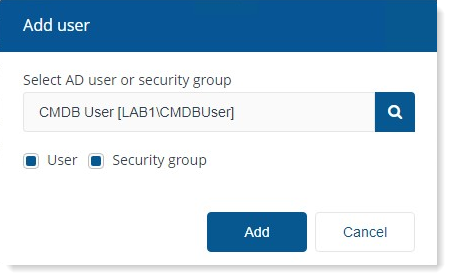
Select the user you want to add from the list. In our example it is CMDB User [LAB1\CMDBUSer].
-
Now click on Add button to add the user.
-
You can see that the user has been added. Click on Edit button given on the right side of the panel.
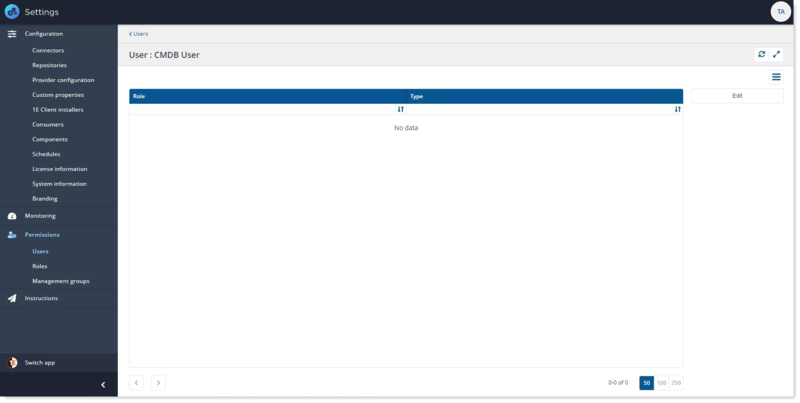
-
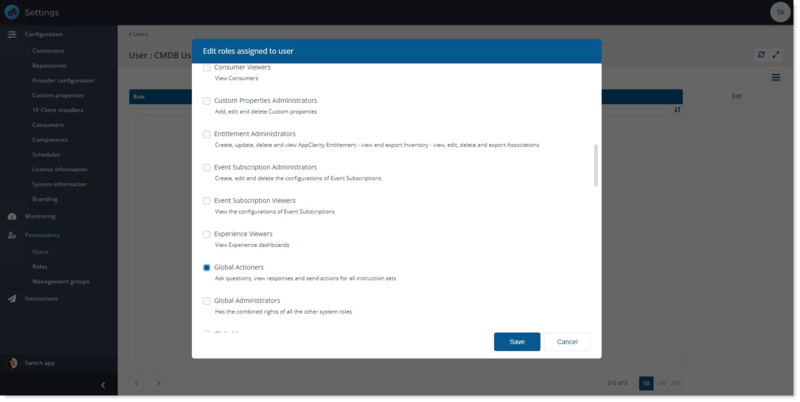
A pop-up window opens up that allows to edit roles assigned to user.
-
Select the role you want to assign to the user. In our example we have selected Global Actioners role as we want the user should be able to perform action on all 1E instructions.
-
Once the roles have been selected click onSave. You should see theGlobal Actionersin the role list.
Preparation for Modern Authentication
For more information on how you can prepare and configure your ServiceNow instance for Modern Authentication, refer to 1E Platform SaaS.
To prepare for Modern Authentication follow the below steps:
-
Prepare your ServiceNow instance using either of the below external IdP:
-
Settings for Modern Authentication
Settings for Modern Authentication
There are few more settings that are required by SGC for 1E application for it to work on Modern Authentication.
For Single Tenant
The following system properties have to be configured as SGC for 1E application works only on a single tenant mode.
|
System property |
Value |
|---|---|
|
x_1e_cmdb_connect.pem_certificate |
The SysID of the PEM Certificate record created in the sys_certificate table. |
|
x_1e_cmdb_connect.jwt_provider |
The SysID of the JWT Provider record created in the jwt_provider table. |
|
x_1e_cmdb_connect.key_id |
The App ID of the non-interactive client assertion App and is used to sign the JWT token. |
|
x_1e_cmdb_connect.oauth_access_token |
A two-way encrypted access token received from IdP. This value is autopopulated. |
|
x_1e_cmdb_connect.access_token_expiry_time |
It is the minimum time left against the total lifespan of the access token to get renewed. The default value assigned is 100 (in seconds). |
To view and configure the values of the system properties, follow the below steps:
-
Login to your ServiceNow instance.
-
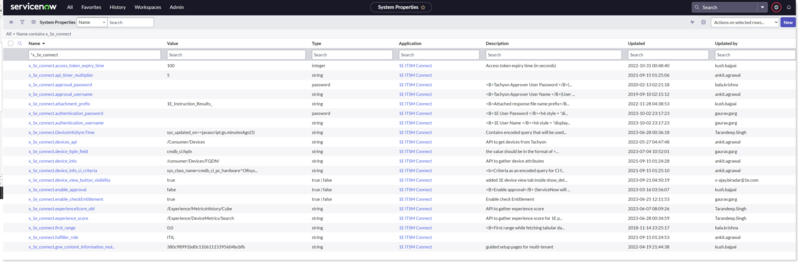
To open System Properties table, type sys_properties.LIST in the filter navigator and press enter.
-
The System Properties table opens up into a new page, and now look for the details of the above listed properties in the table as shown below.
-
You can edit the values of the desired system property as per the details given in the above table.