Instruction management
1E offers a wide range of instructions from 1E Exchange, designed to investigate devices and resolve issues throughout your entire enterprise. Using the 1E ITSM Connect application, you can access the same capabilities directly within ServiceNow. To enable this functionality, the instructions available in 1E must be synchronized and cached within ServiceNow, allowing you to run instructions and collect responses directly within a ServiceNow incident.
The 1E instructions that are available to any ServiceNow user with the x_1e_connect.Tachyon_User role, must be defined in 1E by setting the appropriate permissions on the proxy user role in 1E. For more details, refer to Configuring 1E Platform.
1E instructions are available in ServiceNow by clicking the Retrieve Instructions button on the App Configuration page. This fetches details of all the instructions currently available to the 1E ITSM Connect app 1E user, along with their parameters and stores them in the ServiceNow tables.
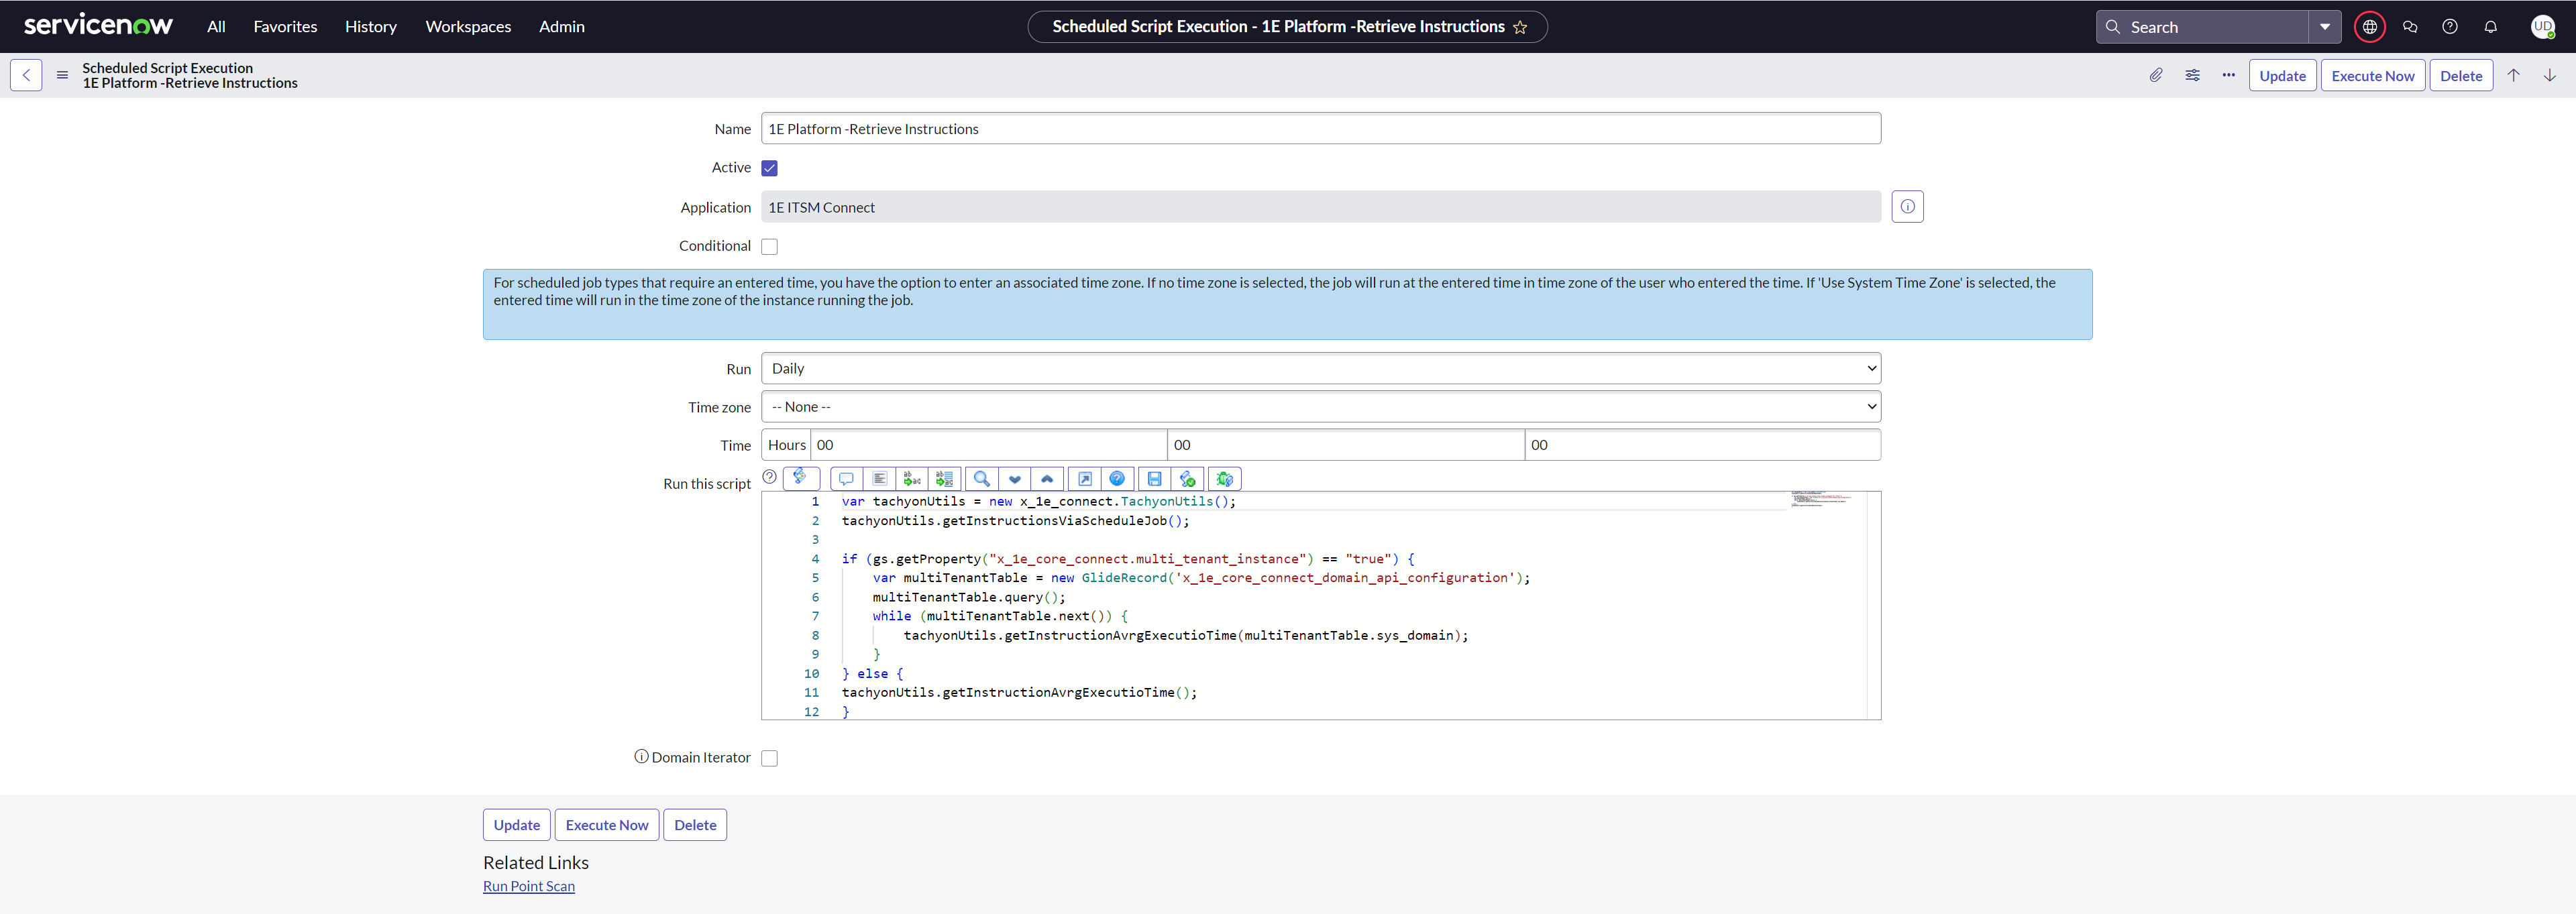
There is a schedule job, 1E Platform-Retrieve Instructions under the Administration section to retrieve instructions. This job allows the user to set the periodic retrieval of instructions from 1E.
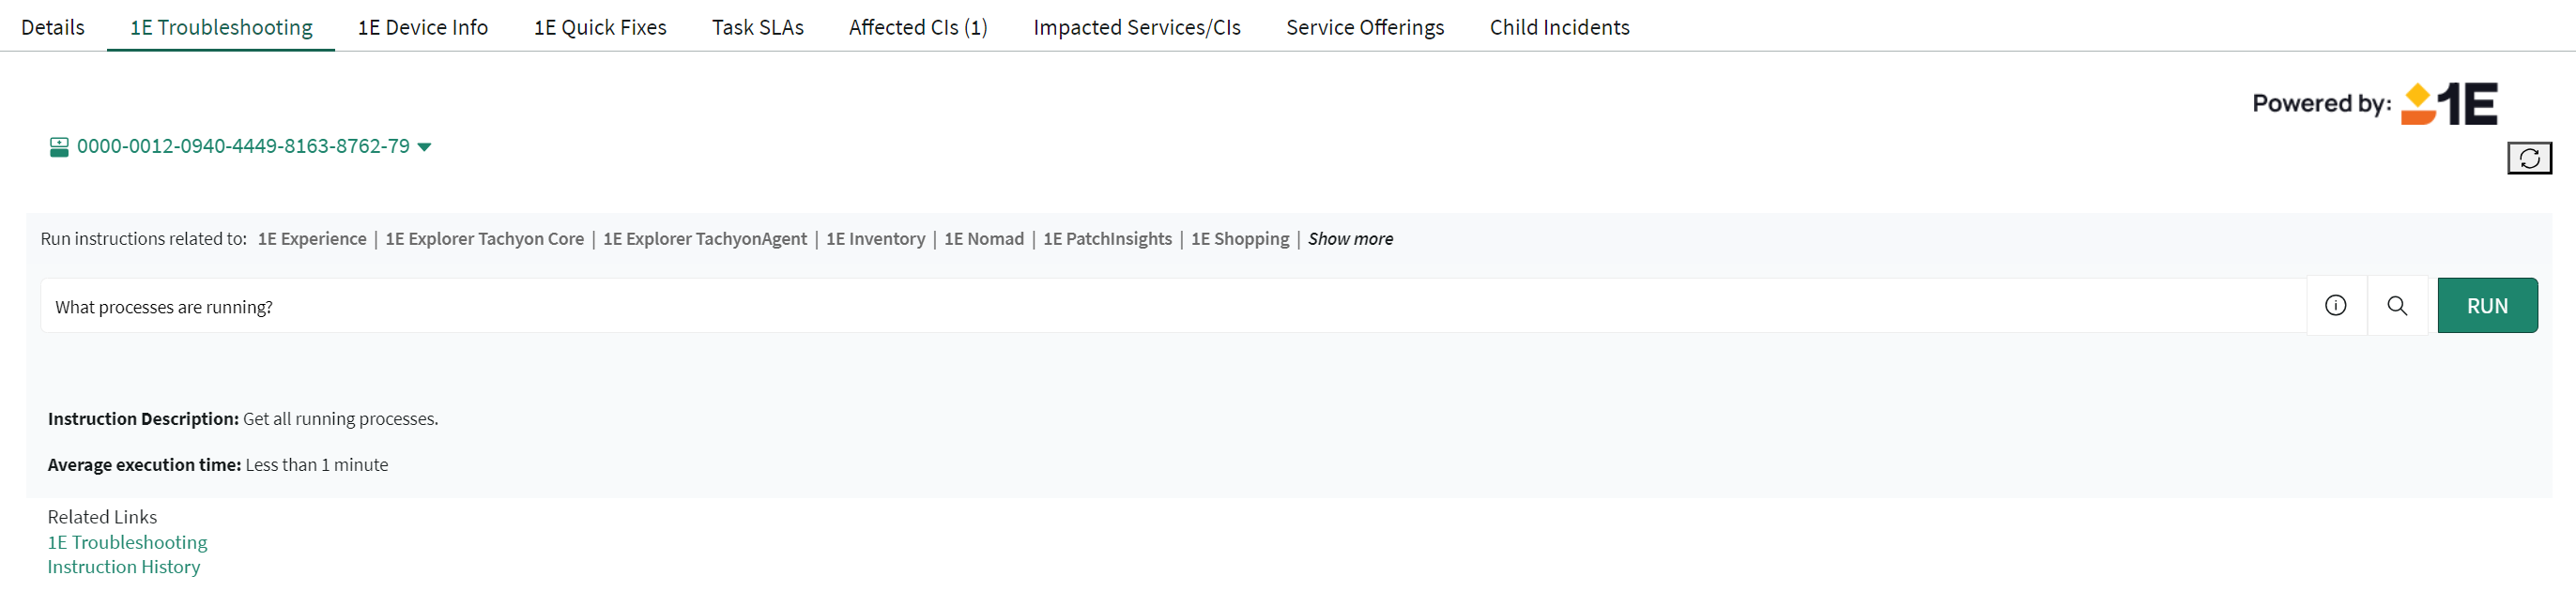
It provides a detailed description of the instruction along with its average execution time, offering valuable insights into system performance and user experience. When you select an instruction, the description and average execution time appear at the bottom of the search field, helping you better understand the results of the instructions.
According to the Average Execution time value, the message is shown based on the below given table:
|
Message |
Description |
|---|---|
|
Average execution time : Less than 1 minute |
If the average execution time is less than a minute for the instruction. |
|
Average execution time : Approx time in minutes |
If the average execution time is greater than 1 minute, then the message specifies the average execution time in minutes. |
|
Average execution time : Instruction not executed enough times |
If there is no average execution time for the instruction. |
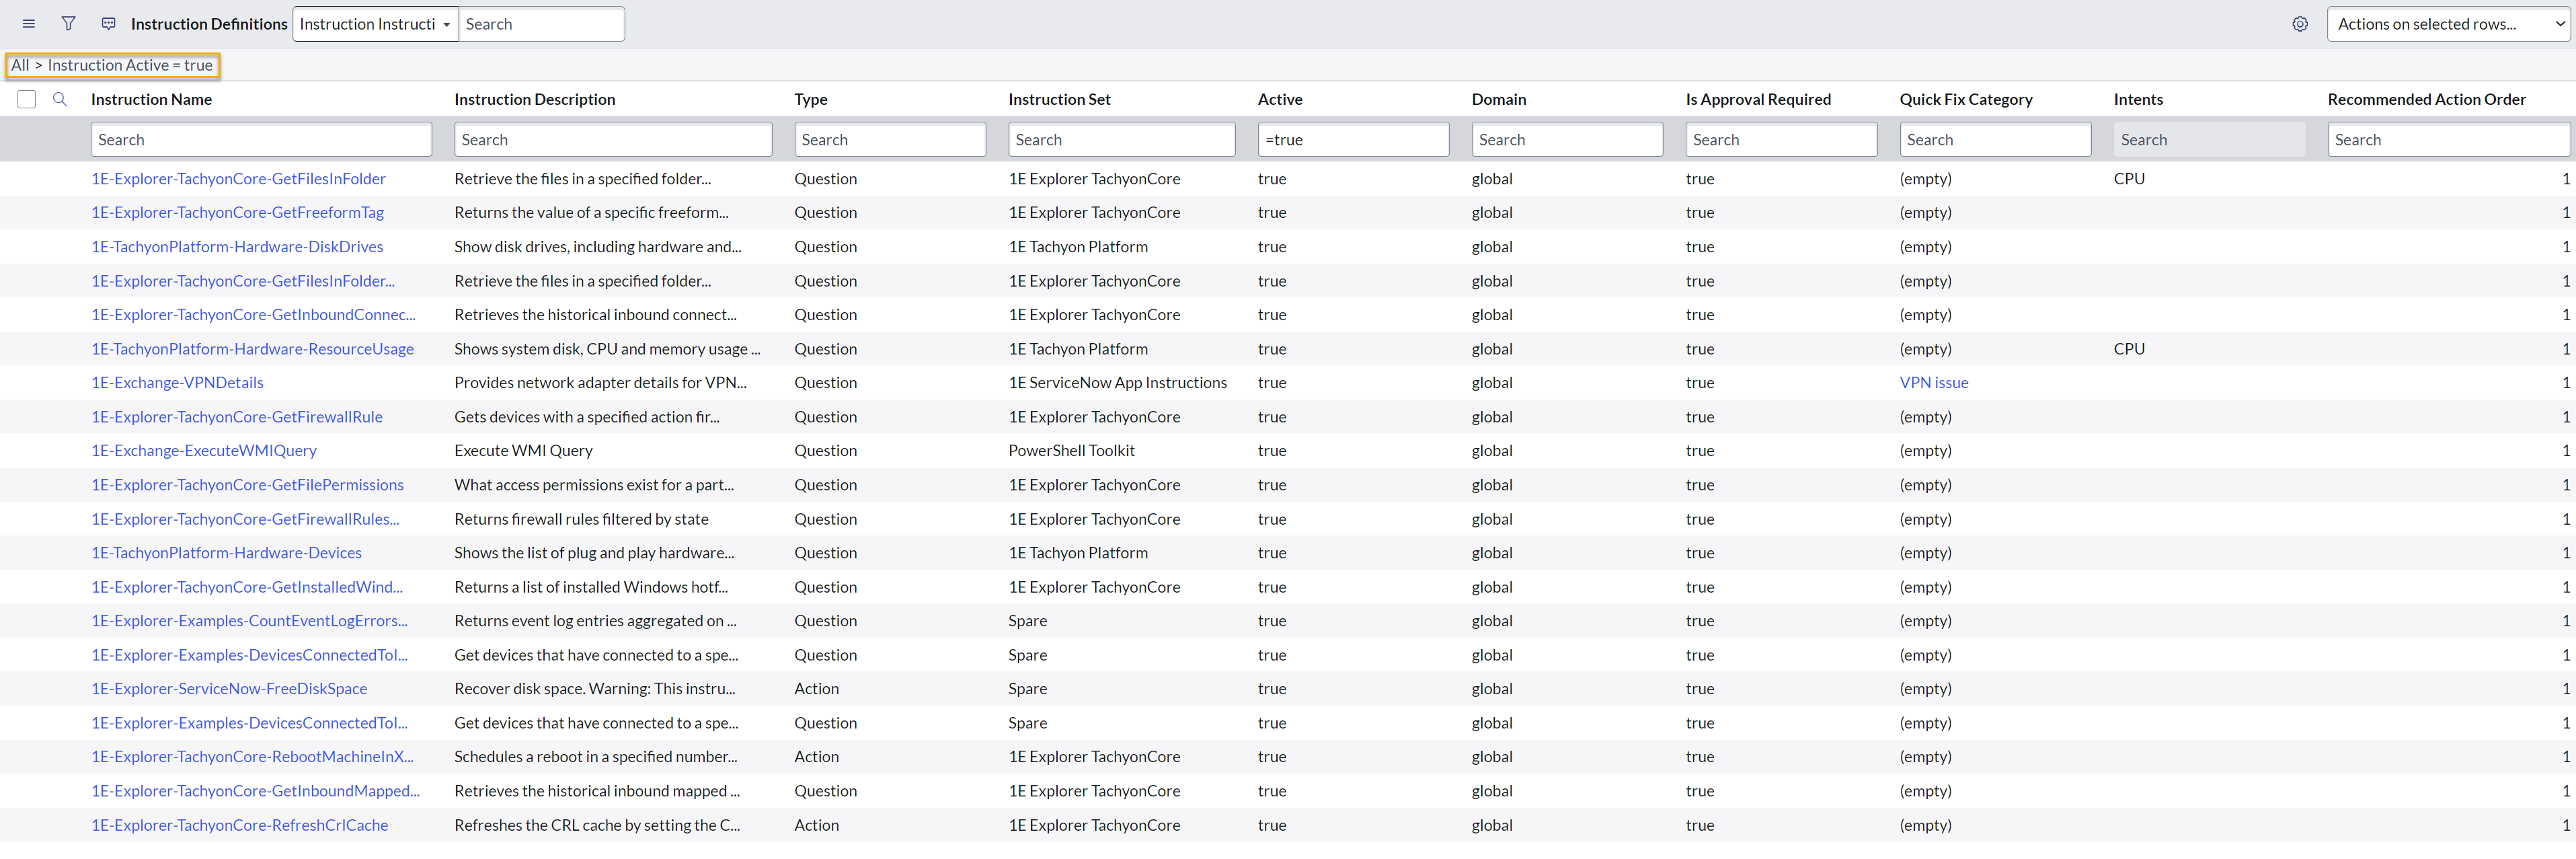
All the instructions available in ServiceNow can be seen on the Instruction Definitions page. The basic details about the instructions, such as name, description, Instruction Set etc. are displayed. The Type of the instruction is also visible on the page and tells you whether an instruction is an action or a question. You can choose which fields to display, based on your own needs.
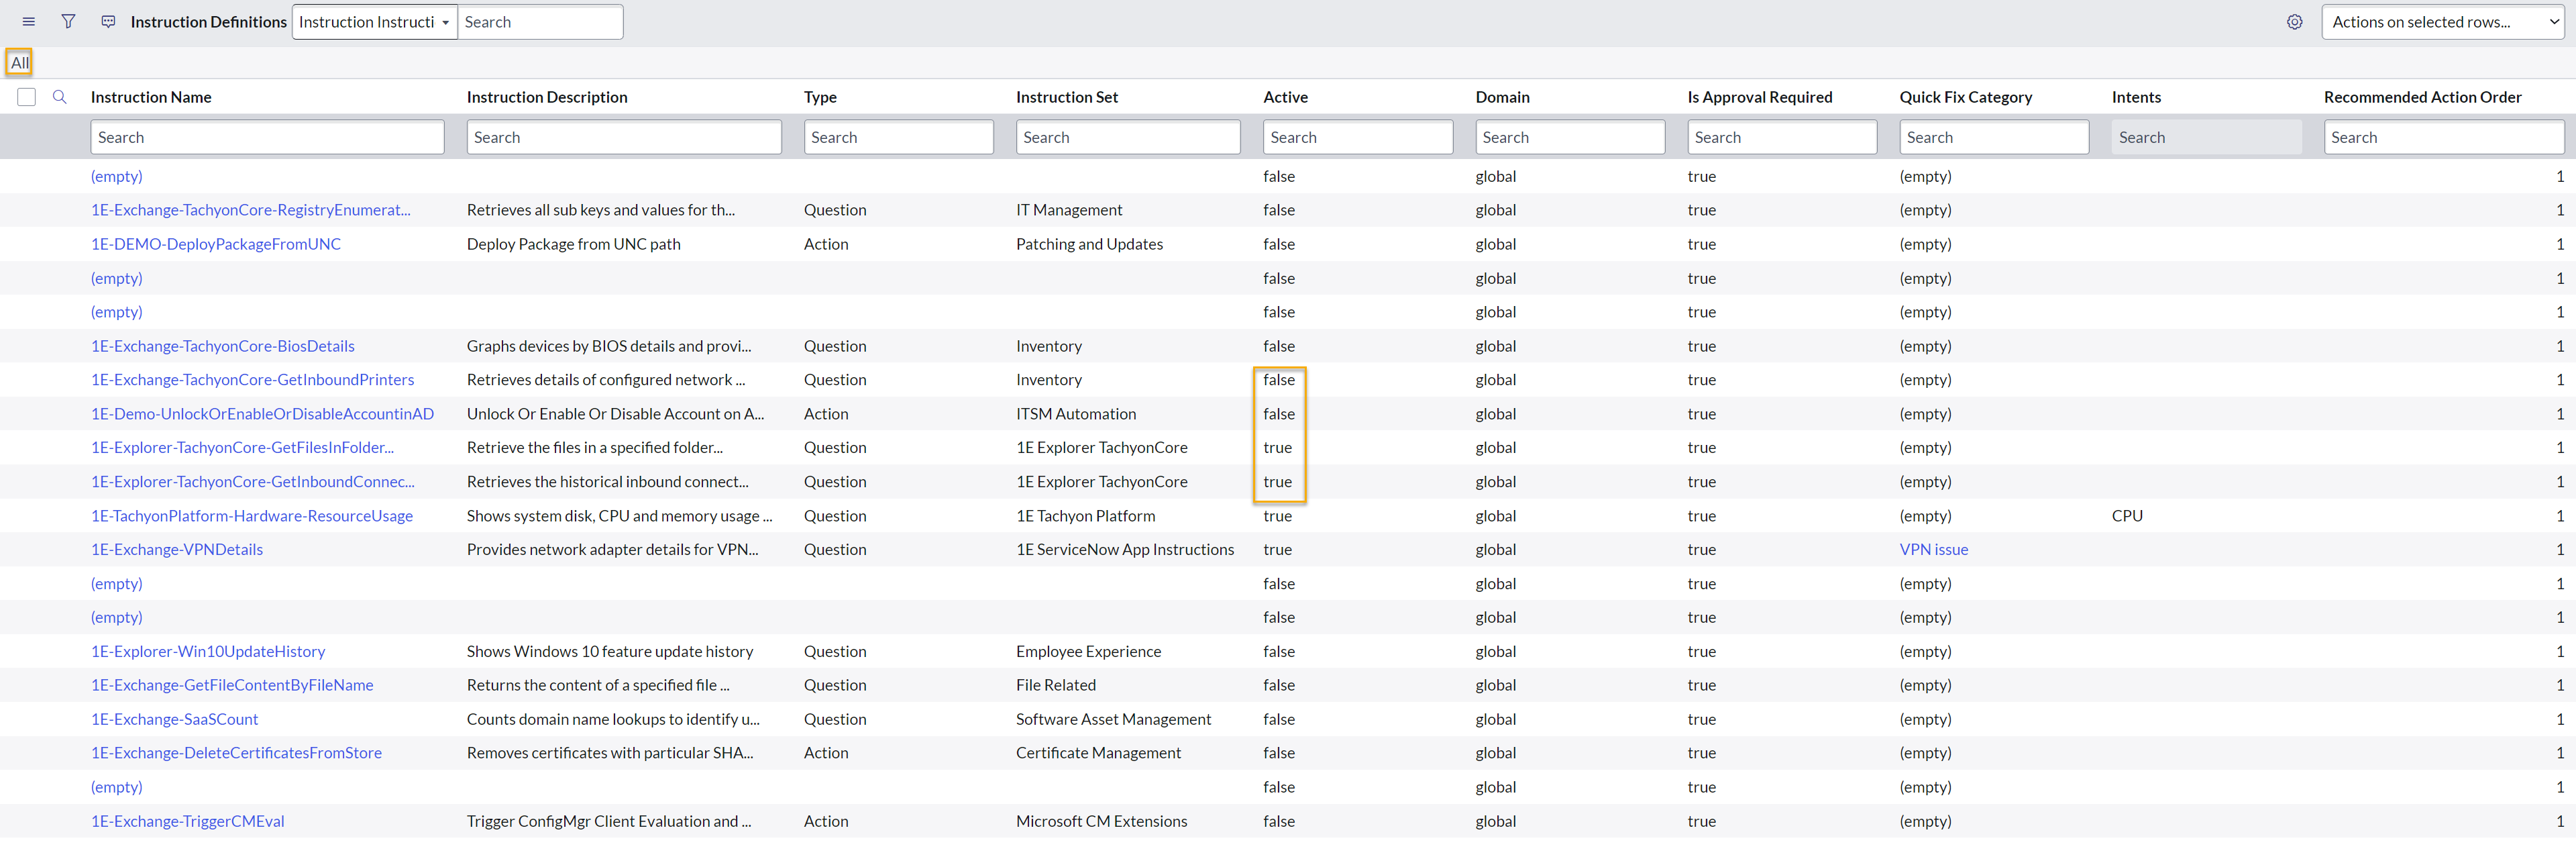
Instructions can be automatically disabled and marked as inactive by displaying false in the Active column, refer the below section for more details about automatically disabled instructions. The contents of the Instruction Definitions page are filtered so that only active instructions are displayed on the page by default.
In order to see all the instructions, including the inactive ones, the default filter should be removed by clicking the All link just before the filter condition.
Instruction detail page
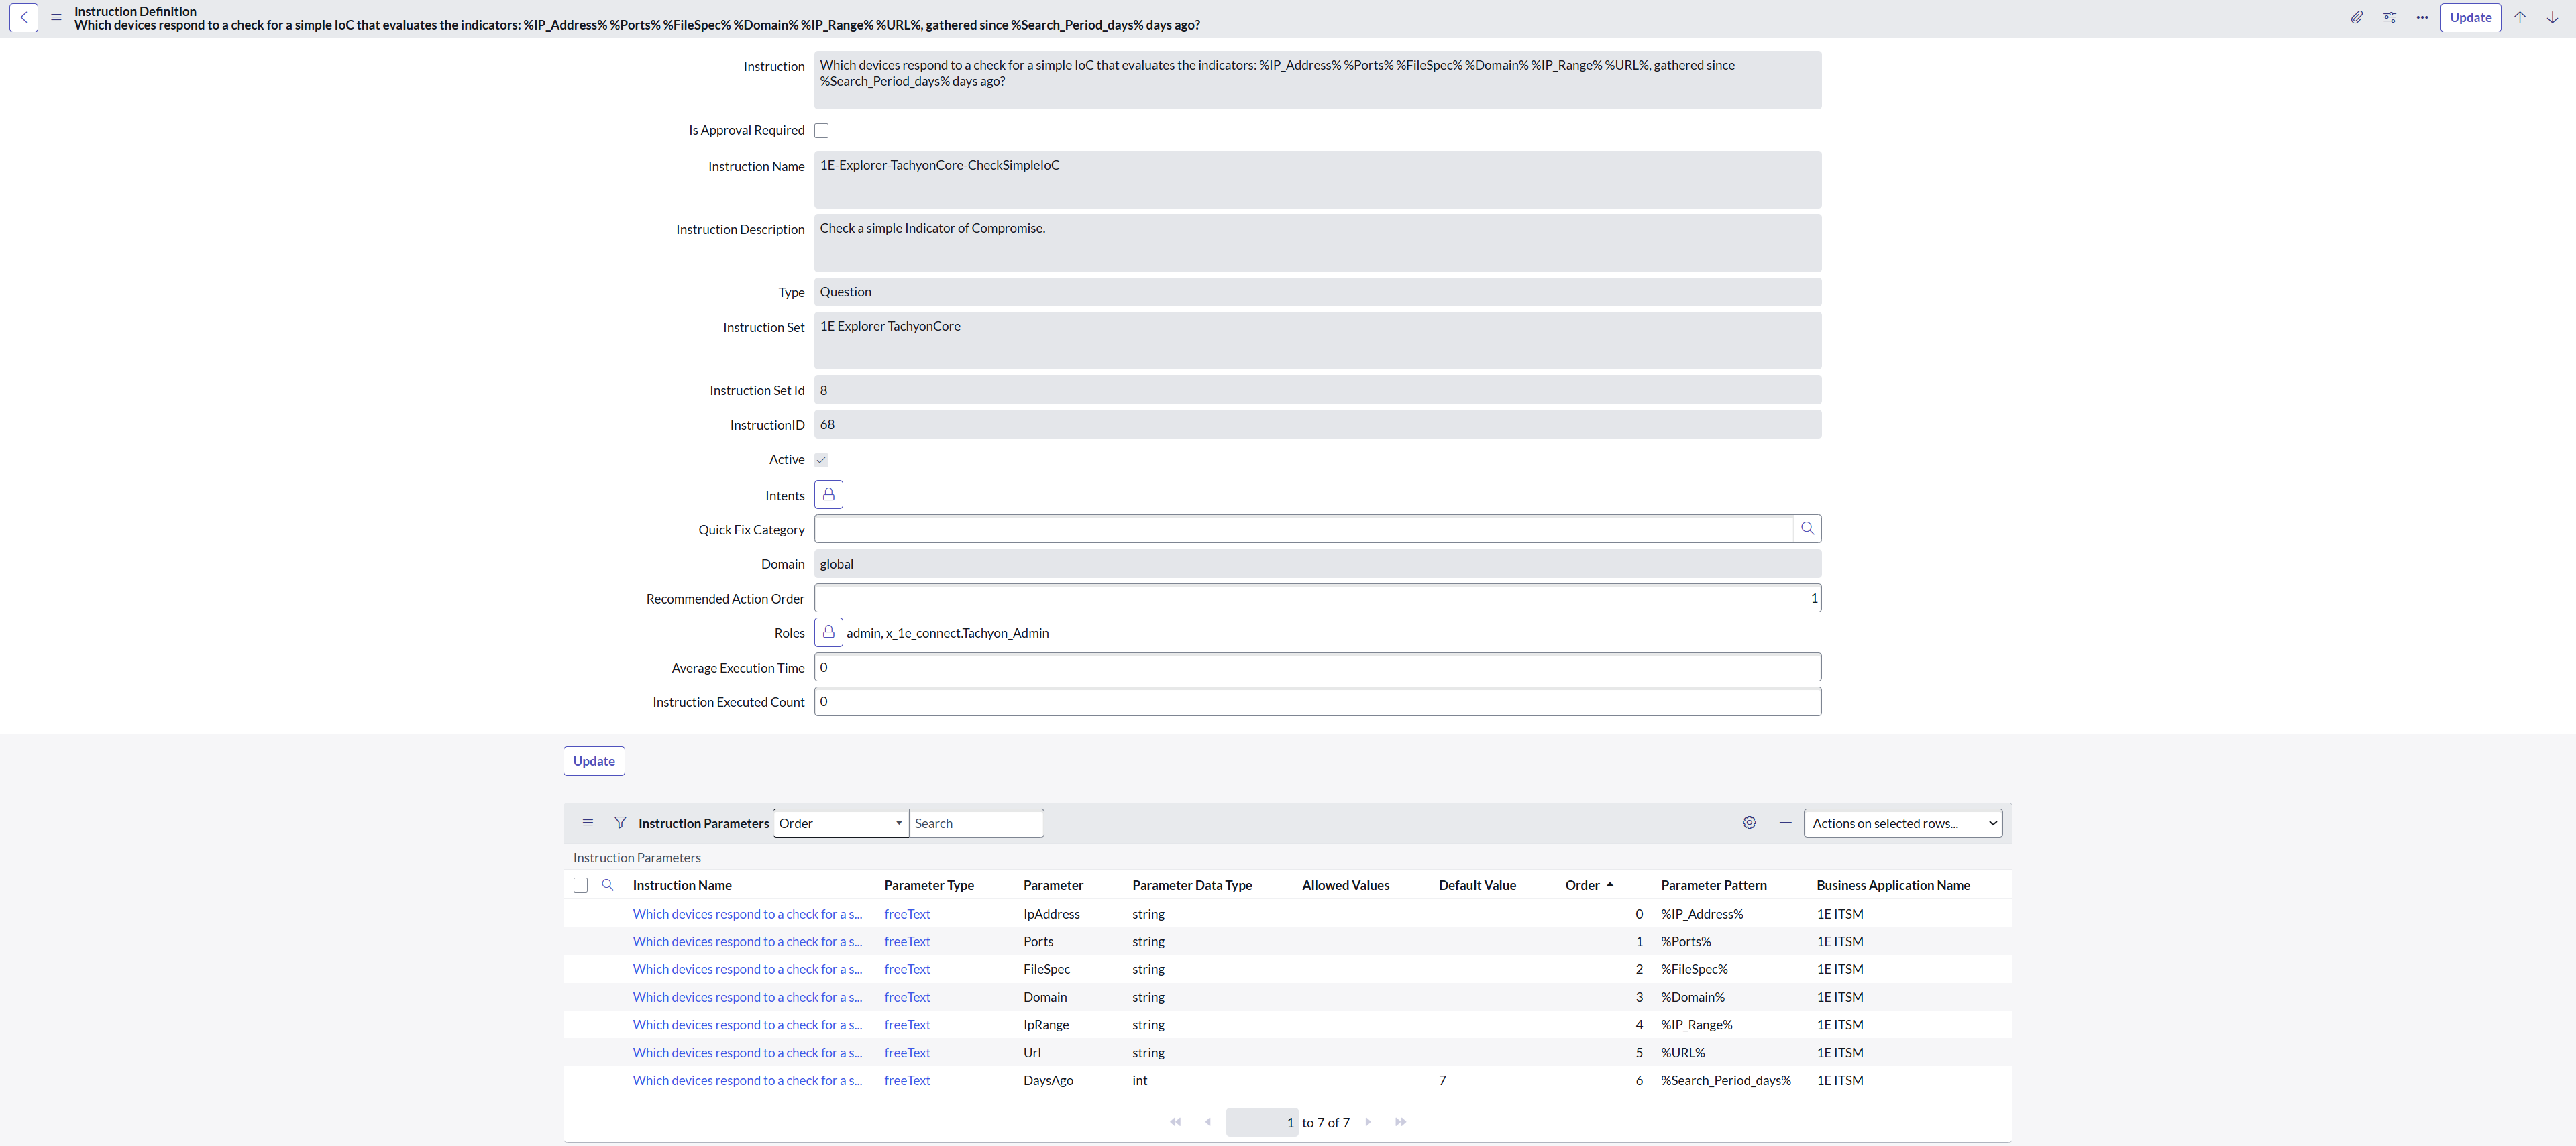
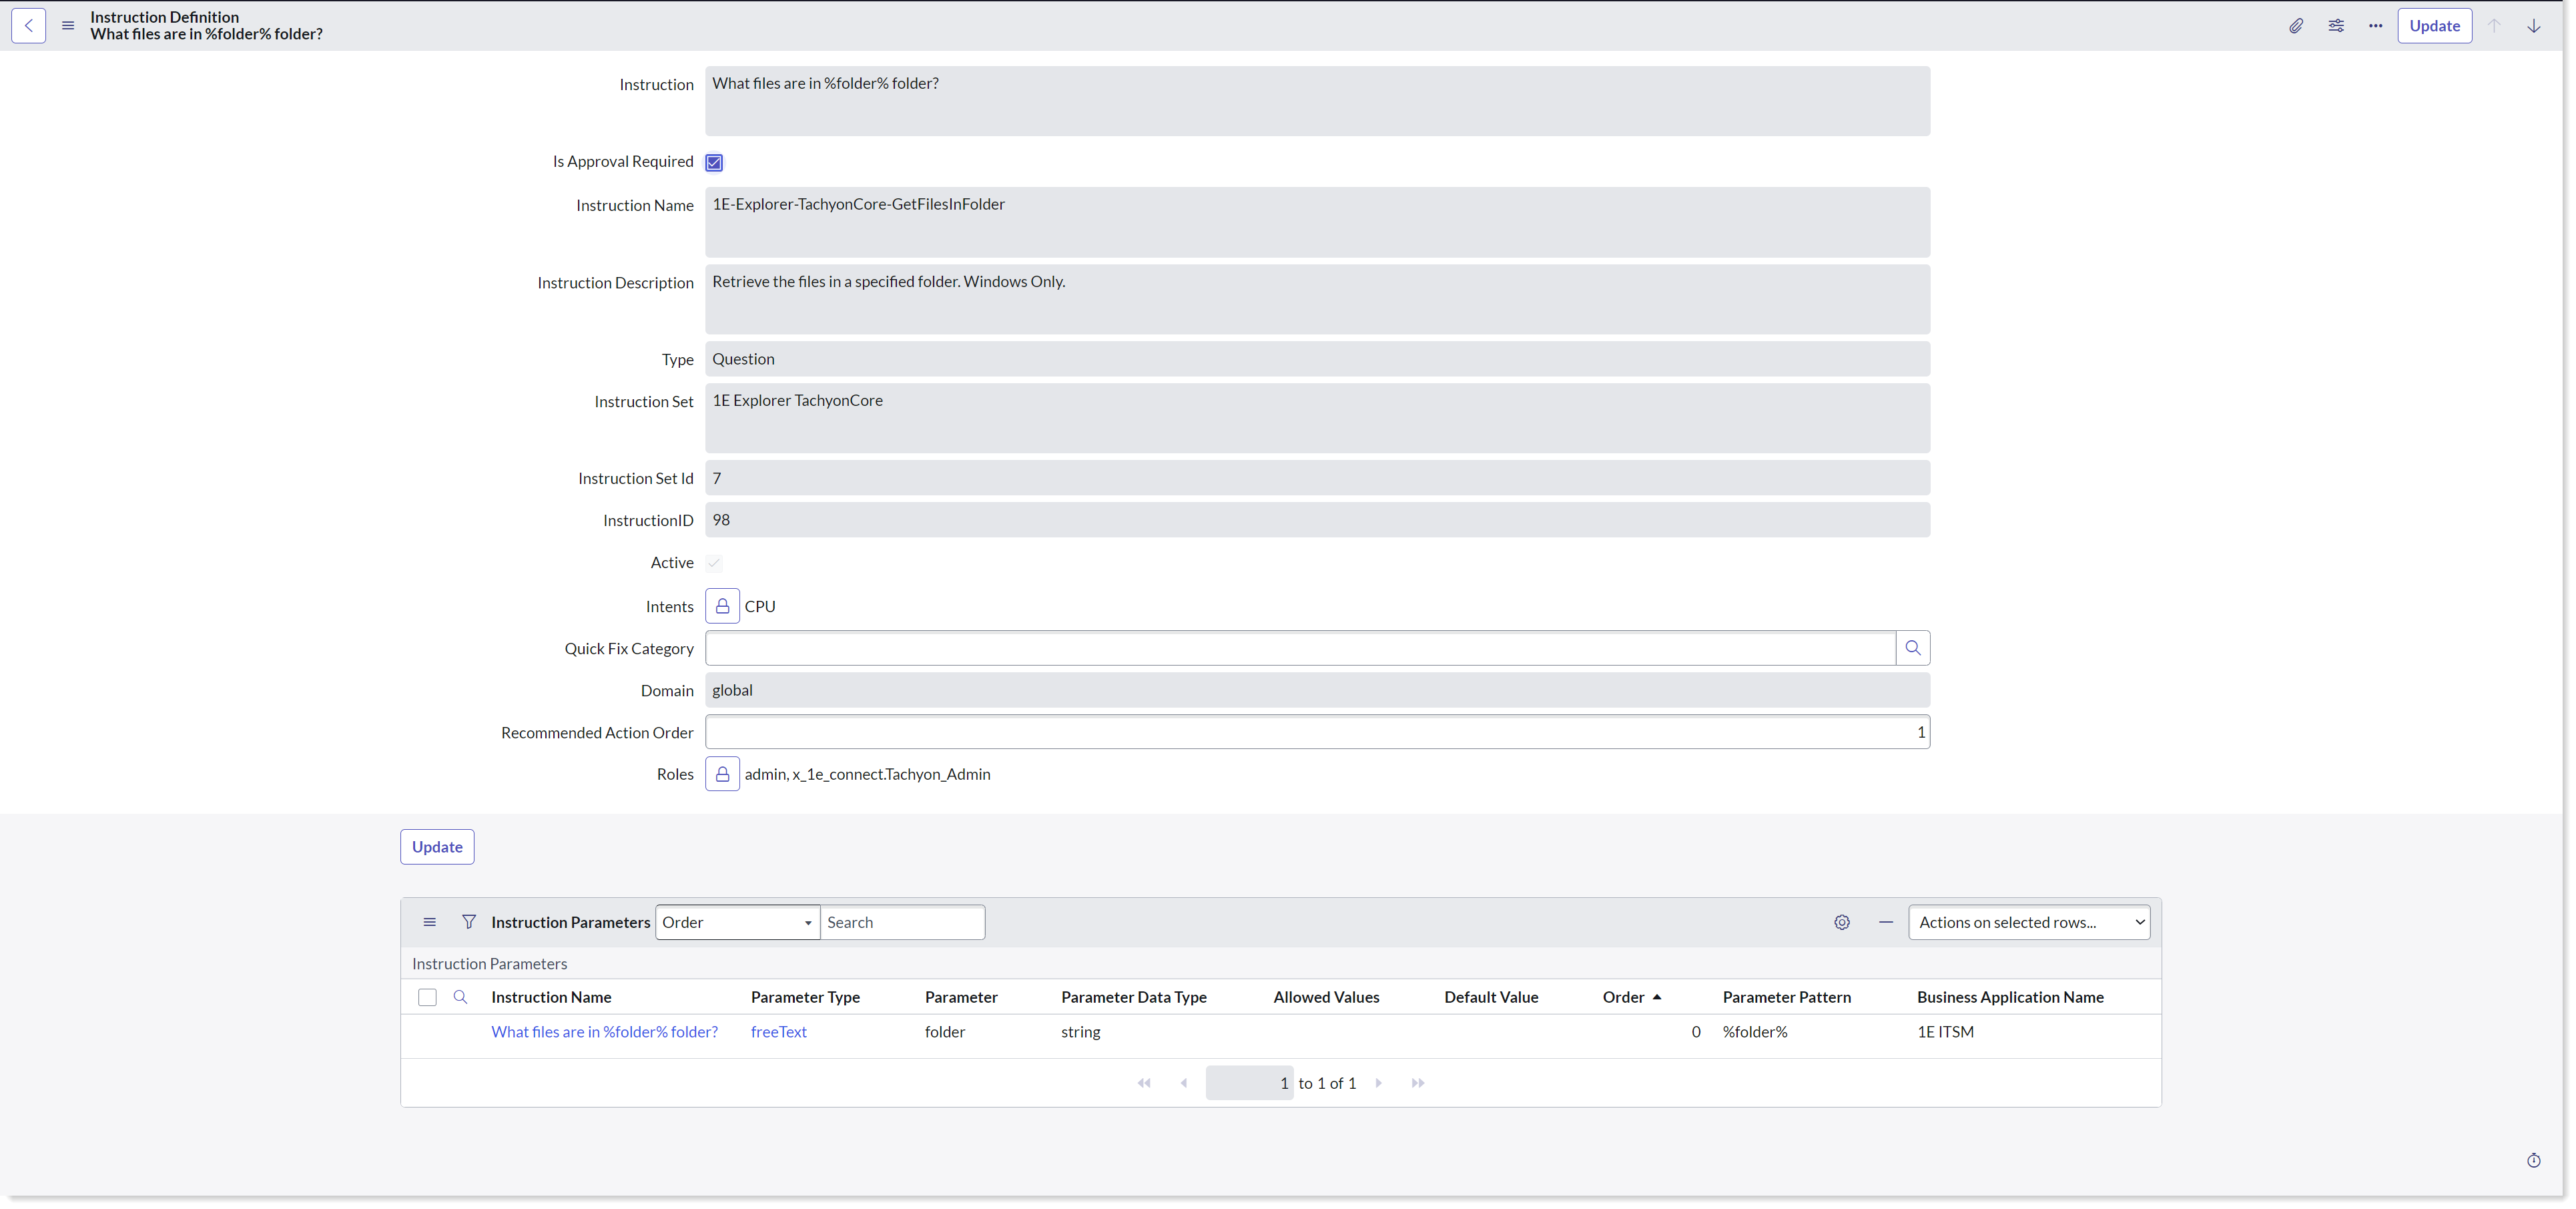
Clicking an Instruction on the Instruction Definitions page, displays the details for the selected instruction.
Specifically, the list of Instruction Parameters required by an instruction is shown on this page. The Instruction Parameters table shows the Parameter name, Parameter Type, the Default Value, and the Allowed Values. The allowed parameter types are free text and value picker.
Parameter detail page
When you click the Parameter Type link on the Instruction Parameters table, the Instruction Parameter details page is displayed. All the details for the selected parameter are displayed on this page.

Managing instruction retry message
You can manage the instruction retry message, by modifying the Instruction TTL Minutes and Response TTL Minutes fields, which have been added to the Instruction Definition table in 1E Core. These fields are automatically populated when instructions are retrieved from the 1E Platform and can be edited by users with the x_1e_core_connect.admin role.
When an instruction is executed, the values from these fields are dynamically incorporated into the retry message, providing users with a clear notification if the response takes time.
You can modify the retry message by updating the values of Instruction TTL Minutes and Response TTL Minutes directly in the Instruction Definition table in 1E Core. However, these value will be overridden when the instructions are retrieved again from the 1E Platform.
To make these changes permanent, update the following settings in TIMS:
-
1E Instruction gather data minutes (maps to Instruction TTL)
-
1E Instruction keep answers minutes (maps to Response TTL)
After making these changes, upload the modified instruction again to the 1E Platform and retrieve the instructions once more in your ServiceNow instance.
An admin can enable or disable approval for a 1E Instruction by checking or unchecking the Is Approval Required checkbox on the Instruction definition detail page.
The admin can also update its value from the Instruction Definitions page by setting the value in the Is Approval Required column to true or false.
-
To set the approval workflow for instructions both the Enable approval checkbox on the App Configuration page and Is Approval Required on Instruction Definitions page must be true. Otherwise, if either of the value is not true, then there is no approval required at the time of executing the instruction.
-
An admin user will retrieve 1E Instructions from the App Configuration page.
Instructions or instruction sets that are assigned to the proxy user specified in the1E User Name field of the API Configuration Page may be deleted, updated, or have their permissions changed within 1E. In this case, instructions are no longer available to the 1E ITSM Connect app users. These instructions are not deleted from the app, instead they are automatically disabled (Active status set to false).
When an admin tries to retrieve the latest set of instructions using the Retrieve Instructions button, a new set of instructions is returned from 1E, which might have added, updated or deleted instructions. Depending on which of those states an instruction belongs to, there are three actions taken:
-
New instructions are added to the ServiceNow database directly
-
Updated instructions are modified in the ServiceNow database and the updates are made available to users from that moment.
-
Instructions that are deleted from 1E and therefore no longer available to 1E ITSM Connect users are not deleted from the ServiceNow database, instead they are automatically disabled by setting their Active status to false. This ensures data integrity by providing full support for the historical data if any of these instructions have been run.
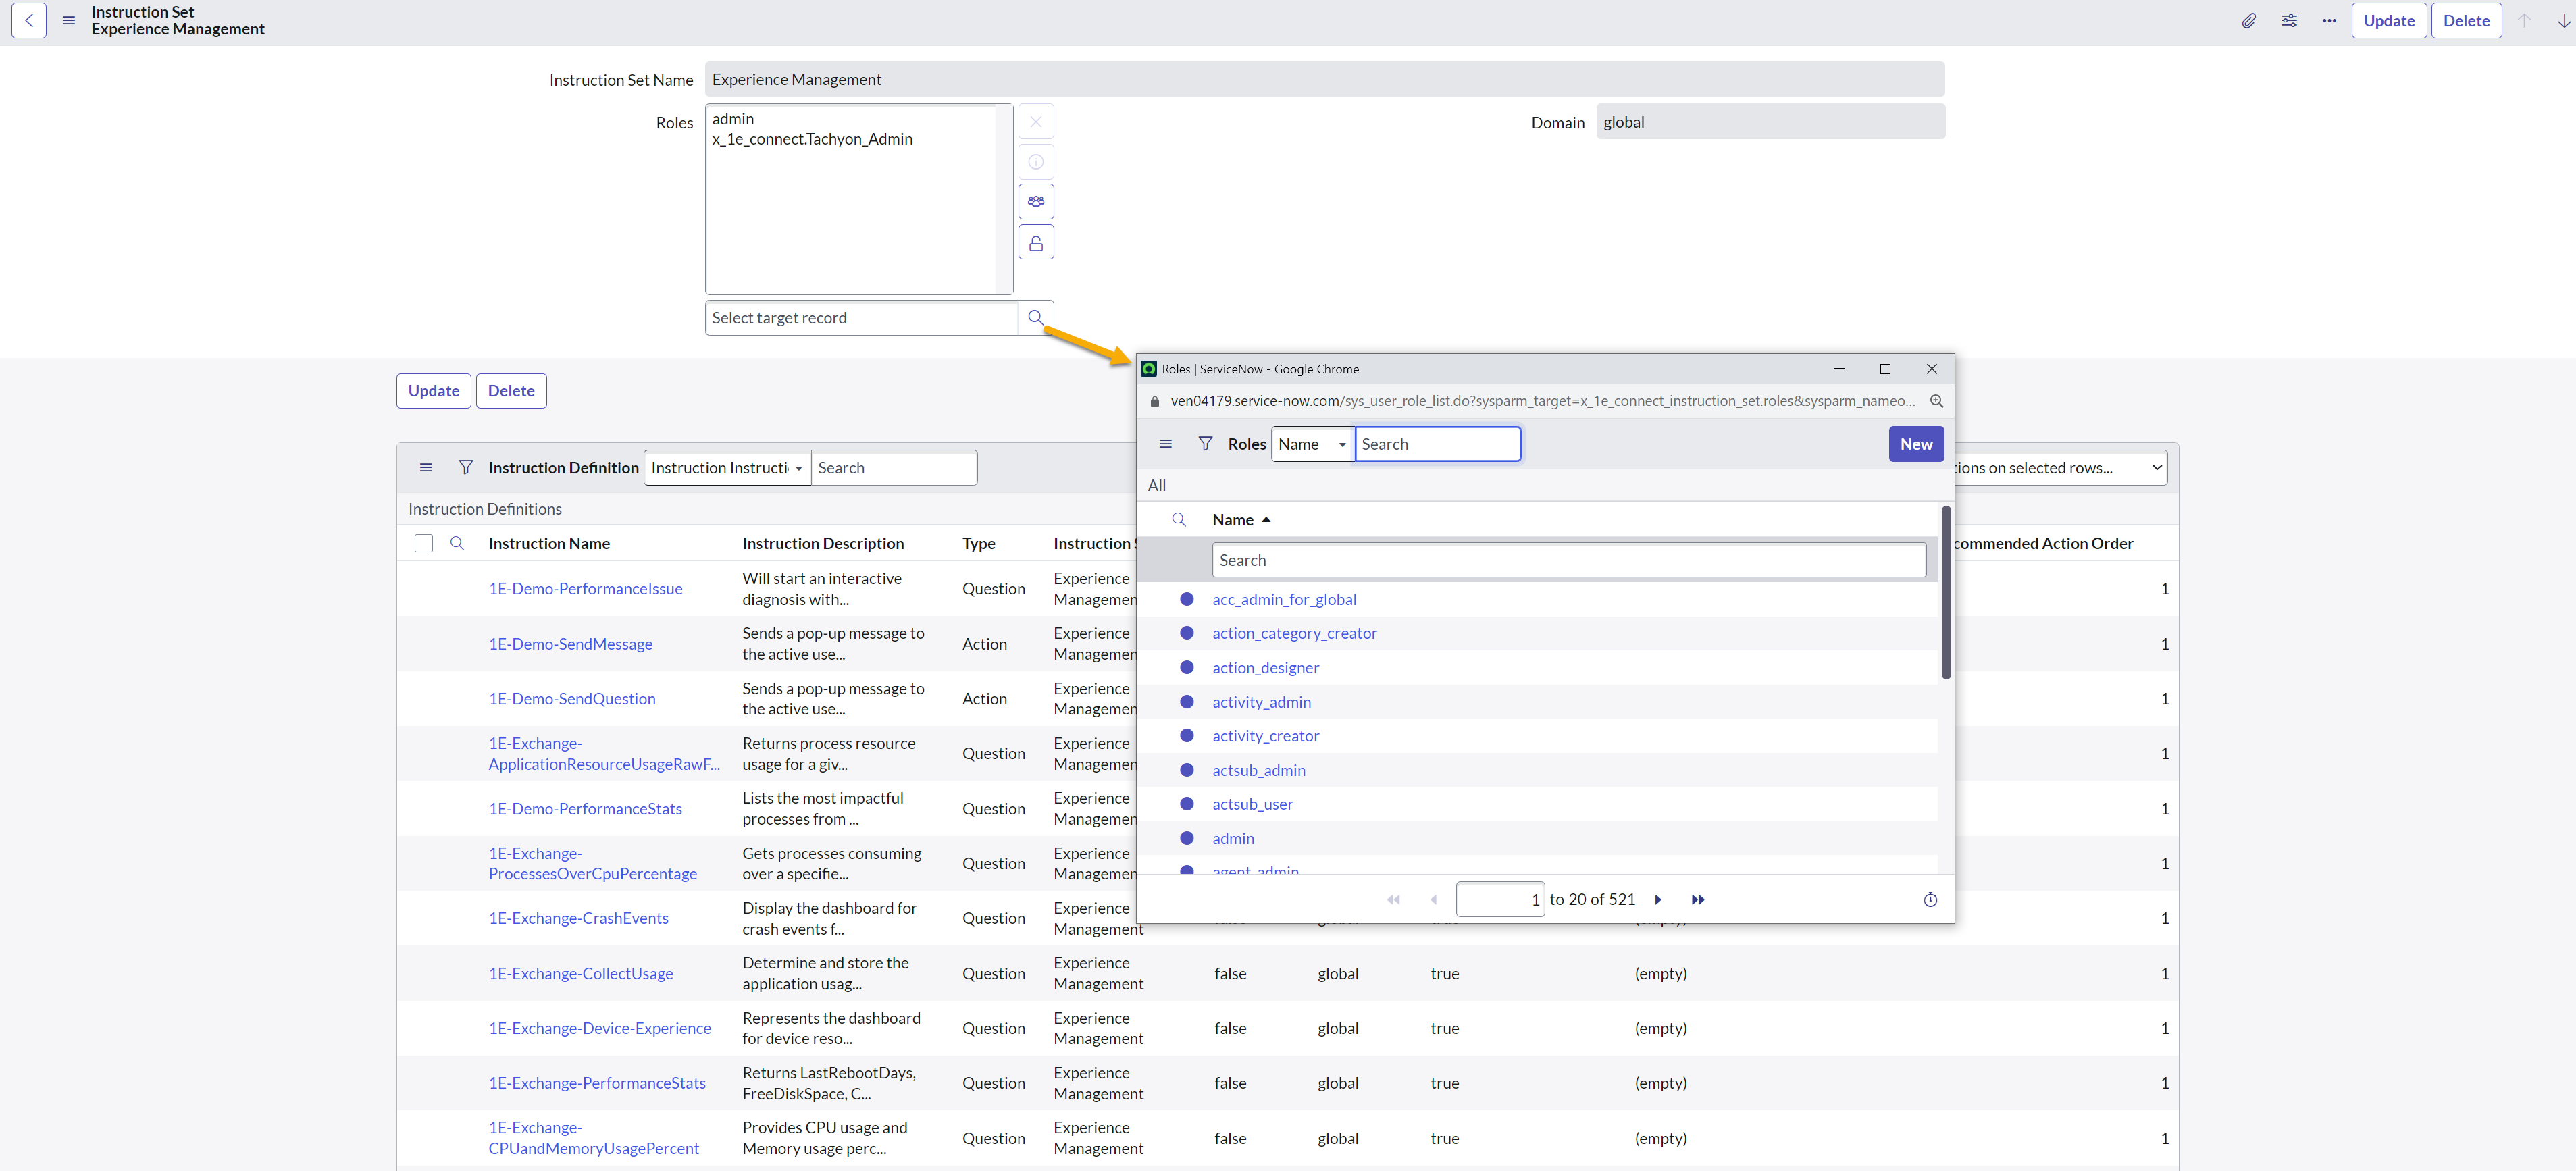
This feature is used to segregate instructions as per the user roles. The x_1e_connect.Tachyon_Admin user can assign the roles to the desired instruction sets. To map roles to the instruction sets, follow the below given steps:
-
Login to your ServiceNow instance.
-
Navigate to 1E ITSM Connect > Administration > Instruction Sets.
-
Click any instruction set from the list that you want to assign role(s) to.
-
Now click Roles field and it allows you to select a role(s) using the look-up list.
-
Click Update to save the form.
-
You can see that all the instructions under the instruction set will have the same roles assigned.
Now, the users can only see the instruction sets that are assigned to them under the 1E ITSM Connect tab.
A role can also be added to the bulk of instruction sets by configuring a setup in the sys_user_role table. Follow the below given steps to map roles:
-
Login to your ServiceNow instance.
-
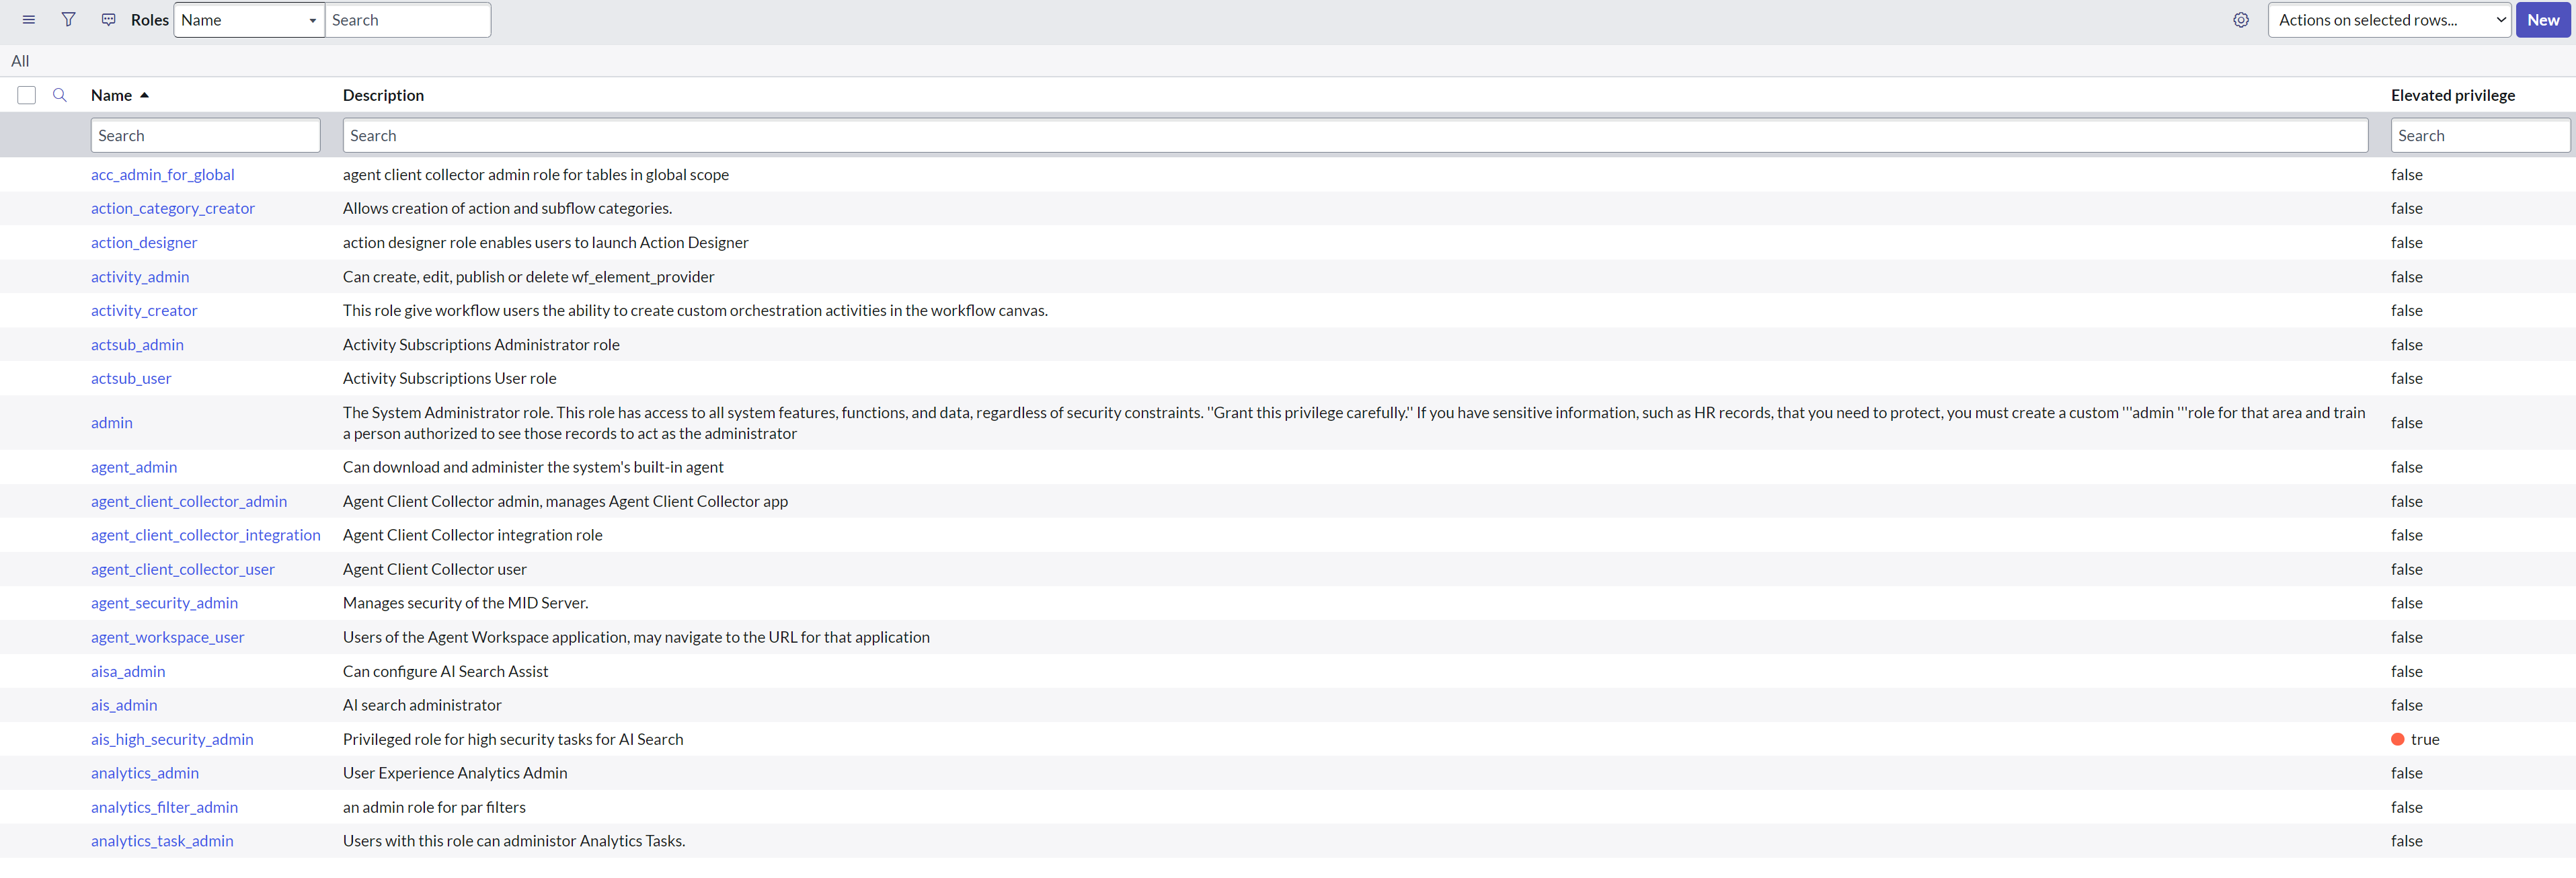
To open the Roles table, type sys_user_role.list in the filter navigator and press enter.
-
Click any role to which you want to add the instruction sets.
-
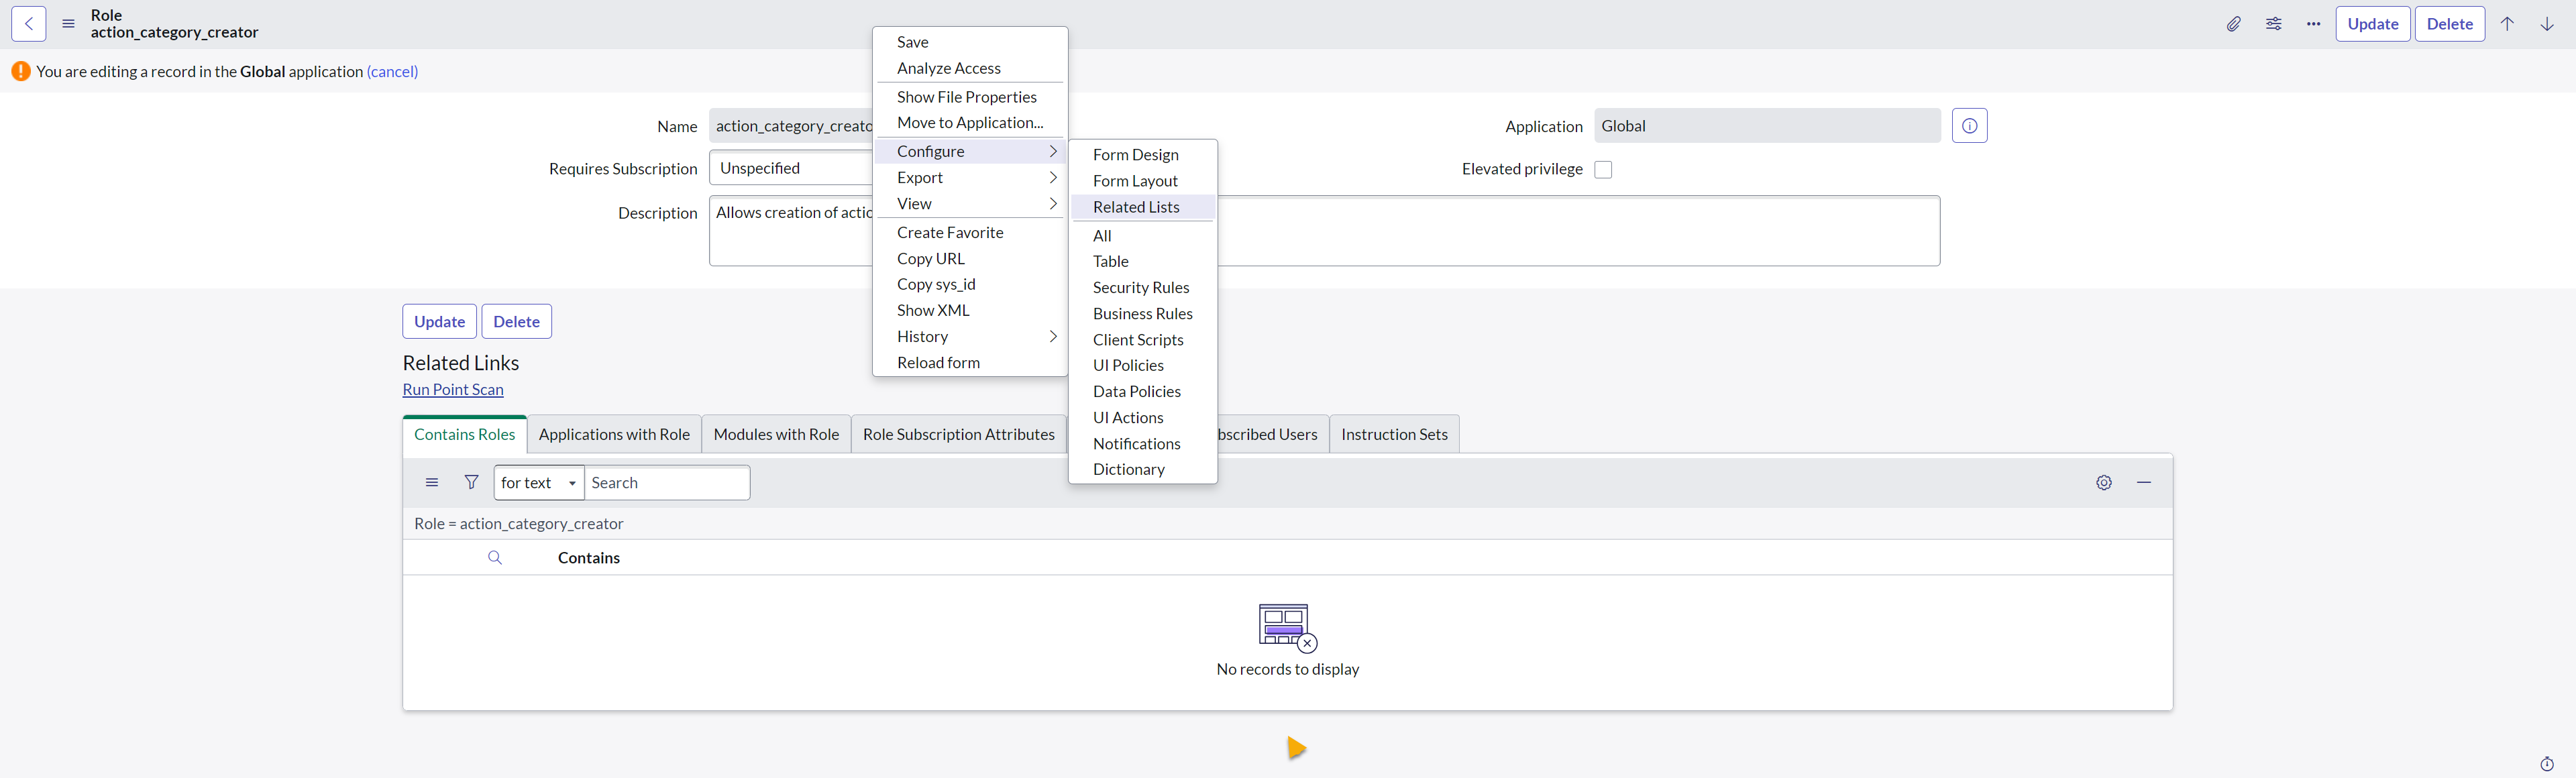
Ensure that the scope of the application is Global, for the configuration below.
-
Right-click the header and select Configure > Related lists from the menu options.
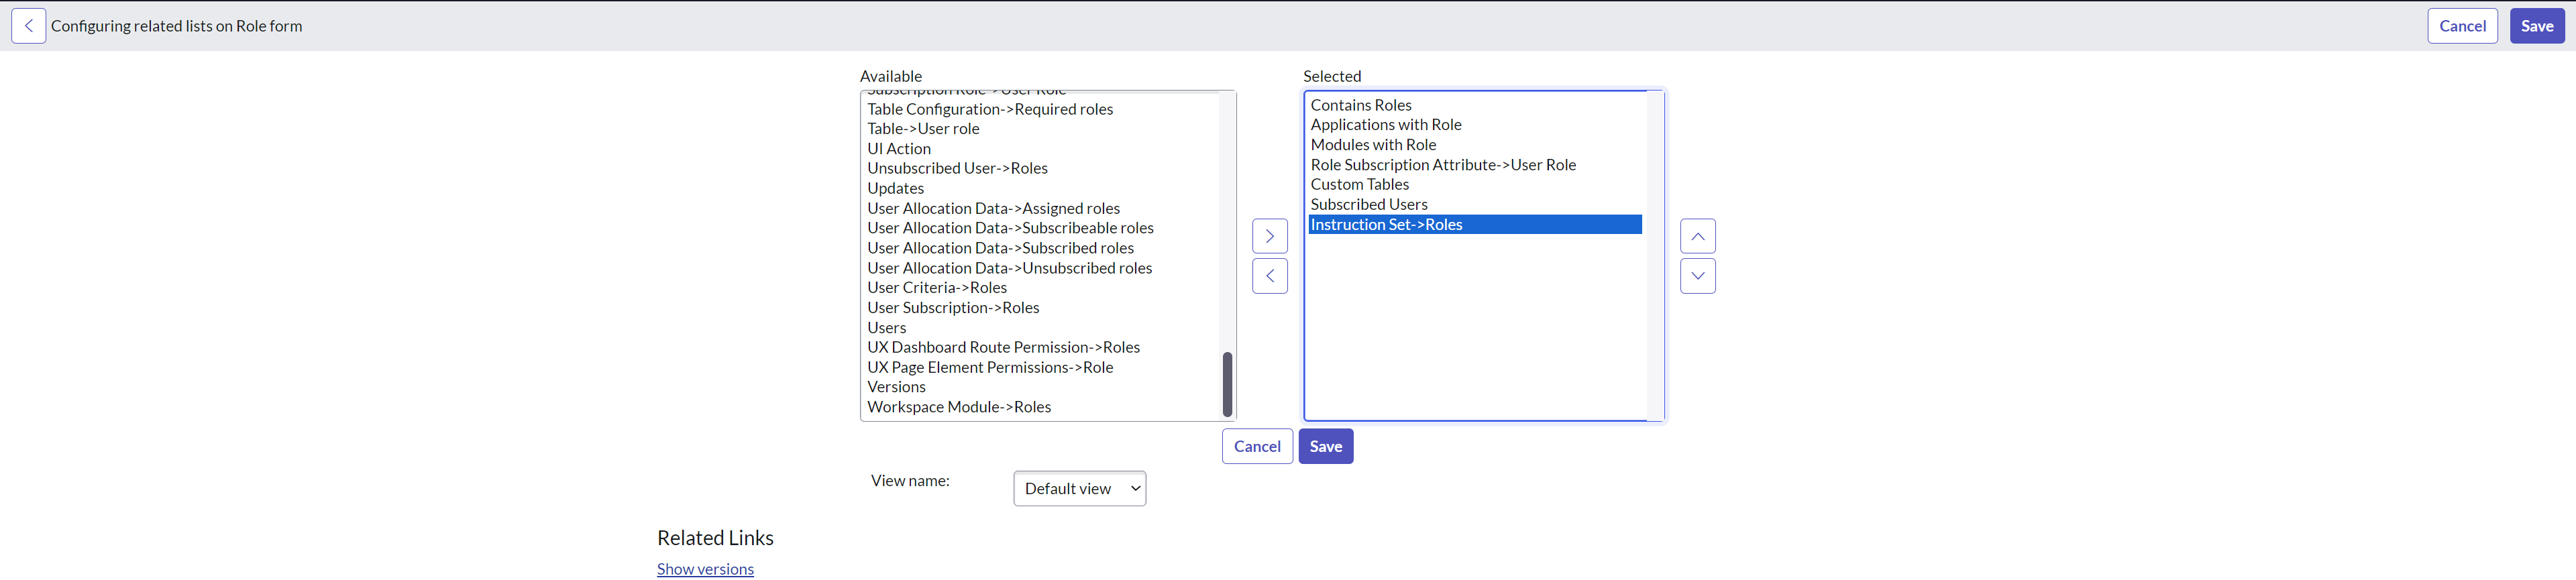
-
This opens the Configuring related lists on the role form. From here, add the Instruction set->Roles item from Available to the Selected list box. Click Save to save the changes.
-
Click Edit... beside the Instruction Sets under Related lists.
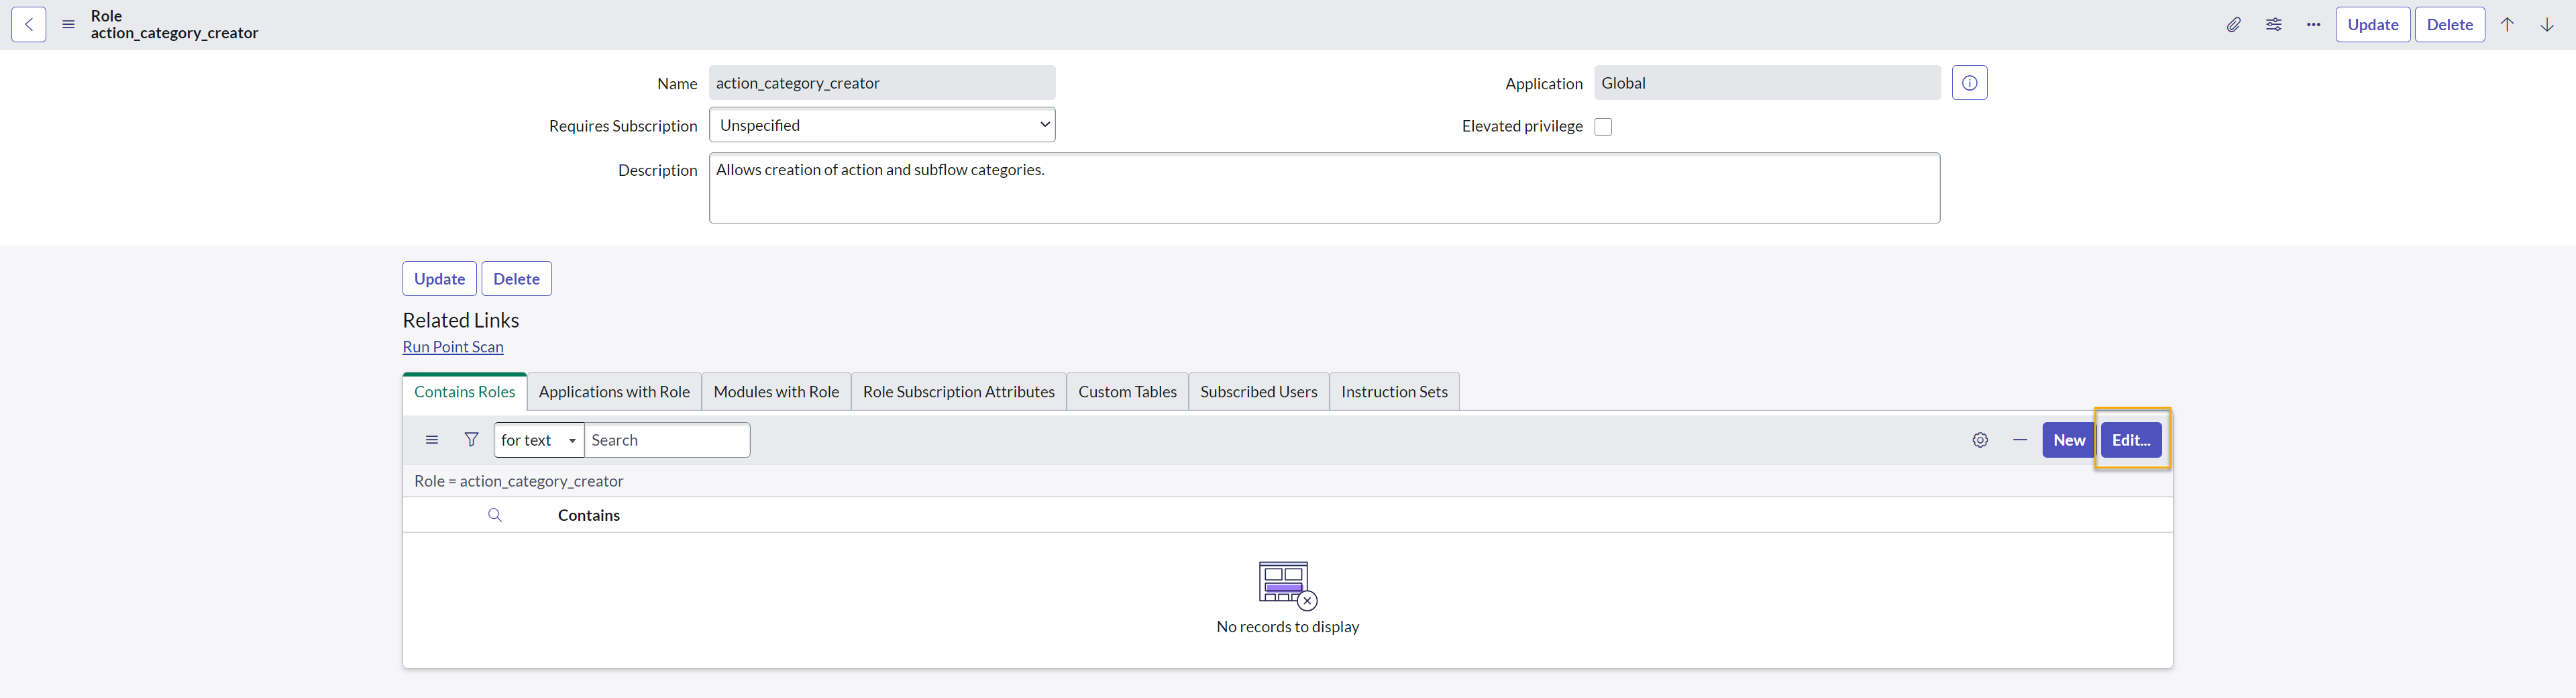
-
This opens the Edit Members page. From here, add all the instruction sets you want to assign a role(s) to from Available to the Selected list box. Click Save to save the changes.

Finally, go to Incidents and the users will only see the instruction sets that are assigned to them under the 1E ITSM Connect tab.