Setup
Setup is a guided, step-by-step procedure for configuring 1E ITSM Connect.
The guided Setup is available under the 1E ITSM Connect menu item in the application navigator. Only users with an Administrator role will see this option in the menu. This Setup contains the basic configuration steps you will need to complete to get the application working.
Getting Started
Click Setup to open the Getting started page.
Click Get Started to start the guided setup and configure the connector.
The configuration process has two steps, as shown in the picture above, these are:
-
1E Platform Configuration
-
1E ITSM Connect Configuration
Click Get Started to view each step's associated tasks.
1E Platform Configuration
The 1E Platform Configuration step consists of four tasks to complete, as shown in the picture.
-
Add the 1EServiceNowCore Consumer
-
Restart Tachyon Coordinator
-
Restart IIS (if Basic Authentication is in use)
-
Add a proxy user
Every task involves a series of configuration steps, as mentioned in the above picture. You need to complete each step before moving onto the next one. As you finish configuring each task, click Mark as Complete and move on to the next one.
As you complete the configuration of each task, your progress shows as a percentage at the top of the page.
Once you have performed all the actions associated to 1E Platform Configuration for your connector, your progress should now show 50% complete.
1E ITSM Connect Configuration
The step 1E ITSM Connect has three tasks to complete, as shown in the picture below.
-
1E Core App Settings
-
1E ITSM Connect App Settings
-
OAuth Configurations
Click the Configure button to work on each task.
Every task involves a series of configuration steps, as mentioned in the above picture. You need to complete each step before moving onto the next one. As you finish configuring each task, click Mark as Complete and move on to the next one.
As you complete the configuration of each task, your progress shows as a percentage at the top of the page.
1E Core App Settings
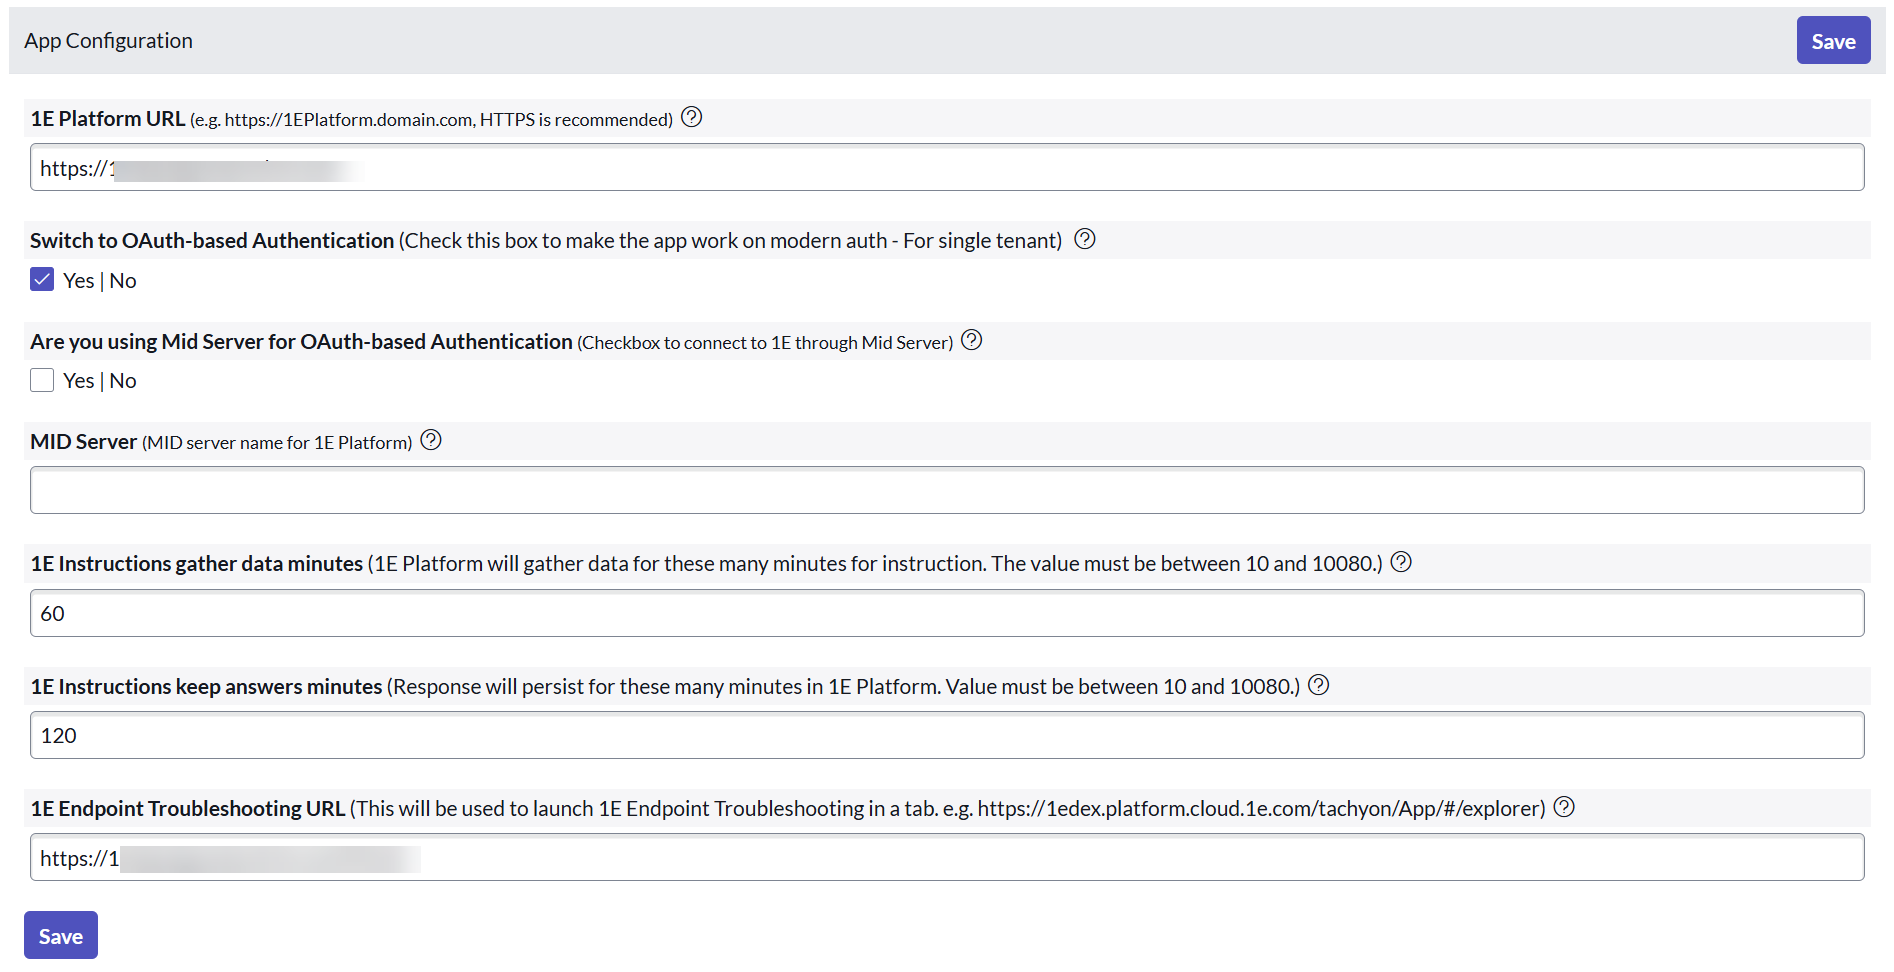
This step guides you in configuring the 1E Core application settings for your connector, click the Configure button to continue. The admin user must complete the form as shown in the picture below.
To save your changes, click Save.
Once you complete the above actions, click Mark as Complete to complete this task of configuration and move on to the next part.
1E ITSM Connect App Settings
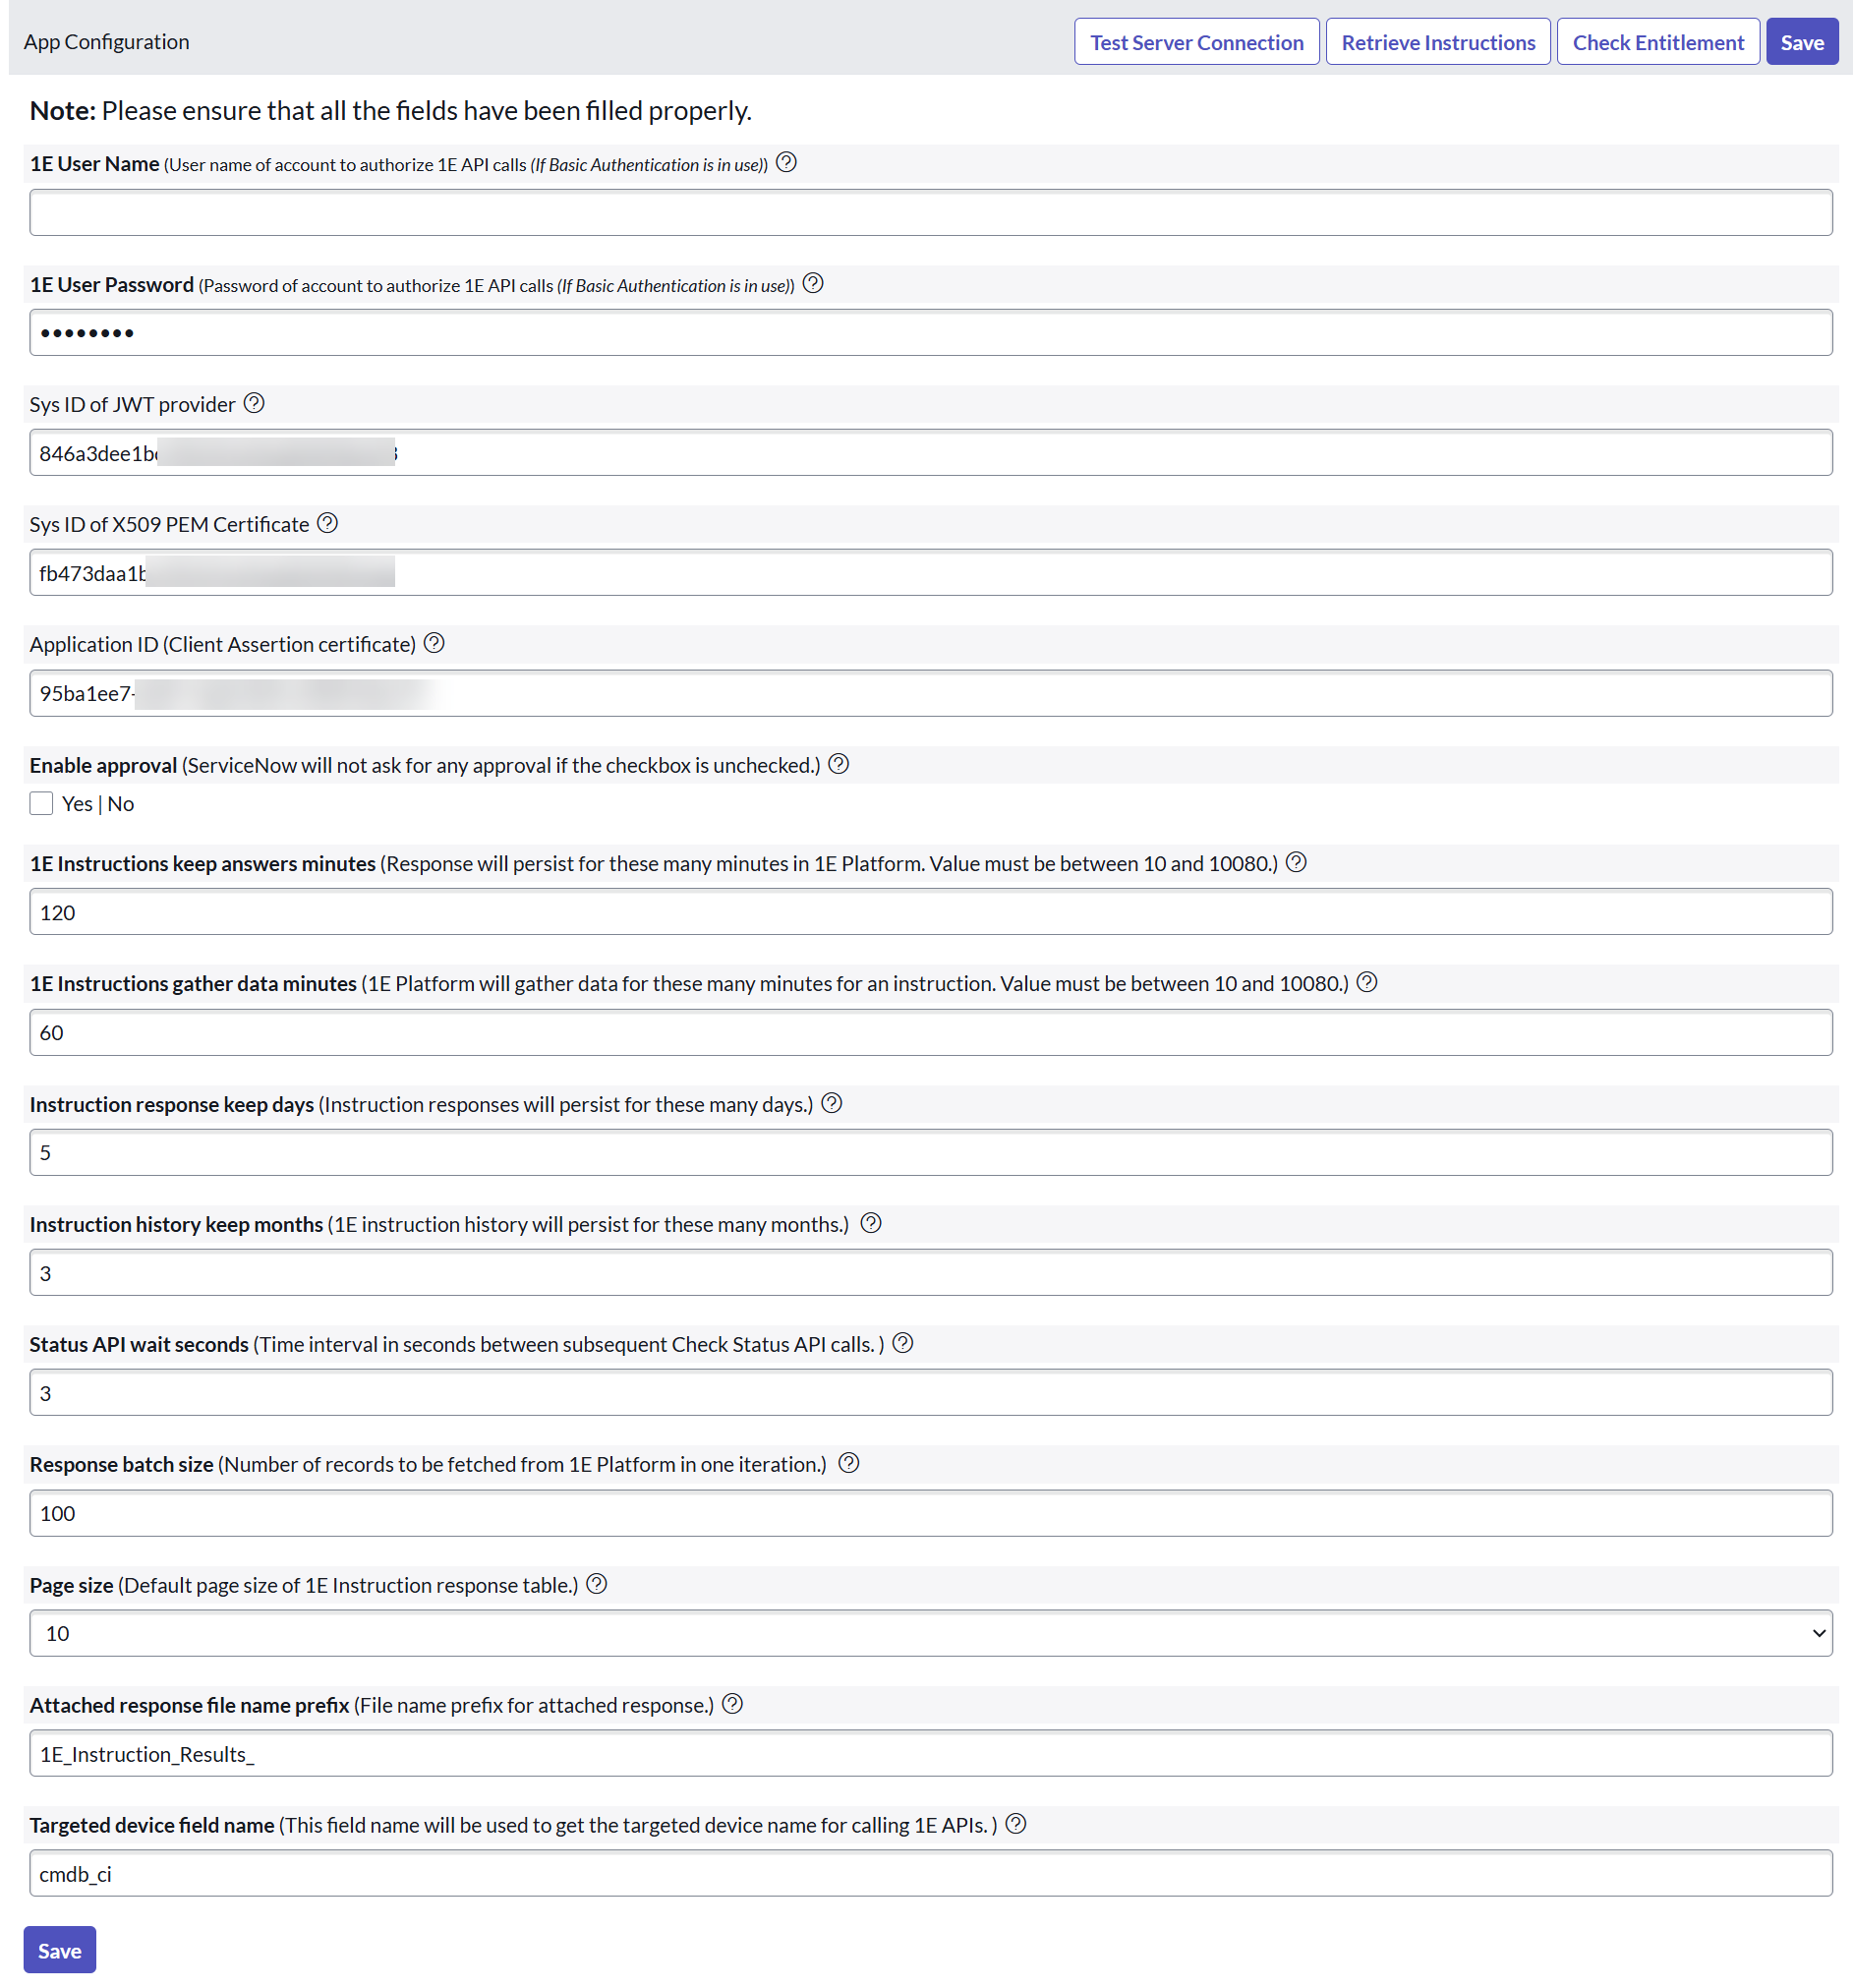
The next step is to configure 1E ITSM Connect App Settings. If you click Configure, it redirects you to the App Configuration page. The admin user must complete the form and Save the App Settings form as shown in the picture below.
Completing this configuration allows the connector to communicate with 1E. To test whether the application is successfully synced with the 1E server, click Test Server Connections in the top right corner. Once the connection is established, click Retrieve Instructions to import the instructions from 1E into ServiceNow. To confirm if Experience is licensed and enabled, click Check Entitlement.
Once you complete the above actions, click Mark as Complete to complete this task and move on to the next part.
The OAuth Configuration is only applicable if you have chosen for Modern Authentication.
OAuth Configuration
Once you have completed the above settings, you now have to configure OAuth settings. This section outlines four steps to be completed. Click Configure to be redirected to the respective settings page.
Every task involves a series of configuration steps. You need to complete each step before moving onto the next one. As you finish configuring each task, click Mark as Complete and move on to the next one.
-
Upload JKS and PEM certificates
To upload the certificates, create a New record and attach the JKS and PEM certificates. Select Type as Java Key Store for JKS and Trust Store Cert for PEM certificates. Attach the JKS certificate and copy the content of the PEM certificate to the respective records. For JKS certificate, provide the Key store password. Submit the records and Validate the certificates.
-
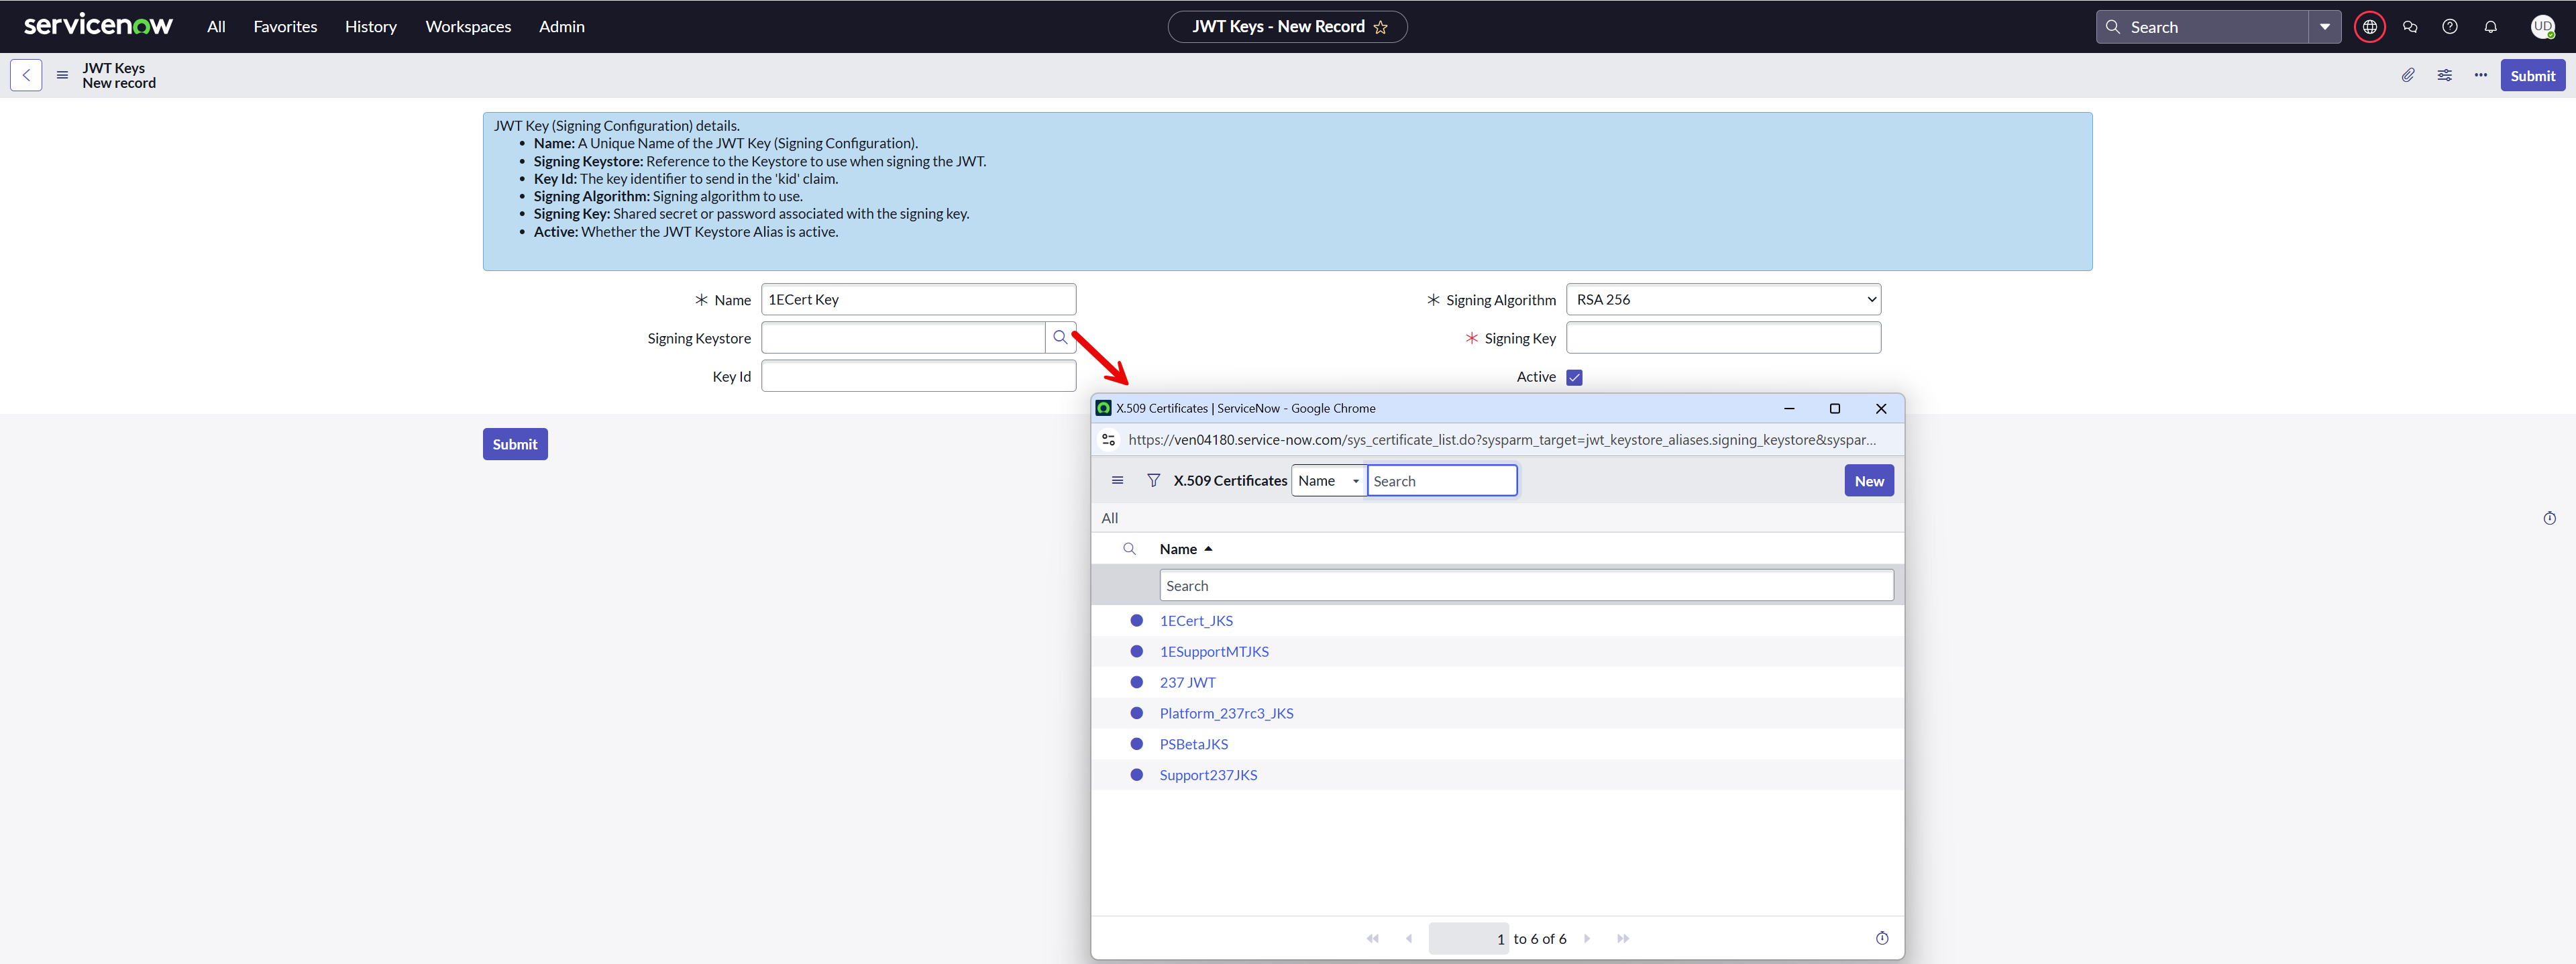
Configure a JWT signing key
Create a new record and provide a descriptive Name. Obtain the JKS certificate uploaded earlier using the lookup list in the Signing Keystore field and provide the Signing Key password. Submit the record.
-
Create a JWT Provider
Create a new record and provide a descriptive Name. Ensure you have the required permissions. Obtain the JWT Key created earlier using the lookup list in the Signing Configuration field and Submit the record. Copy the sys_id of the JWT Provider for future reference.
-
Configure System Properties
Configure the following system properties by adding the respective values.
System property
Value
x_1e_connect.x509_pem_certificate
The SysID of the PEM Certificate record created in the sys_certificate table.
x_1e_connect.jwt_provider
The SysID of the JWT Provider record created in the jwt_provider table.
x_1e_connect.key_id
The App ID of the non-interactive client assertion App and is used to sign the JWT token.
x_1e_connect.oauth_access_token
A two-way encrypted access token received from IdP. This value is autopopulated.
x_1e_connect.access_token_expiry
It is the minimum time left against the total lifespan of the access token to get renewed. The default value assigned is 100 (in seconds).
x_1e_connect.newExperienceAPISupport
This value identifies the 1E version. The value is true for 1E 23.5 or higher and is false otherwise. The default value is true.
Once you complete all the above actions, click Mark as Complete to complete this task of configuration. With the completion of this last step, your configuration is now complete, and the progress should show 100% complete.
1E ITSM Connect Configuration
The step 1E ITSM Connect has just one task to complete, that is
-
Multi-tenant configuration
Multi-tenant configuration
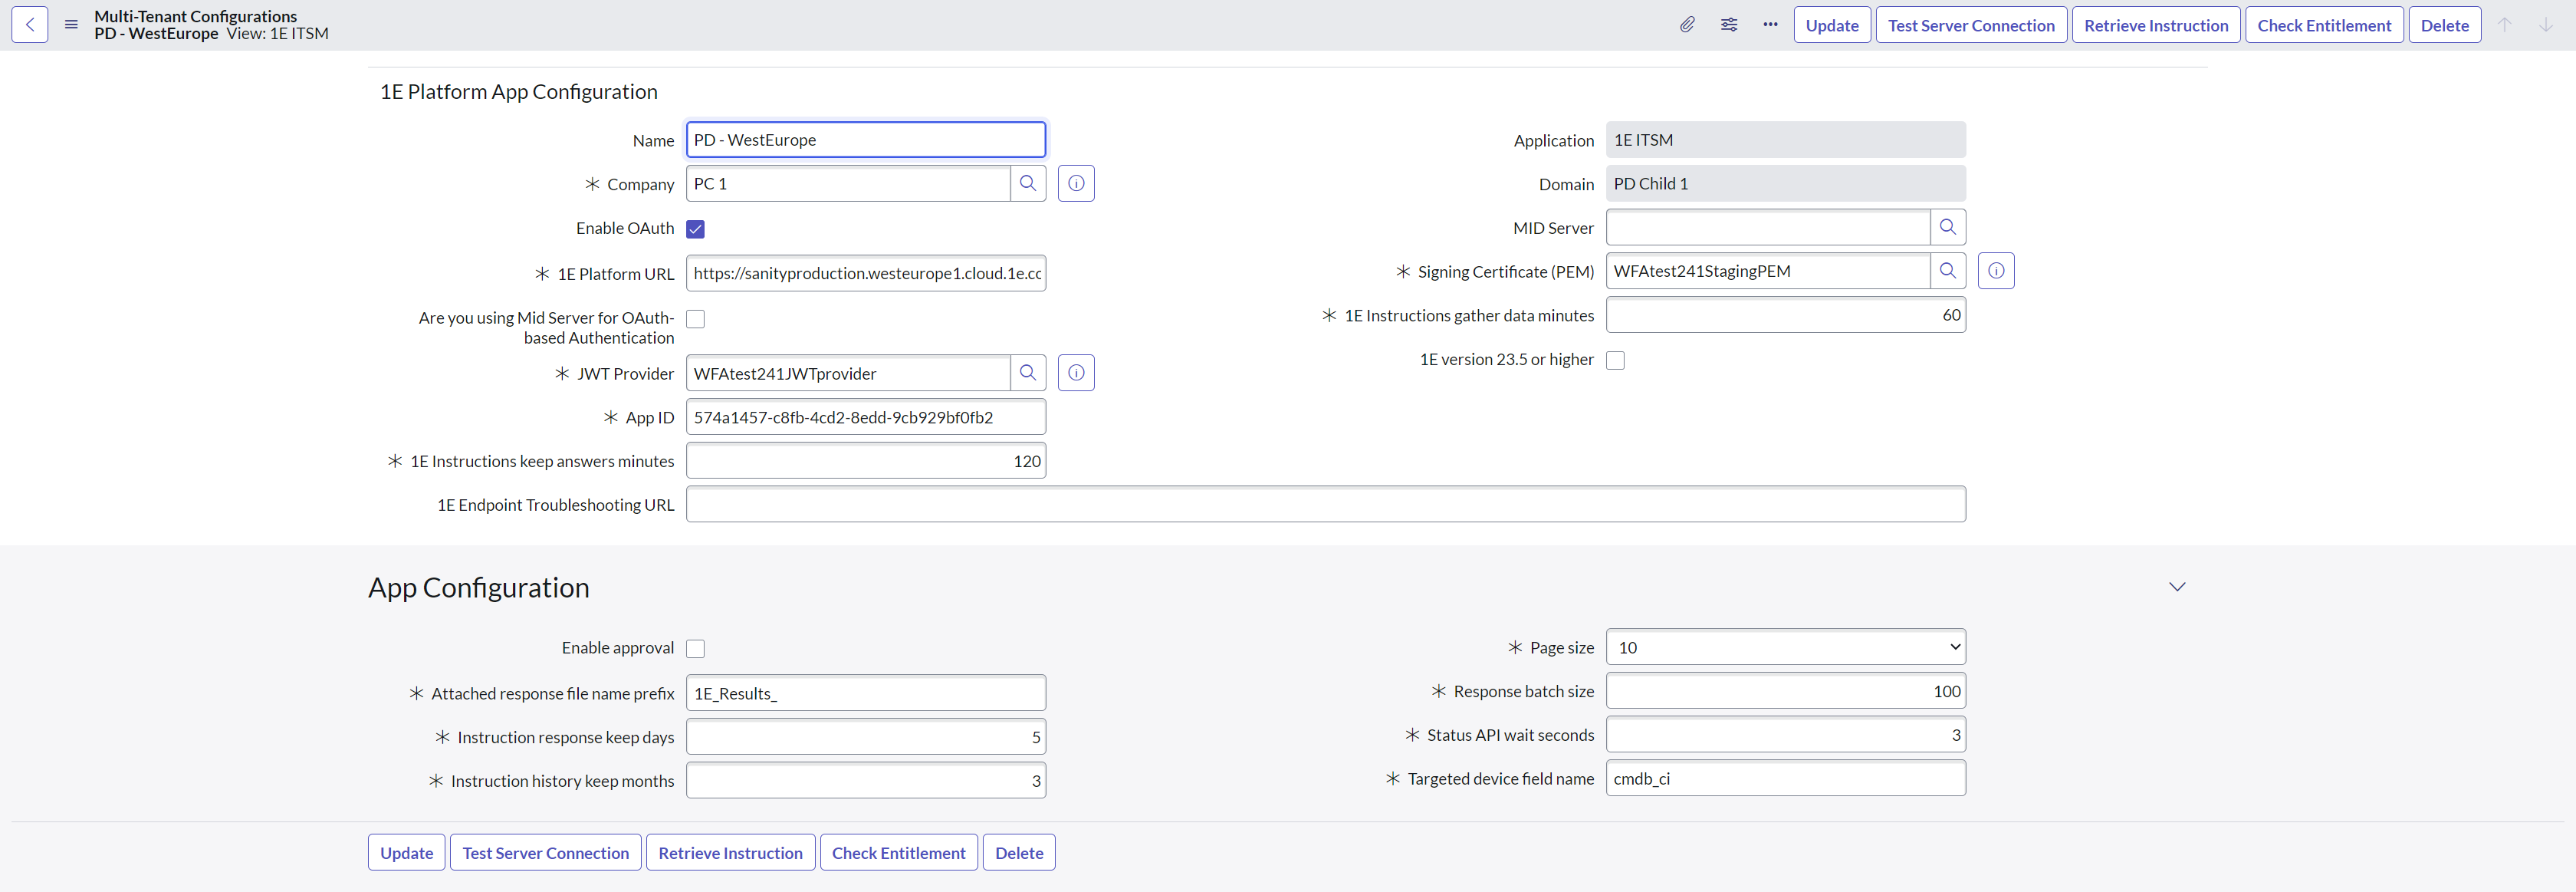
This step guides you in configuring multi-tenant configuration, click the Configure button to continue. The admin user must complete the form as shown in the picture below.
To save your changes, click Submit.
Completing this configuration allows the connector to communicate with 1E. To test whether the application is successfully synced with the 1E server, click Test Server Connections in the top right corner. Once the connection is established, click on Retrieve Instructions to import the instructions from 1E into ServiceNow. To confirm if Experience is licensed and enabled, click Check Entitlement.
Once you complete the above actions, click Mark as Complete to complete this configuration. With the completion of this last step, your configuration is now complete, and the progress should show 100% complete.


