Preparation
Prepare your environment for the 1E Virtual Assistant with ServiceNow. Learn about required prerequisites, permissions, configuration steps, and setup considerations to ensure a smooth and successful integration.
Enable the Glide Virtual Agent plugin
The 1E Virtual Assistant integrates with the ServiceNow Virtual Agent. To enable the Virtual Agent, the Glide Virtual Agent extended plugin needs to be activated before installing the 1E Virtual Assistant.
Follow the steps below to activate the Glide Virtual Agent:
-
Log in to your ServiceNow instance as a ServiceNow admin user (System Administrator).
-
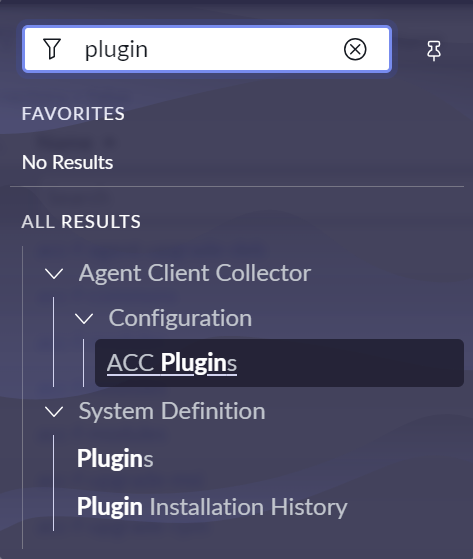
In the application navigator, search for Plugins, then click System Definition > Plugins to open the Application Manager page.
-
In the search field, search for the Glide Virtual Agent plugin and click Install.
-
In the Activate Plugin pop-up, click Activate.
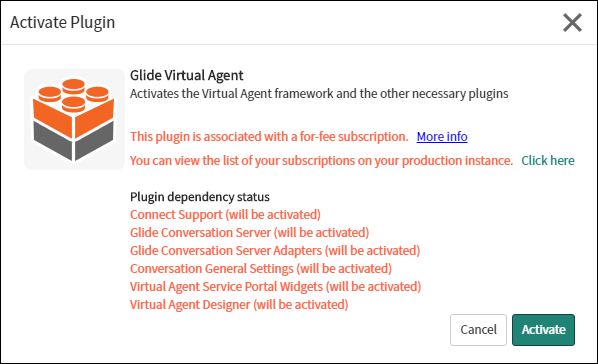
-
Once the Glide Virtual Agent has been activated, click Close & Reload Form.
-
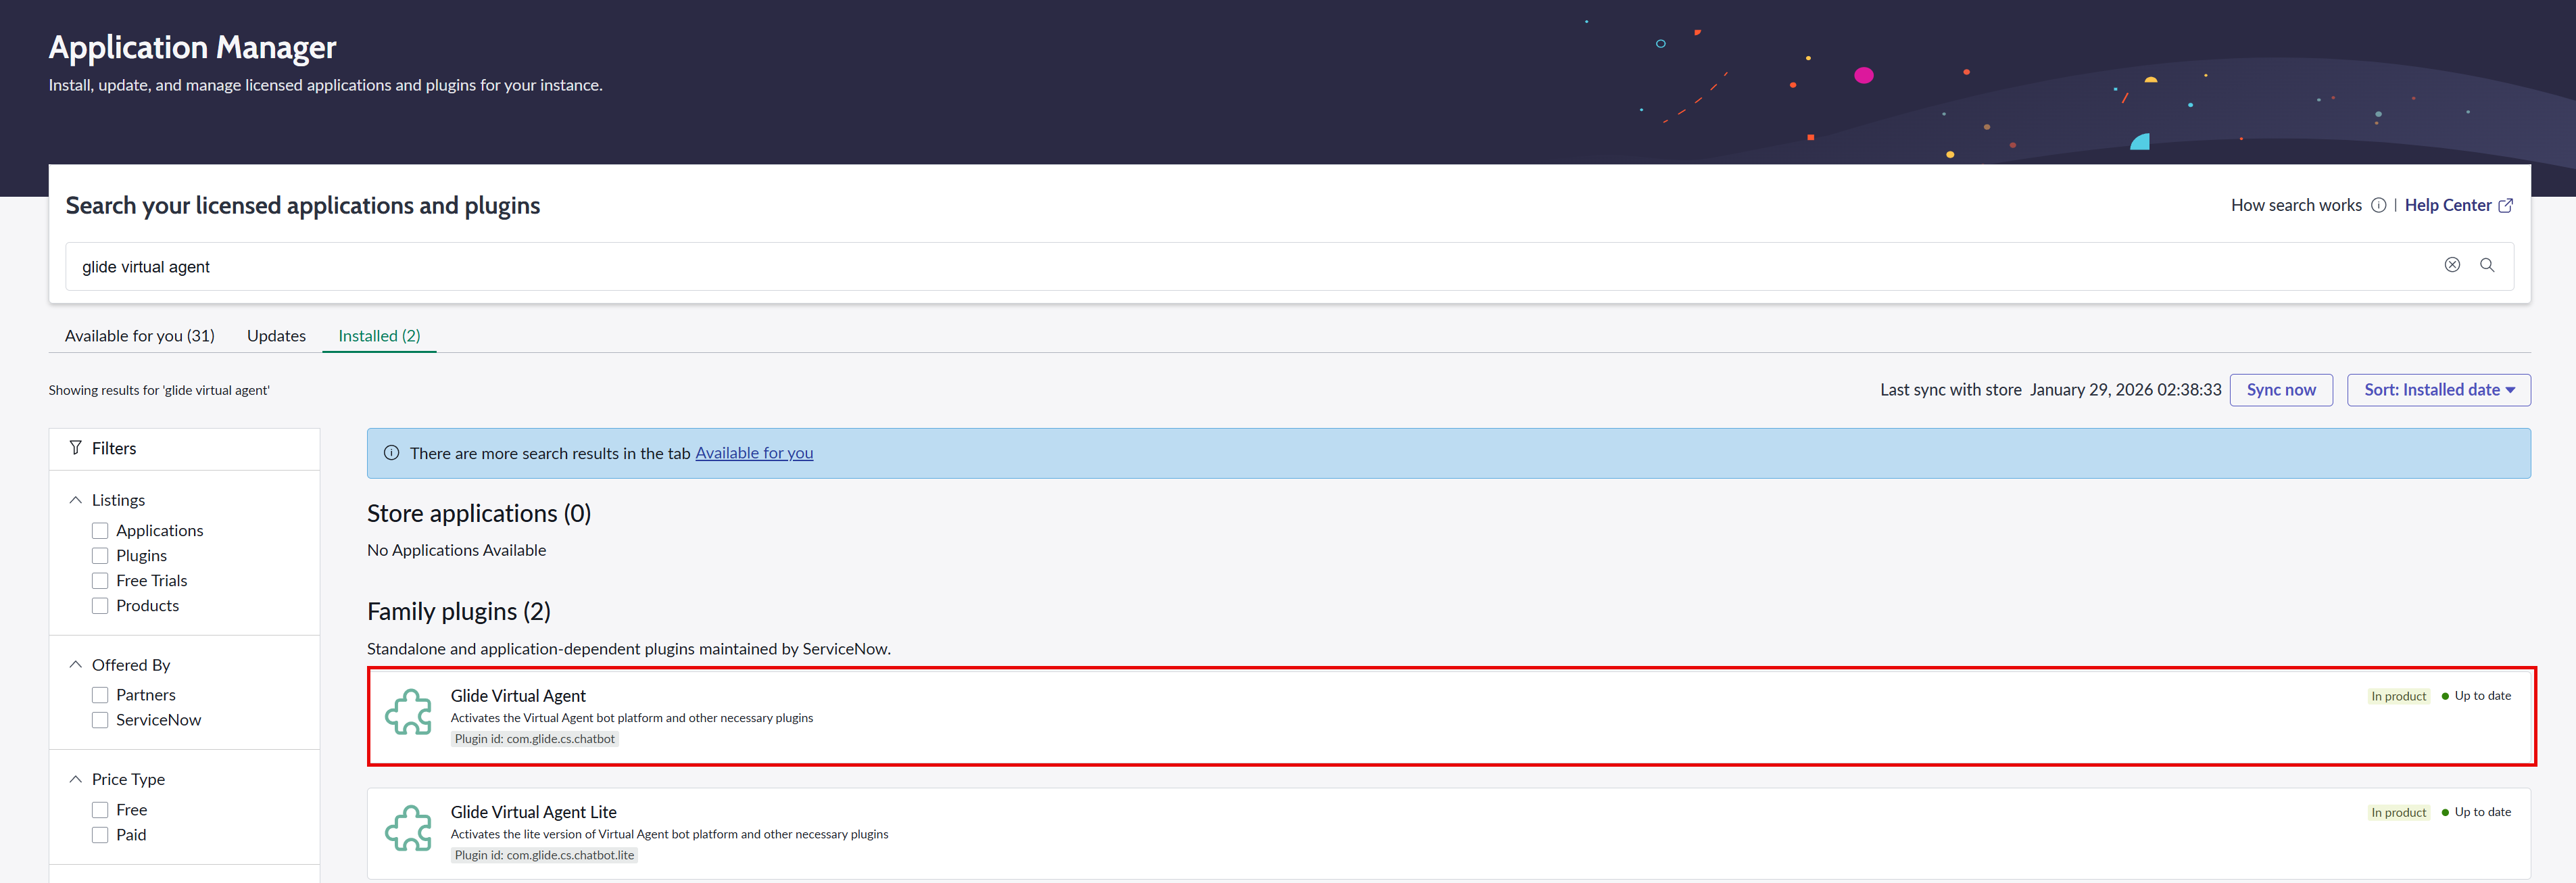
On the Applications Manager page, search for Glide Virtual Agent. If the plugin is activated successfully, the status will show Installed.
Install and configure Shopping for use with the 1E Virtual Assistant
The 1E Virtual Assistant integrates with the ServiceNow Virtual Agent module, Shopping and 1E. Some topics provided by the 1E Virtual Assistant require an existing Shopping installation. Shopping is also required to retrieve the fully qualified domain name (FQDN) of the device from which the user is accessing the ServiceNow portal. When Shopping is not available, the user is prompted to select a device associated with their account in the ServiceNow CMDB.
The image below illustrates a system in which Shopping is not used. In this scenario, a user opens the Virtual Agent and selects the print topic in the 1E Virtual Assistant. Because the Virtual Assistant cannot detect the device the user is currently logged on to, it displays the following message:
I am unable to find your logged-in device, but I can still perform the fix on one of the device(s) assigned to you, listed below. Which one would you like to proceed on?
If you are having 1E Virtual Assistant 3.1.1 or earlier, then you see the message: Looks like you are not logged into a company device, but I can still perform the fix on one of the device(s) assigned to you, listed below. Which one would you like to proceed on?
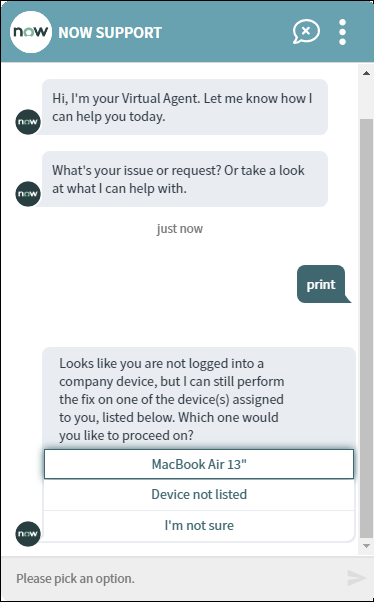
A list of options is then presented, which contains the devices that are assigned to that user in the ServiceNow CMDB. This requires two things. The devices assigned to the user in the ServiceNow CMDB:
-
Are kept up to date.
-
Contain all the devices they log on to.
It would be much better if the 1E Virtual Assistant could detect the device where the user is browsing from and offer that as a selection option. To do this, you need Shopping.
The following instructions show how to install Shopping and configure it for use with 1E Virtual Assistant.
Installing Shopping
Shopping is a 1E product that is licensed separately and integrates with a number of technologies to provide self-service application requests. For details on the implementation of Shopping, please refer to Shopping.
Configuring Shopping for use with the 1E Virtual Assistant
Once you have installed Shopping, or already have a working copy, you will need to configure it so that it works with 1E Virtual Assistant.
On the Shopping admin console → Settings page, you will need to:
-
Add the URL for your ServiceNow instance
-
Enable Firefox support
-
Enable loopback exemption
-
Ensure that the loopback URL starts with https://
To do this:
-
Open the Shopping admin console.
-
Navigate to Settings.
-
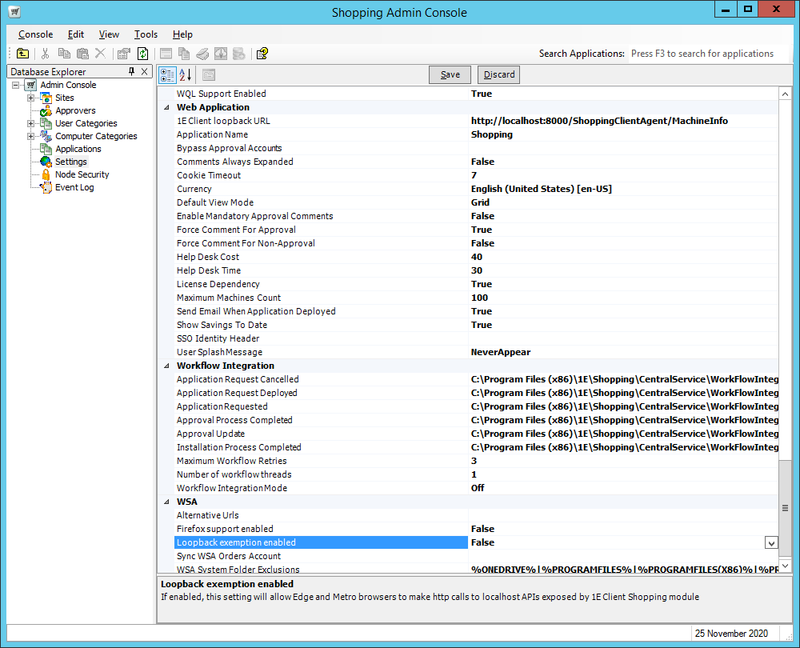
If Loopback exemption enabled is not visible in the WSA section of Shopping Settings:
-
Log on to the SQL instance where the Shopping2 database is installed.
-
Run the following SQL query to set the Loopback exemption enabled to make it visible
update tb_Preference set Hidden=0 where PreferenceName='Loopback exemption enabled' -
Click the refresh button in the Shopping Admin Console toolbar and check that the Loopback exemption enabled setting is now visible
-
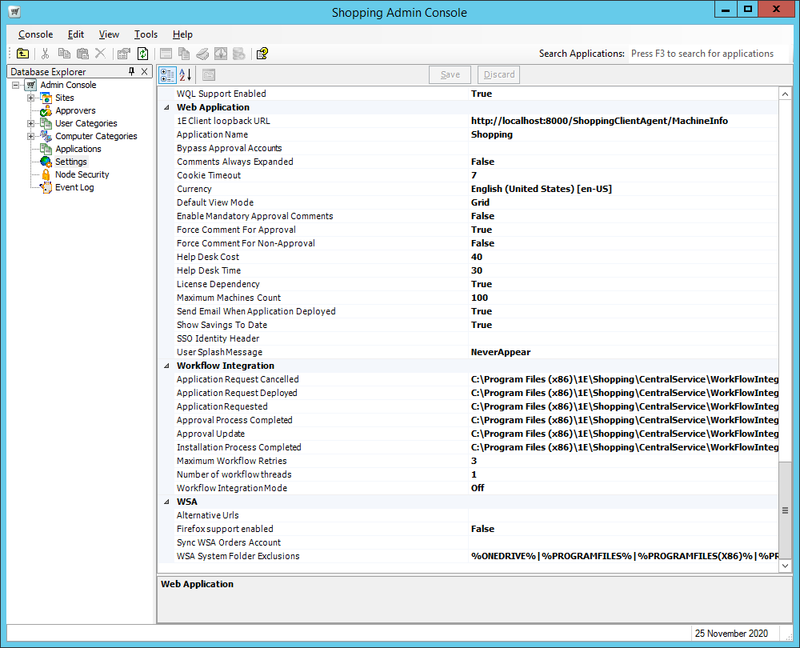
How Shopping Admin Console Settings appear after installation:
Loopback exemption enabled setting made visible:
-
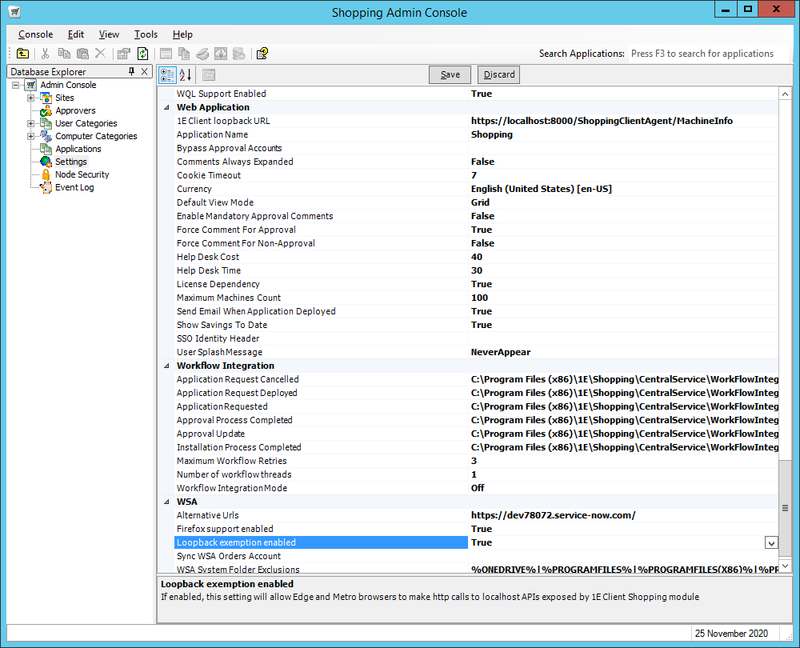
In the Web Application section:
-
Ensure that the value in the 1E Tachyon Agent loopback URL starts with https:// (by default this will be set to http://).
-
-
In the WSA section:
-
Add the URL for your ServiceNow instance to the Alternative Urls setting. You can add multiple URLs using the pipe | character.
-
Set the value of Firefox support enabled to True.
-
Set the value of Loopback exemption enabled to True.
-
-
Click Save at the top of the Settings screen to save the changes.
-
After making these changes in the Shopping Admin Console you will then need to restart all the currently installed 1E Client services where the Shopping module is enabled.
Example completed Settings:
After Shopping integration has been enabled
Now when a user opens the Virtual Agent by browsing on a device where the 1E Client and Shopping module is installed, the 1E Virtual Assistant will be able to determine the user's current device and allow them to select that in addition to any that are currently assigned to them in the ServiceNow CMDB, as shown in the picture below.
