Setup for 1E SaaS
- Perform the below settings, if you are using 1E Platform 24.12 and 1E Client 24.11.0.74 or later versions.
- If you are using 1E Platform 24.12 or later versions, you don't have to perform Guided Setup, configuring data sources and configuring schedule import.
Follow the steps below to configure your Service Graph Connector for 1E application (4.0.18 or later versions). Ensure that these settings are done before populating the CMDB data.
- Type robust import set transformers in filter navigator and press enter. Or you can also navigate to All > System Import Sets > Administration > Robust Import Set Transformation.
- Filter the list by the Application column using Service Graph Connect for 1E and click Run.
- Set the active values of Device App Mapping import ETL to true and Tachyon Software ETL to false as shown below. And the rest of the ETL's should retain the default value as true for the Active field.

-
Type transform maps in filter navigator and press enter. Or you can also navigate to All > System Import Sets > Administration > Transform maps.
-
Set the active value of 1E Software Import table to true as shown below. Click Cancel if you get a pop-up for Coalesce field not indexed.

-
Navigate to Service Graph Connector for 1E > Schedule Jobs. On the Schedule Job page, set the active value for scheduled jobs SG-1E Remove Software to false and SG-1E Remove Software-Kafka to true.

-
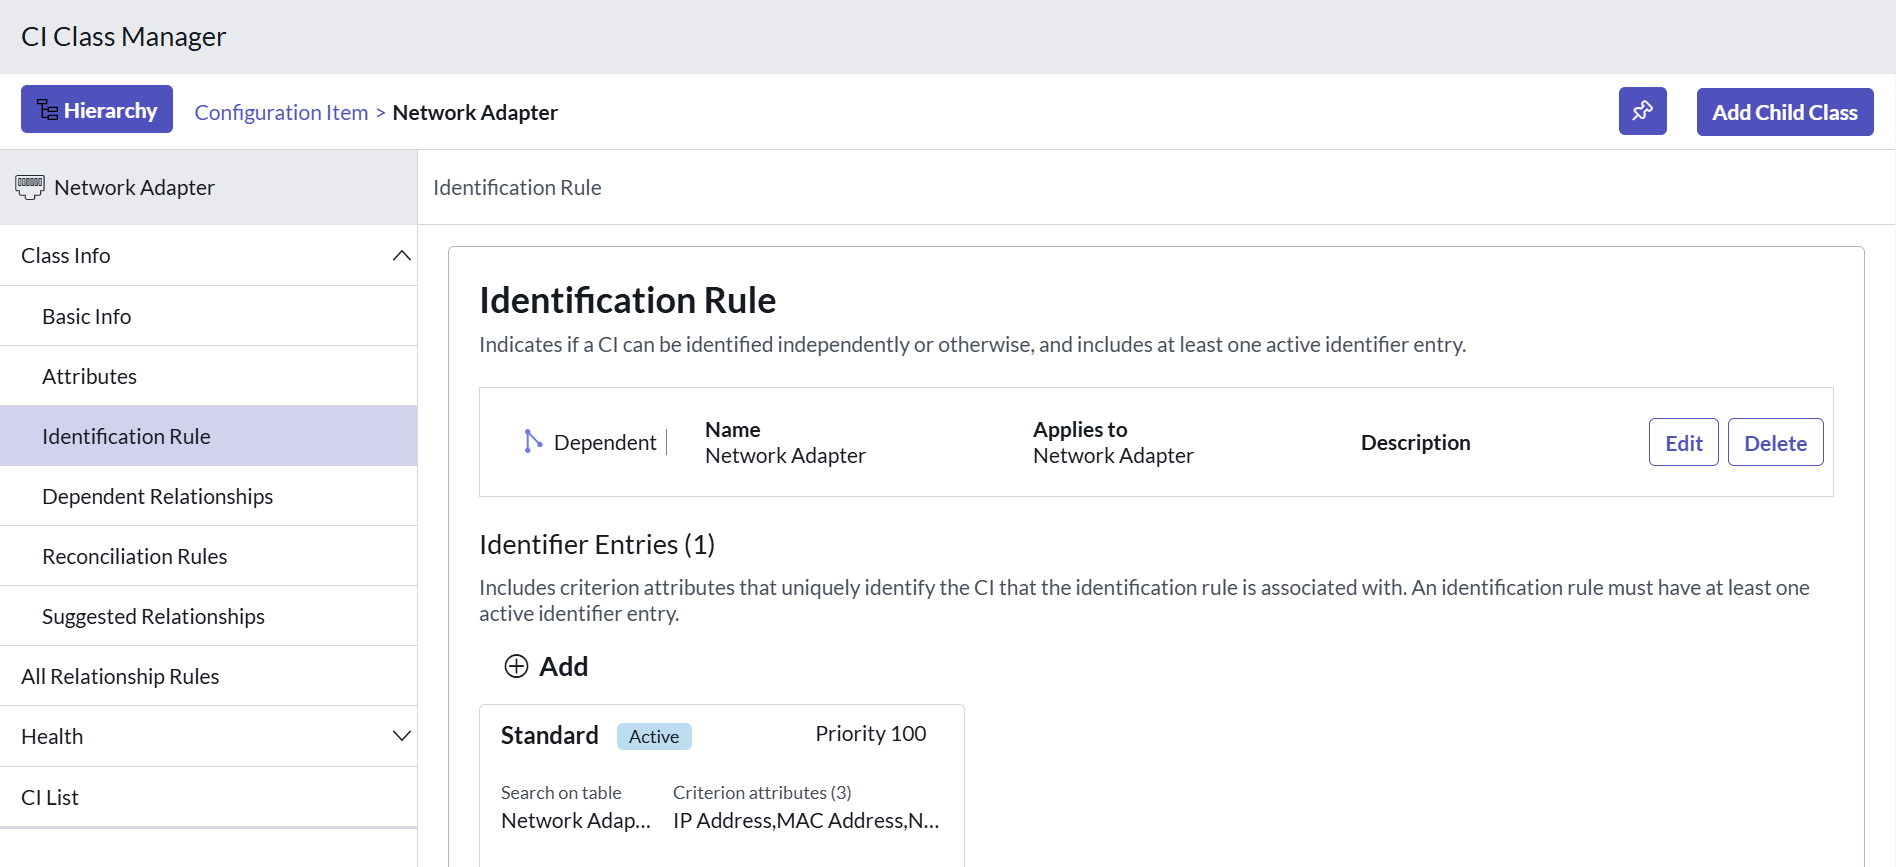
Modify the IRE rule for network adapter by adding an IP address as the identification rule under the Identifier Entries.
- Change application scope to Global.
- Navigate to All > CI Class Manager and either open Hierarchy or click Open Hierarchy.
- From the CI Classes list, search for Network Adapter and select it.
- Under the Network Adapter menu, select the Identification Rule item.
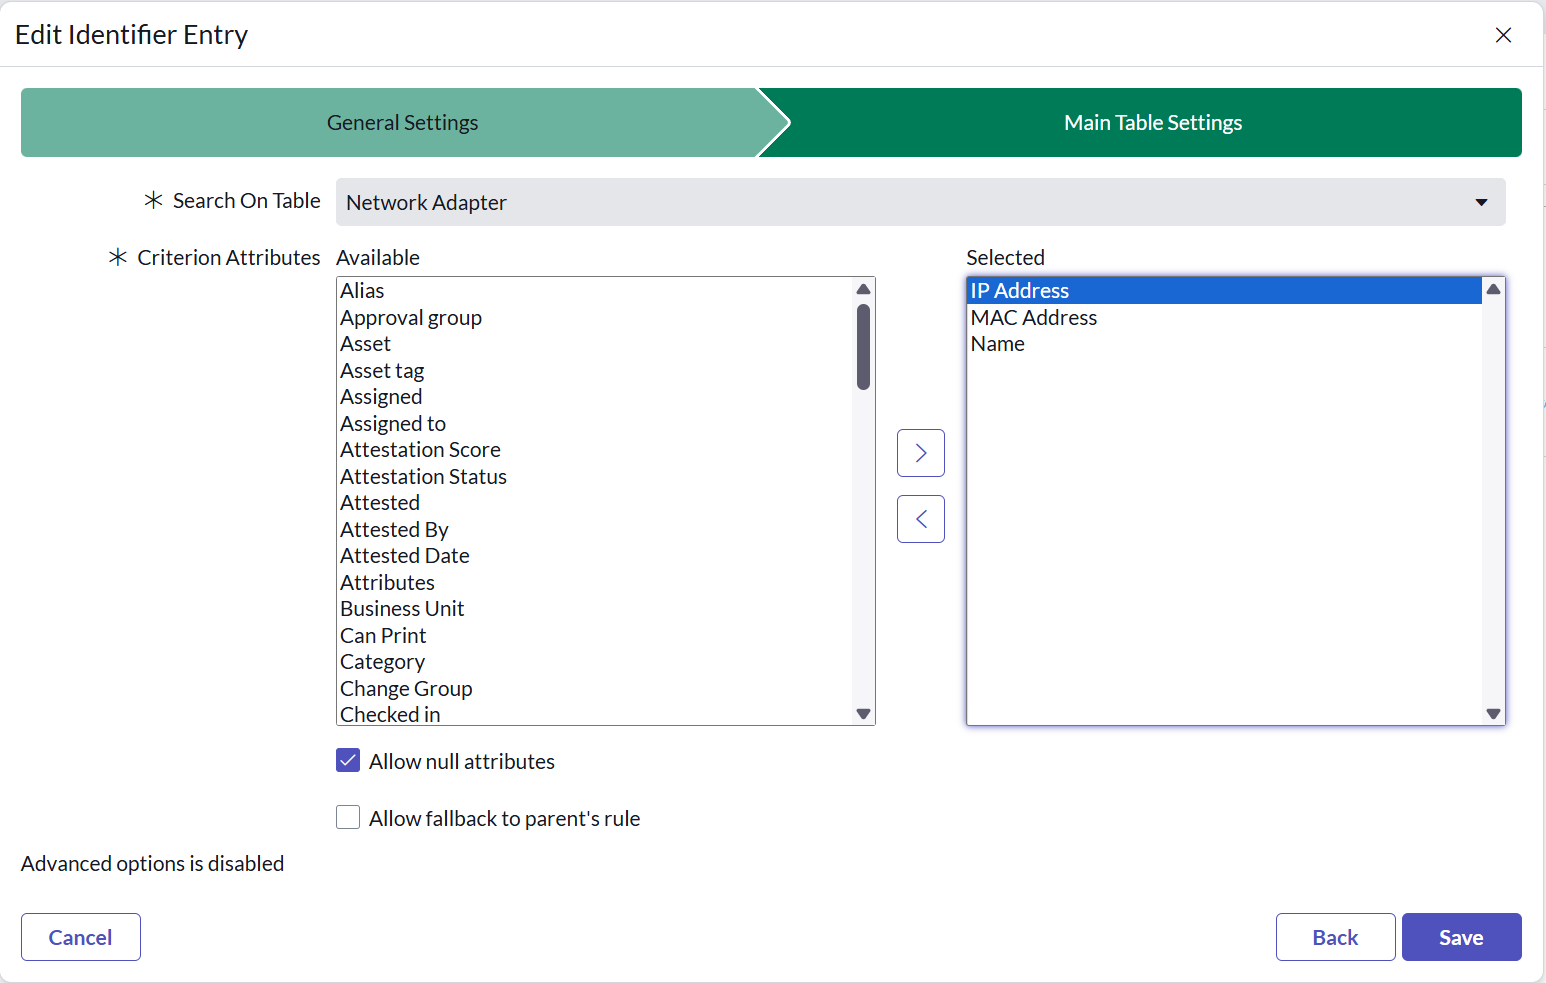
- Click the Standard field. A pop-up window appears to Edit the Identifier Entry and click Next.
- In the Criterion Attributes select IP Address and move it from Available to Selected.
- Click Save to update your changes.
Configure the ServiceNow instance to support 1E communications
To configure this 1E Platform integration in your ServiceNow instance, follow the steps given below:
- Create a user with role x_1e_cmdb_connect.user and import_set_loader.
Navigate to User Administration > User Administration > Users.
- Click New and enter the required details. Click Submit to create a new user.
- To add roles to this user, click the link in the UserID column and select the Roles tab.
- Click Edit and on the Edit Members page select the roles x_1e_cmdb_connect.user and import_set_loader. Click Save to add the roles.
- Share the user credentials with the 1E Platform team.
- To configure OAuth, you need to create an OAuth profile in ServiceNow.
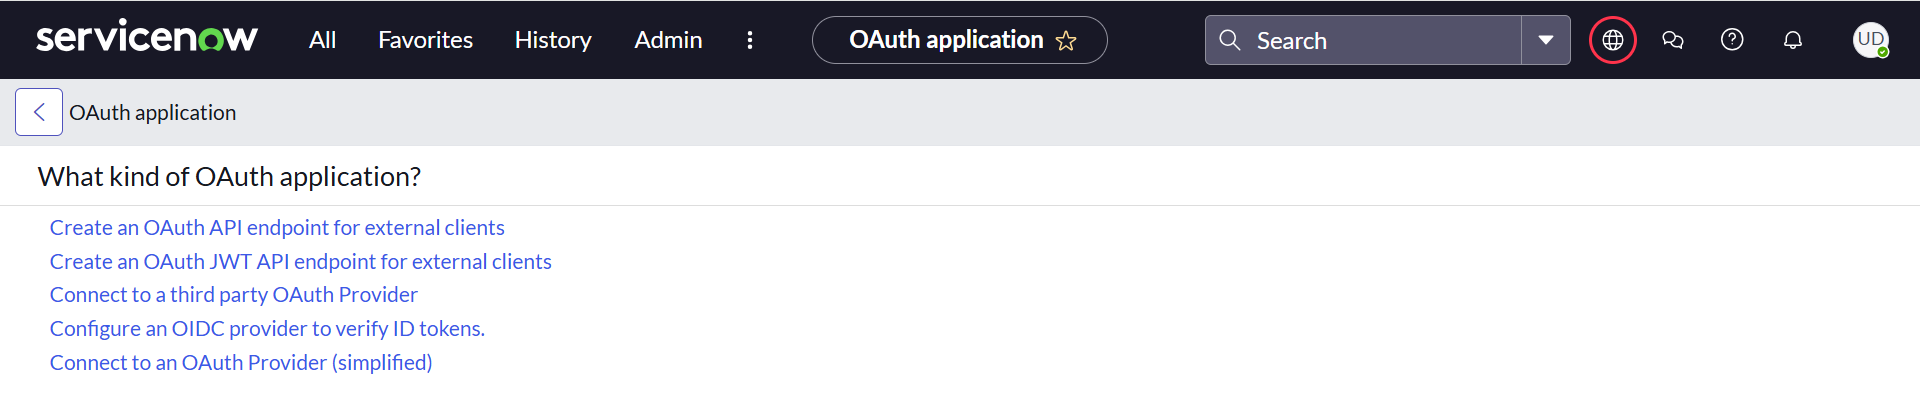
- Navigate to System OAuth > Application Registry and click New to create a new record. From the available list of OAuth application, select the option Create an OAuth API endpoint external clients.
- Create an application registry record when connecting with OAuth. Ensure that you are making these changes in the application scope of Service Graph Connector for 1E.
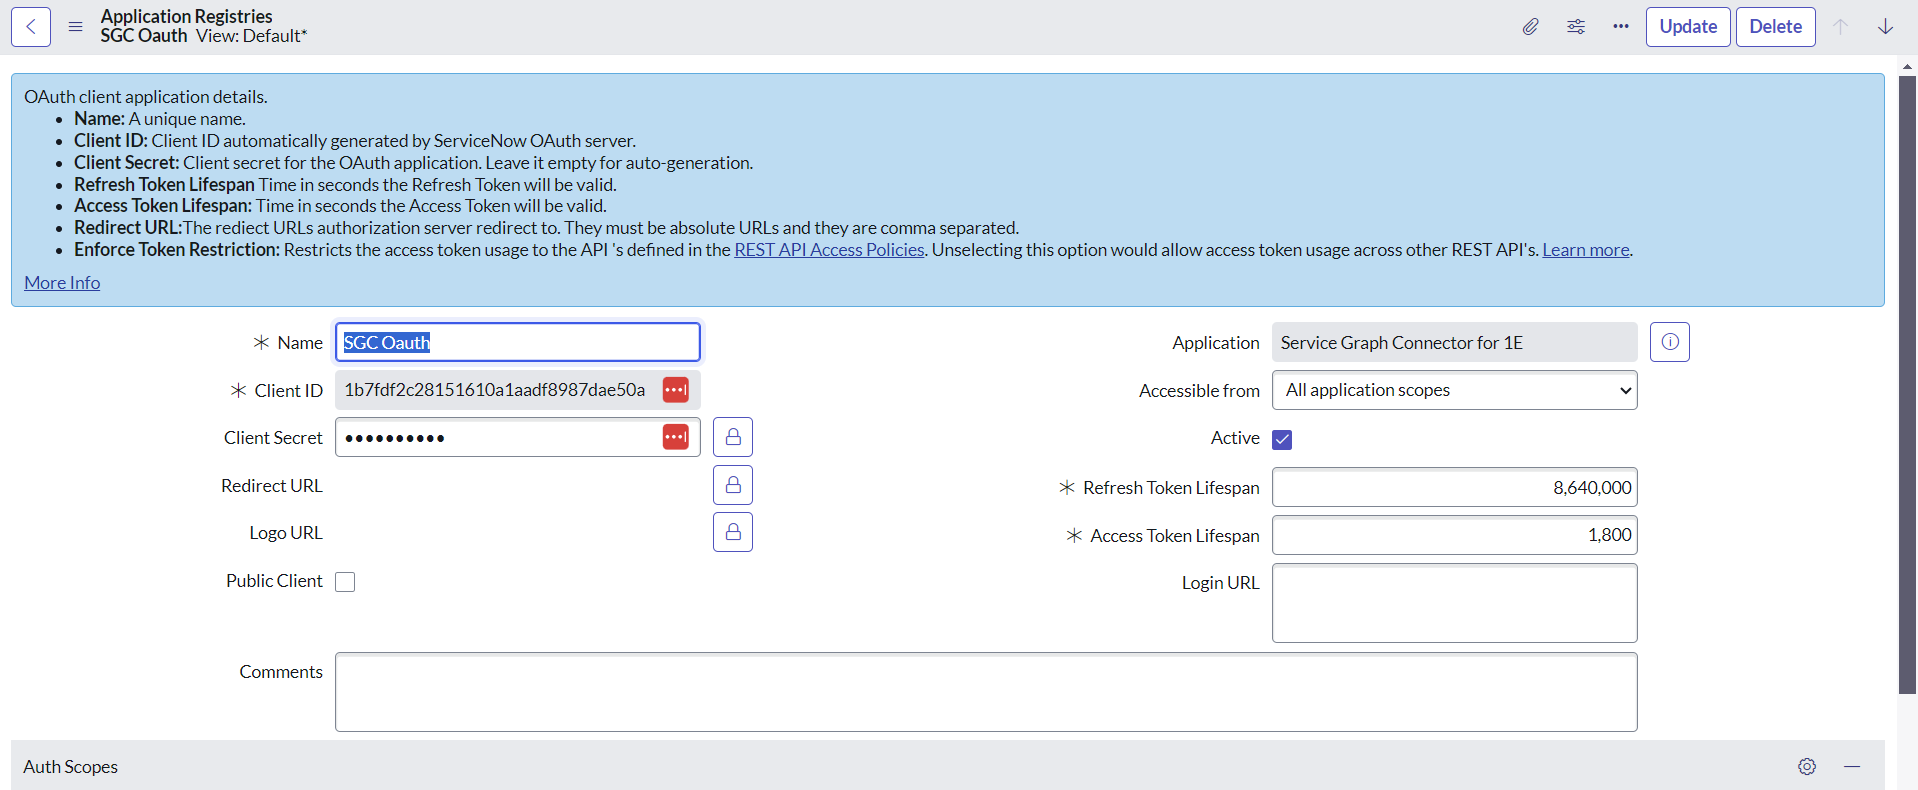
Let the Client Type value remains None, the default value.
Share the client ID and secret along with the other details given in the table below with the 1E Platform team.
Details required
PS toolkit consumer settings
Sample values
User ID
ServiceNowUserName
sn_kafka_user
User Password
ServiceNowUserSecret!
Abcdef@1
Import URL
ServiceNowImportUrl
https://<customer instance>.service-now.com/api/now/import
Client ID
ServiceNowOAuthClientId
1b7fdf2c28151610a1aadf8987dab50c
Client Secret
ServiceNowOAuthClientSecret!
VyxU&7![}a
Token URL
ServiceNowOAuthTokenUrl
https://<customer instance>.service-now.com/oauth_token.do
Authentication type
ServiceNowAuthenticationType
OAuth
The rest of the required tasks can be performed either by the 1E Platform team or by the user in the PowerShell toolkit to set up this 1E Platform integration.
- Navigate to System OAuth > Application Registry and click New to create a new record. From the available list of OAuth application, select the option Create an OAuth API endpoint external clients.
- Configuration settings and commands to run on PowerShell Toolkit
Download the 1E PowerShell Toolkit from the Releases page of the TeamViewer DEX Support Portal. Extract the downloaded .zip file. Refer to Installing the 1E PowerShell Toolkit for setting up the 1E PowerShell Toolkit.
Ensure that you get the 24.12.1 or later versions of 1E PowerShell ToolKit.
After opening a PowerShell prompt and importing the PowerShell Toolkit modules, log into the server instance to change the configuration parameters.
CopySet-1EServer acmedev.dev.preprod.1e.comAfter completing the login process, send the following commands to query the configuration settings (the encrypted settings cannot be returned by this command) and update the values.
CopyGet-1EConfigurationSettings ServiceNowPublisher.ConsumerEnsure that you have set the server's import property x_1e_cmdb_connect.import_server_records to true, if you want to insert the details of server devices into cmdb_ci_win_server table.
Add the configuration settings one by one using the below commands.
CopySet-1EConfigurationSetting ServiceNowPublisher.Consumer "ServiceNowUserName" '<import user name>'
Set-1EConfigurationSetting ServiceNowPublisher.Consumer "ServiceNowUserSecret!" '<password for import user>'
Set-1EConfigurationSetting ServiceNowPublisher.Consumer "ServiceNowOAuthClientSecret!" '<client secret>'
Set-1EConfigurationSetting ServiceNowPublisher.Consumer "ServiceNowImportUrl" '<servicenow url.com>'
Set-1EConfigurationSetting ServiceNowPublisher.Consumer "ServiceNowOAuthClientId" '<client id>'
Set-1EConfigurationSetting ServiceNowPublisher.Consumer "ServiceNowOAuthTokenUrl" '<servicenow url.com>'
Set-1EConfigurationSetting ServiceNowPublisher.Consumer "ServiceNowAuthenticationType" 'OAuth'
Set-1EConfigurationSetting ServiceNowPublisher.Consumer "ServiceNowEnabled" 'true'Set the value of the system property x_1e_cmdb_connect.is_1E_version_24.1_or_newer to true, before running the above PowerShell scripts.
You must update the setting ServiceNowEnabled to true only after updating all of the above configuration settings.
After updating all the configuration settings, run the following PowerShell command to initiate a full inventory rebuild.
An Inventory user or admin role is required for this configuration. Ensure that 1E-Inventory-Trigger-FullReplication instruction is available on 1E Platform.
CopyPS> Import-Module .\ps1etoolkit -force
PS> Set-1EServer myServer.1e.com
PS> Invoke-1EInventoryRebuild
This is a costly operation. If you are sure about it, re-run the command with the -force option.
PS> Invoke-1EInventoryRebuild -force
True