Catalog
Use the Inventory Insights Catalog to normalize software inventory data into a standardized vendor, product, version, and edition format, enabling accurate software identification, usage analysis, and license management across your organization. This reference explains how the Catalog supports automated software normalization, custom matching rules, auto-curation, and enriched inventory reporting to improve asset visibility and decision-making.
Catalog provides the following capabilities within the Inventory and other applications:
-
Have a consistent view of your estate.
-
Uniquely identify software products deployed in your estate.
-
Identify device types (laptop, desktop, virtual machine), operating system, device family, device manufacturer, and maximum number of processors.
-
Normalize processor information like processor model, processor family, vendor name, and number of cores of processors running on your devices.
-
Define and apply bundling rules to identify suites and their components.
-
Apply auto fill entitlement information using software SKU.
The Catalog is no longer available from the main navigation, and remains accessible using a direct link (/Catalog/Product) on your tenant-specific platform URL. For example https://my_platform_name/Catalog/Product.
When you access the Catalog UI, the first page displays a list of software products in the Catalog. The top right of the screen shows navigation elements for each section of the UI:
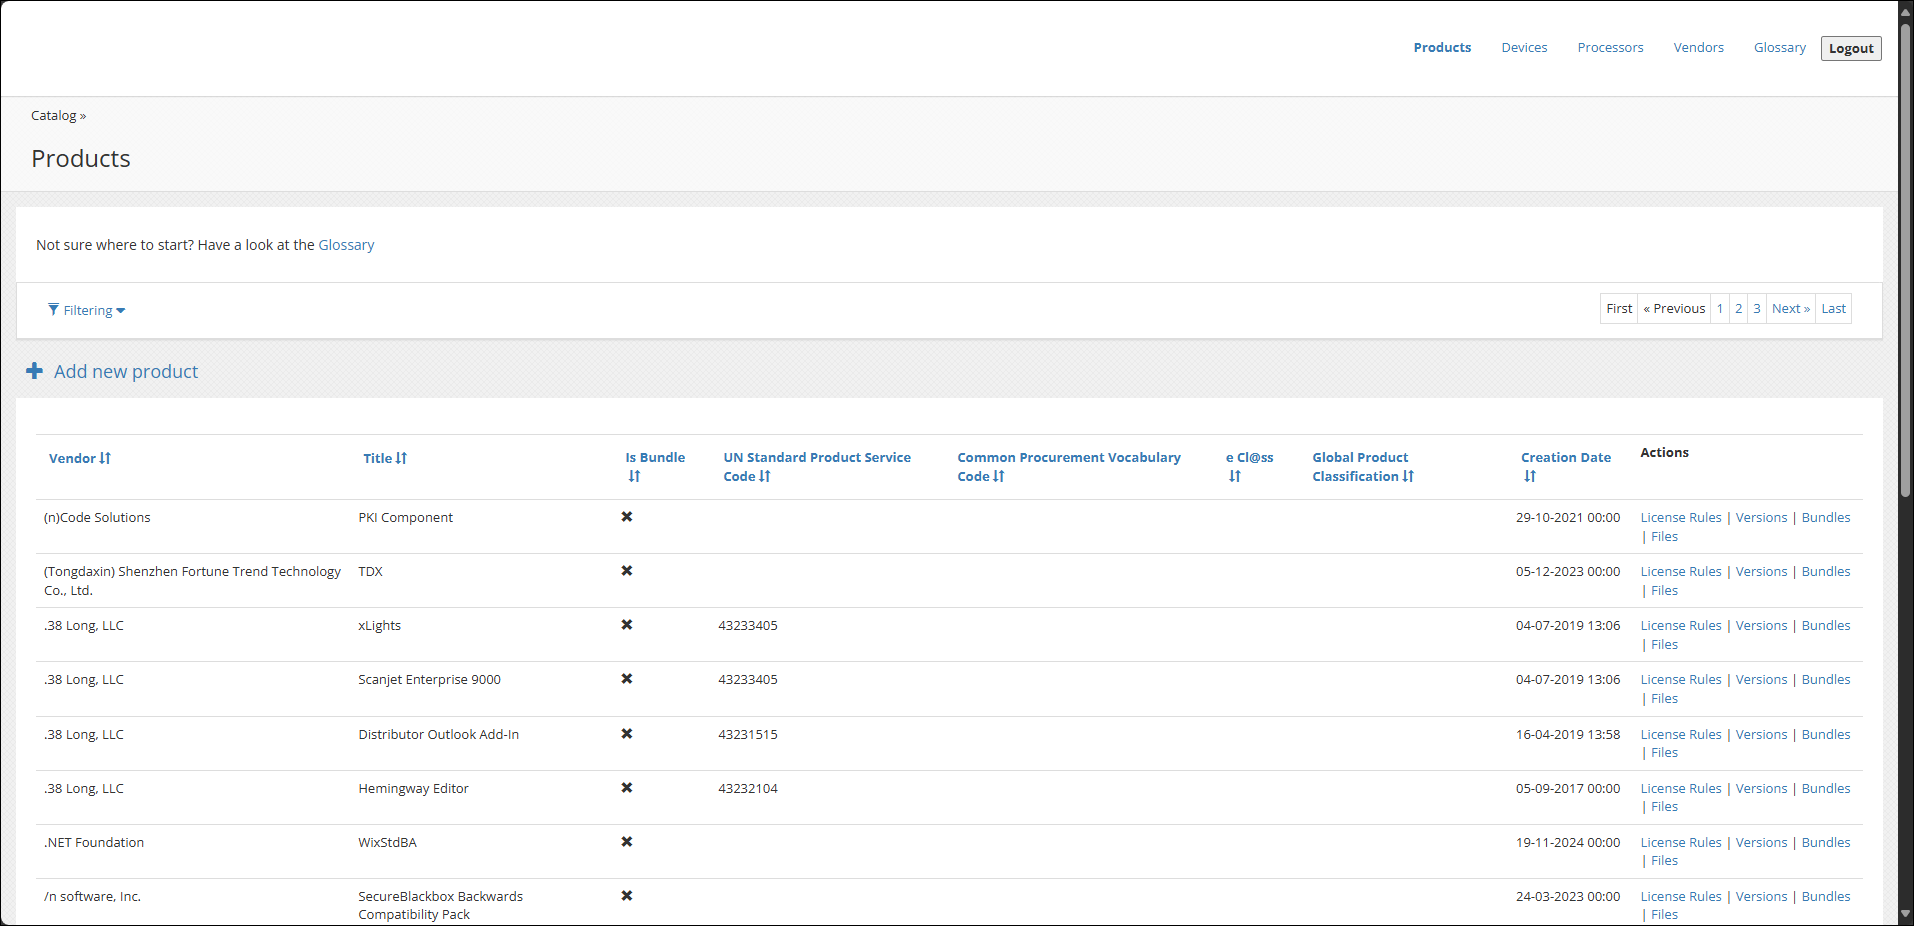
Products
The software products screen, which is also the Catalog landing page where you can perform tasks like:
Devices
List of Catalog devices, click Managing match rules to update details of a device or Match Rules to edit an existing rule or associate a new rule with it.

Processors
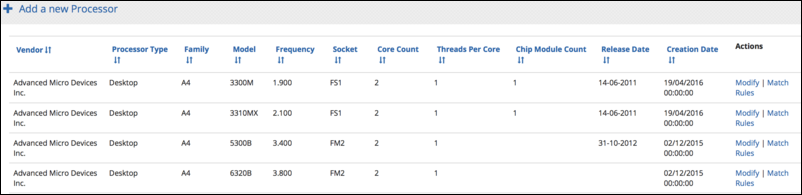
List of Catalog processors - click Modify to update the details of a processor or click Managing match rules to edit an existing rule or associate a new rule with it.

Vendors
List of software publishers in the Catalog

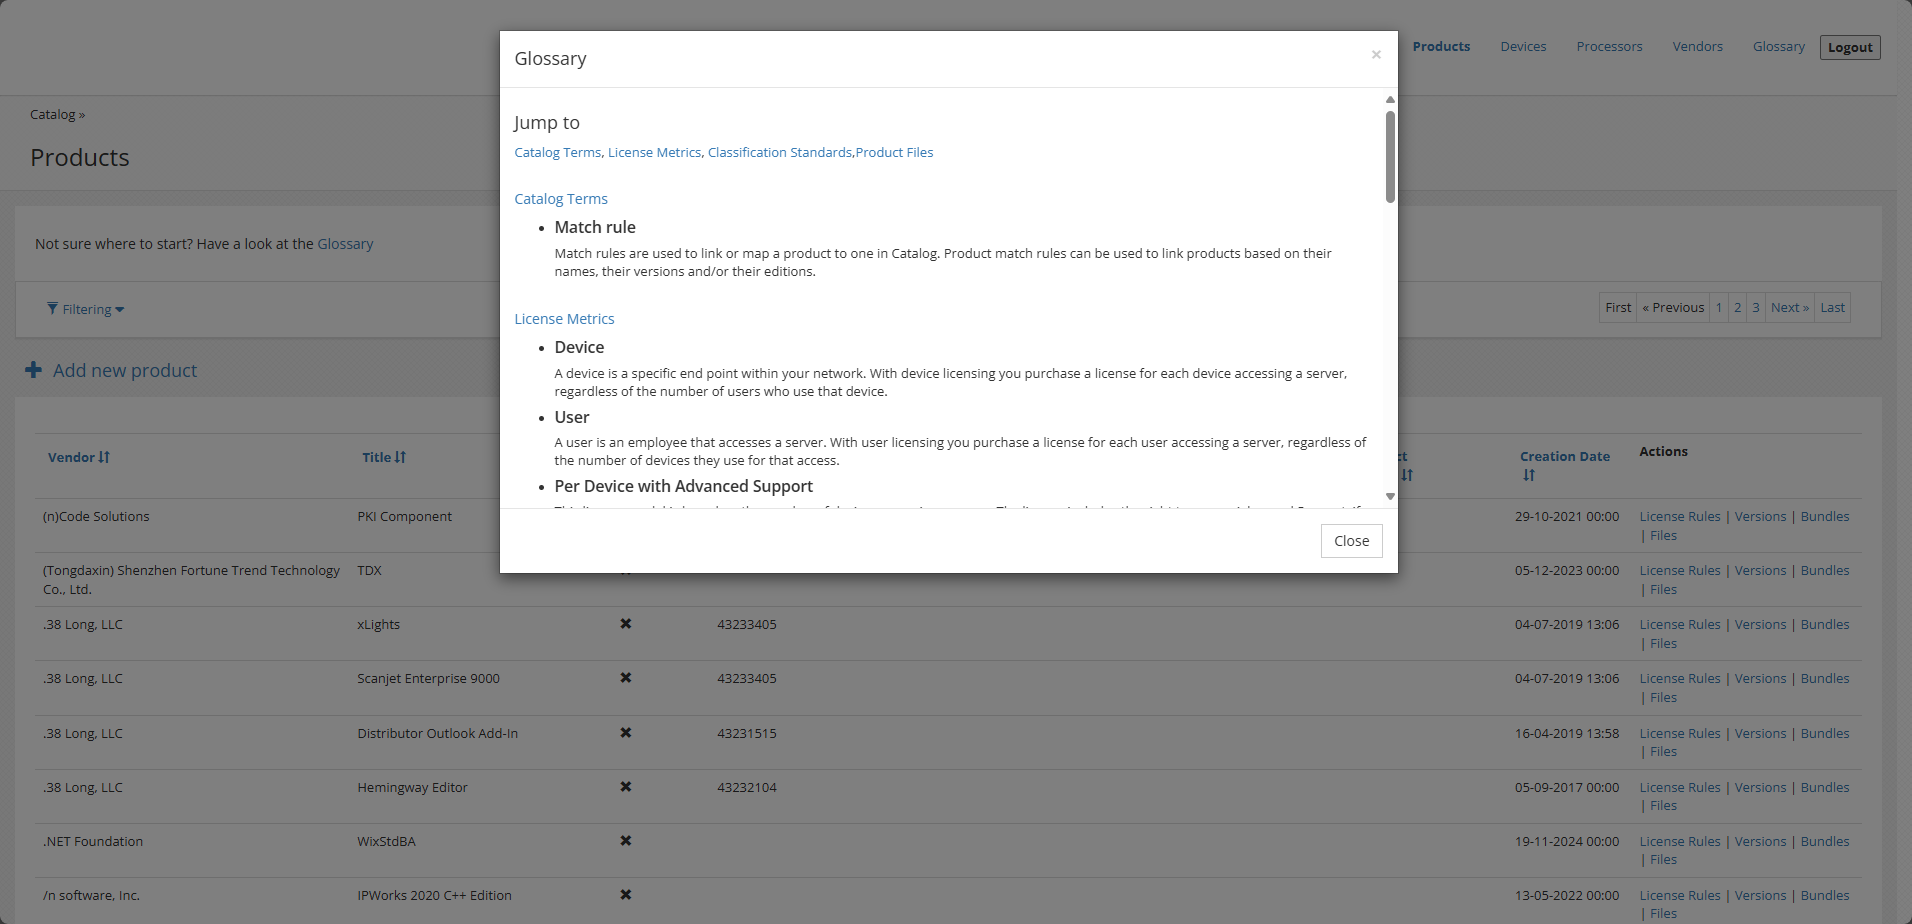
Glossary
List of terms used in the Catalog UI.
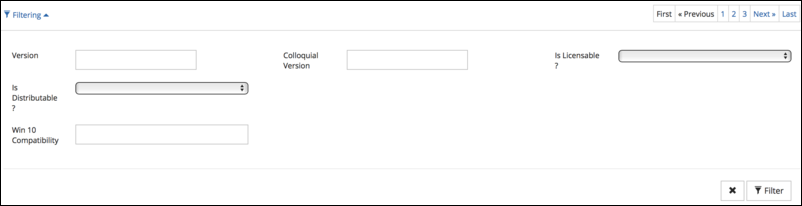
The Filtering feature narrows the results of your search list. To do this:
-
Click Filtering.
-
Enter your search criteria.
-
Click Filter.
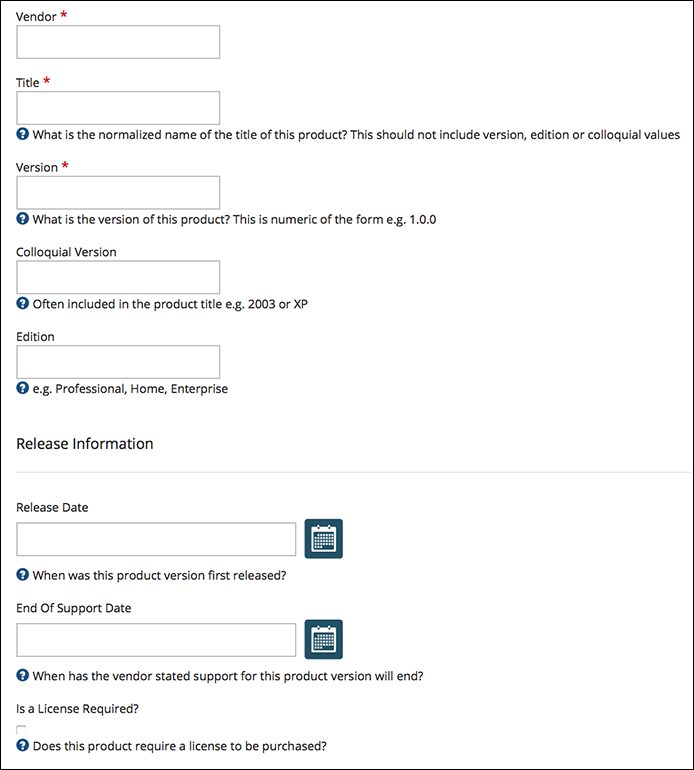
To add a new software product:
-
Click the Add a new product link.
-
On the Product Information page, complete the following mandatory fields:
-
Vendor
-
Title
-
Version
And optionally:
-
Colloquial Version
-
Edition
-
Release Date
-
End of Support Date
-
Is a License Required?
-
-
Click Save.
-
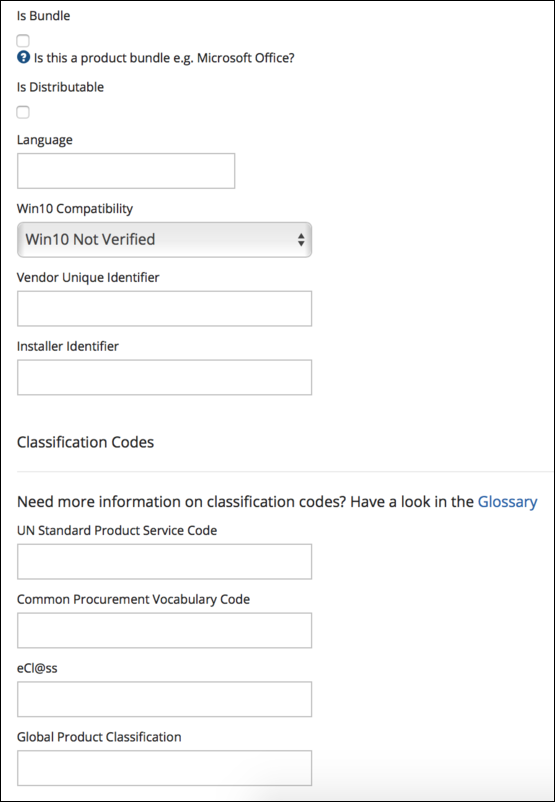
To provide more information about the new product, click the Additional details tab and complete these fields or tick the checkboxes as necessary:
-
Is Bundle
-
Is Distributable - is this software title distributed separately?
-
Language
-
Windows 10 Compatibility
-
Vendor Unique Number
-
Installer Identifier
-
UN Standard Product Service Code
-
Common Procurement Vocabulary Code
-
eCl@ss
-
Global Product Classification
-
-
Click Save.
To view a software product's versions, click the Version link to the right of the product screen to show a list of versions for that product, refer to Using filters.
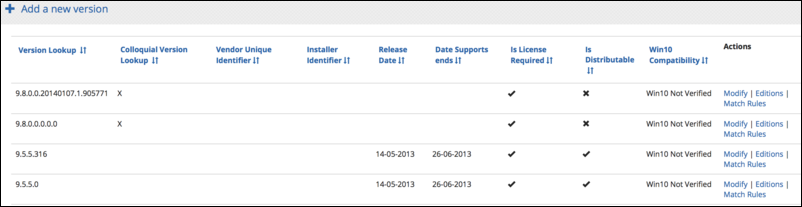
The same number of version parts are required for each major.minor version of a product:
-
If the first entry for a product is 9.0, we accept it.
-
If a new entry in the Catalog has 9.0.1, the original 9.0 entry will be automatically updated to 9.0.0 thereby forcing a three-part version number for consistency (9.0.0 and 9.0.1).
-
If there are two entries in the Catalog with the same major.minor version and title (like 9.0 and 9.0.0) they will be merged to form one record (after merging just 9.0.0 will be left).
-
Any existing match rules are added to the new consolidated record.
For example:
-
Adobe After Effects 9.0 has a match rule:

-
Adobe After Effects 9.0.0 has a match rule:

-
The source parts of these two match rules are merged to produce two new match rules associated with the new 9.0.0.0 version:

Adding a new version
To add a new version:
-
Click the Add a new version link at the top of the screen - Adobe Acrobat in this example.
-
On the Product details tab for Adobe Acrobat, complete the Version field.
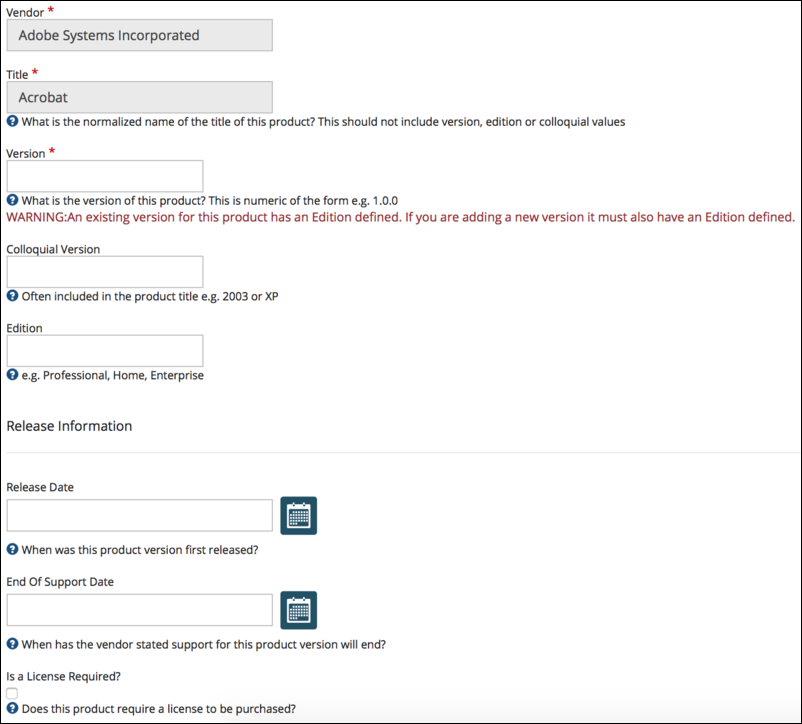
And optionally:
-
Colloquial Version
-
Edition
-
Release Date
-
End of Support date
-
Is a License Required?
-
-
Click Save.
-
To provide additional information associated with this particular version, click the Additional details tab and complete the fields or tick the checkboxes as necessary:

-
Is Distributable?
-
Vendor Unique Identifier
-
Installer identifier
-
-
Click Save.
Deleting an existing product version or edition
You can only delete products, versions, or editions you created. New product items added by the 1E curation team are marked as 1E Verified and cannot be deleted.
To delete an existing product version or edition:
-
On the Version screen find the item in the list.

-
Under the Actions column, click Delete.
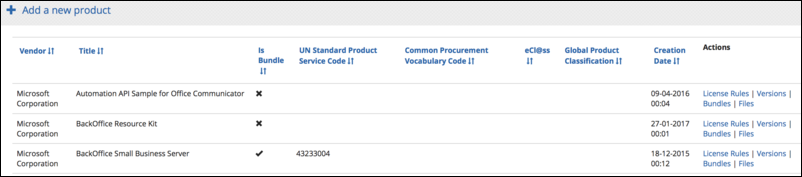
Bundles are a collection of products and the 1E Catalog already contains all the bundles you should need. In the event you need to create a bundle:
-
On the Products screen, find the item from the list, for example, Microsoft BackOffice Small Business Server.
-
Under the Actions column, click Bundles.
-
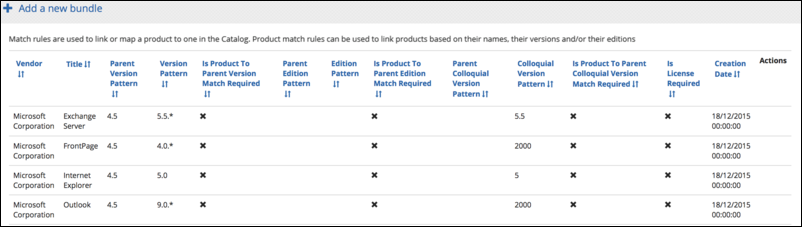
Click Add a new bundle.
-
On the Bundles screen:
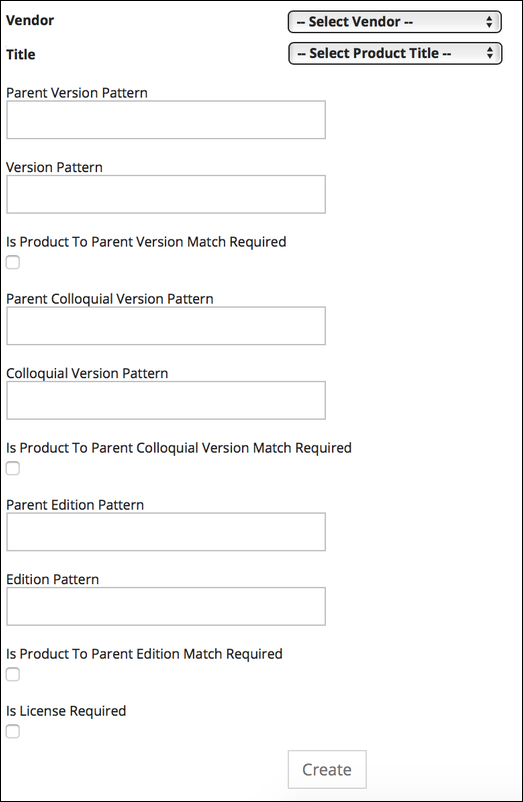
-
In Vendor, click the list and choose a vendor for this bundle. The title list displays after you pick a vendor - the image displays both the Vendor and Title pick lists
-
In Title, click the list and choose a product title for this bundle
-
Complete the remaining fields as necessary
-
-
Click Create.
Filesets define which files are used by a particular product. AppClarity consumer uses filesets to determine its usage, it does this by looking at the last run dates for that file name.
Adding a fileset
To add a fileset:
-
On the Product screen, find the item you want to add files to.
-
Under Actions click on Files.
-
On the Product Files screen, click Add a new Product File.
-
On the Product File screen, enter the filename:
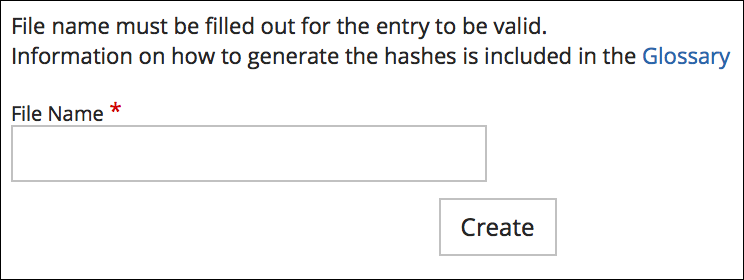
From 1E Catalog 2.0 and later products can be associated with more than one executable, before this version products were restricted to a single executable.
-
Click Create.
Modifying an existing fileset
To modify an existing fileset:
-
On the Product screen, find the item you want to modify.
-
Under the Actions column, click Files.
-
From the list of files, locate the one you want and click Edit.

-
In the Product File screen, update its filename
-
Click Save.
Deleting an existing fileset
To delete an existing fileset:
-
Repeat steps 1 and 2 above.
-
From the list of files, locate the one you want and click Delete.
-
You will be prompted to confirm your actions.
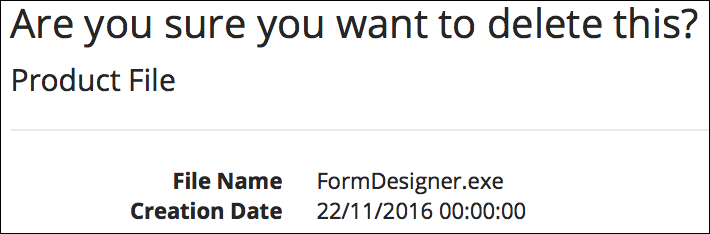
-
Click Delete to remove the file or Back to List to cancel the action.
Licensing rules define how a product or a specific version of a product is licensed, for example, what metric they use or the average price of the license. You can set up different license rules for specific versions by using version patterns, for example, 10.*.* has license metric = Device; 11.* is licensed by User.
To add a licensing rule:
-
On the Product screen, locate the item you want to associate a licensing rule with.
-
Under the Actions column for that product, click License Rules.
-
Click Add a new license rule.

-
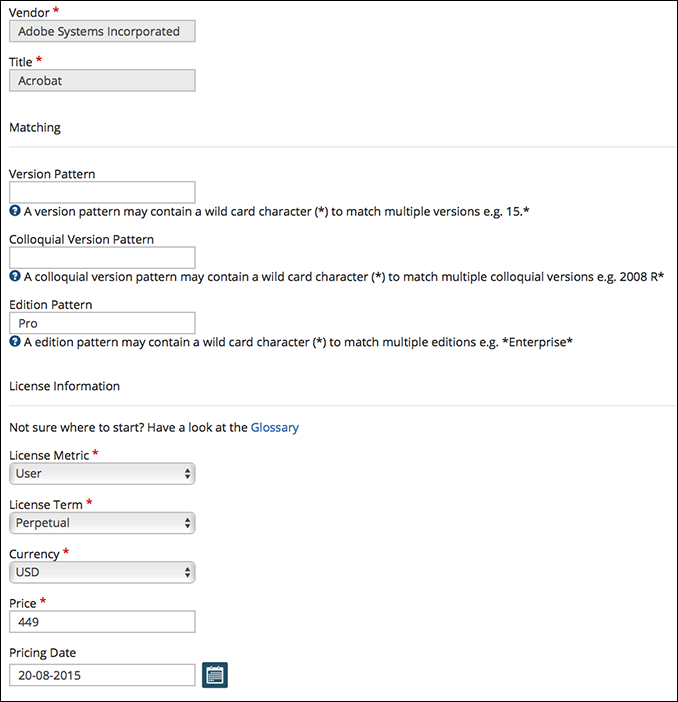
In the Product Information screen:
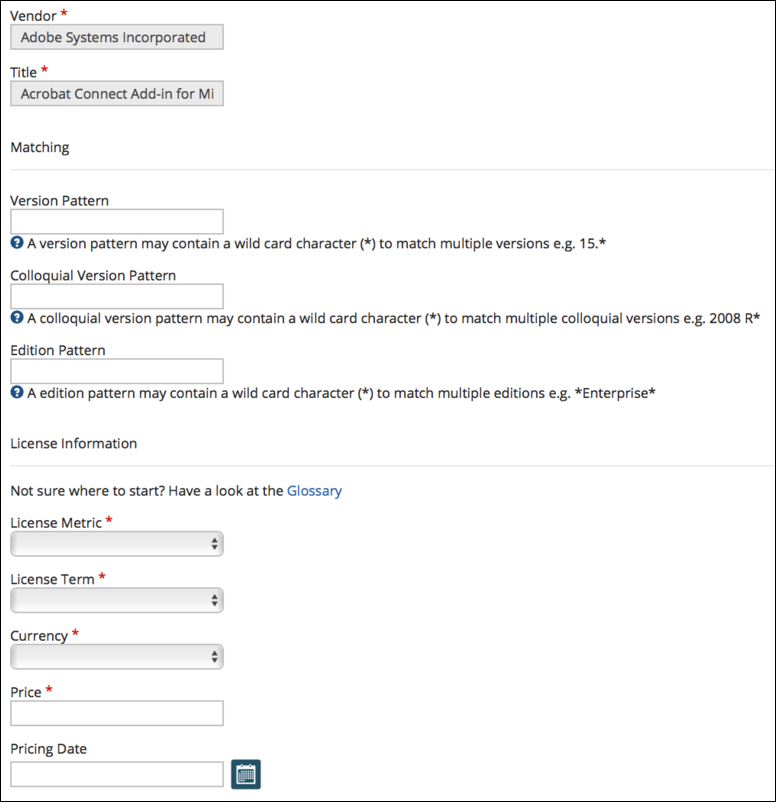
-
In the Matching section, populate the pattern fields if you are using patterns - you can use the wildcard (*) in the pattern.
-
In the License information section for these mandatory fields:
-
License Metric - click the list and choose one
-
License Term - click the list and choose from device, non-perpetual, perpetual or subscription
-
Currency - click the list and choose one
-
Price - enter the unit price for it
Optionally:
-
Pricing Date
-
-
-
Click Save.
Updating an existing license rule
You can modify or delete an existing Licensing Rule associated with a product, for example the licensing rules for Adobe Acrobat.

To modify an existing license rule:
-
Locate the item from the list and under the Actions column, click Modify.
-
In the Product Information screen, update the fields as necessary.
-
Click Save.
Deleting an existing license rule
To delete an existing license rule:
-
Locate the item from the list and under the Actions column, click Delete.
-
You will be prompted to confirm your actions.
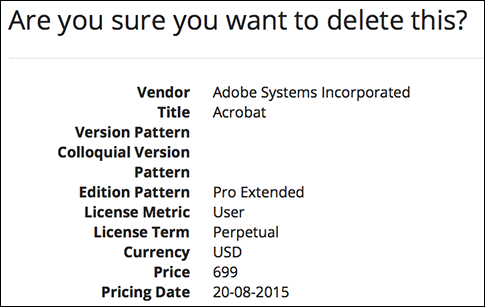
-
Click Delete to remove the rule for that product or click Back to List to cancel the action.
To add a new device:
-
Click the Devices link - top right of the screen.
-
On the Devices screen, click Add new Device.
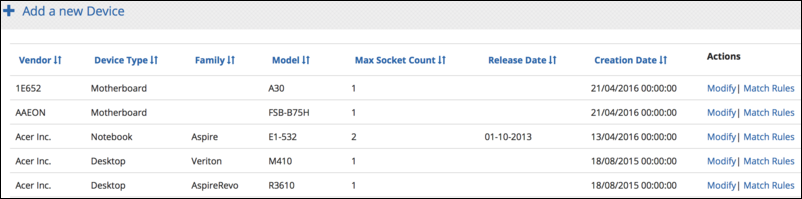
-
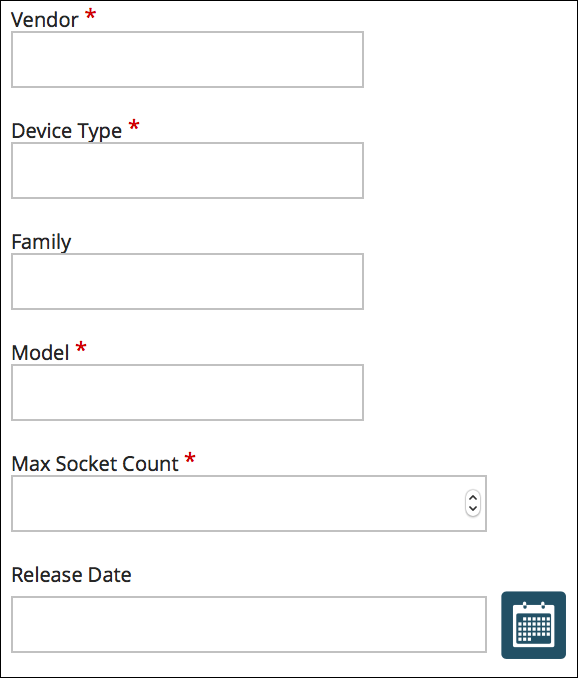
On the Add a new Device screen - fields marked with a red asterisk are mandatory:
-
Vendor: Enter the name of the vendor
-
Device Type: Enter the type of device, for example, motherboard, laptop, notebook, desktop, server, or blade server
-
Family: Enter the family of the device such as EliteBook, HP Omni, Pavilion, Pro, TouchSmart
-
Model: Enter the model number of the device
-
Max Socket Count: Enter the socket count for the device
-
Release Date: Click the calendar icon and choose a date
-
-
Click Save.
From 1E Catalog 1.2.100 and later Processor identification and normalization has greater accuracy and coverage.
To achieve this we removed the current dependency on Processor frequency during normalization. We did this because processors can run at a variety of speeds, so using the processor frequency for normalization does not help to identify processor type. For example, you could have up to 10 different speeds for a single processor because an OS typically reports the speed of a processor as it’s currently running.
Now, one of the following criteria has to match during normalization:
-
SourceFamily and SourceModel
-
SourceName
This change makes finding matches more successful because there's no need to evaluate every source field.
In the following example, the two source entries will be matched to the same processor because the SourceName values are the same:
| SourceVendor | SourceFamily | SourceName | SourceModel | SourceFrequency | SourceSocket |
|---|---|---|---|---|---|
| GenuineIntel | Intel Xeon |
Intel(R) Xeon(R) CPU E5-2637 v4 @ 3.50GHz |
NULL | 3500 |
NULL |
| GenuineIntel | NULL |
Intel(R) Xeon(R) CPU E5-2637 v4 @ 3.50GHz |
NULL |
NULL |
NULL |
To manage processors:
-
Click the Processors link - top right of the screen.
-
On the Processor screen, click Add new processor.
-
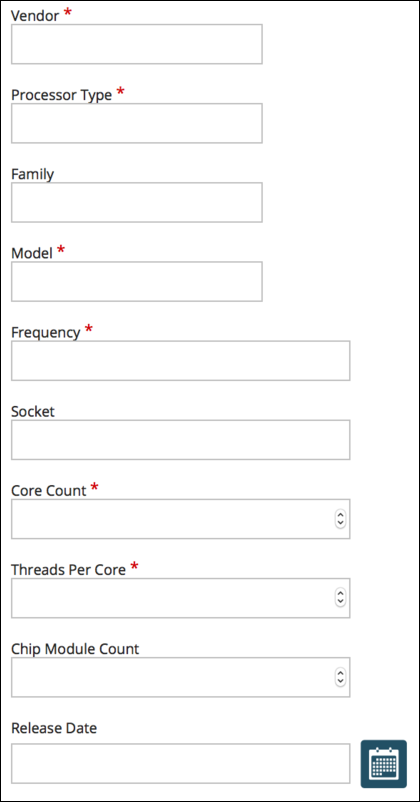
On the Add a new Processor screen - fields marked with a red asterisk are mandatory:
-
Vendor - enter the name of the vendor
-
Processor Type - enter the type of processor such as desktop, server
-
Family - enter the family for the processor such as A4, Athlon XP, Atom, Corei5, Corei7, Pentium, Xeon
-
Model - enter the model of the processor such as 260M, T2500, Z670
-
Frequency - enter the processor frequency in GHz such as 0.600, 2.500
-
Socket - enter the model of the socket supported by the processor such as FM1, FCBGA676
-
Core Count - enter the number of cores for the processor such as 1, 2, 4, 8
-
Threads Per Core - enter the threads for the processor core such as 1, 2
-
Chip Module Count - enter the count for it such as 1
-
Release Date - click the date icon and choose a date.
-
-
Click Save.
To add a new vendor:
-
Click the Vendors link - top right of the screen.
-
On Vendors screen, click Add new vendor

-
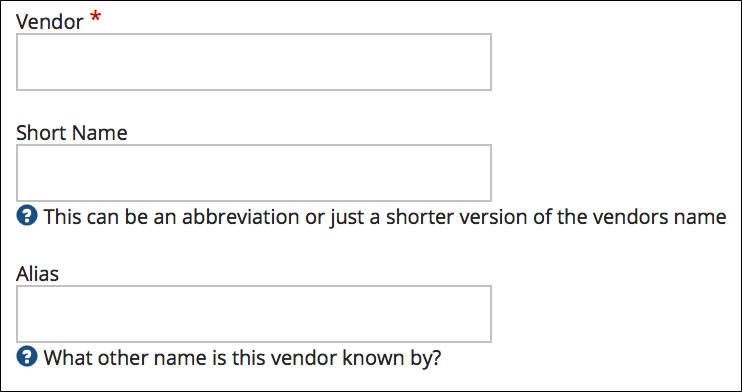
On the Add a new vendor screen:
-
Vendor - enter the name of the vendor - a mandatory field
-
Short Name - enter a short name for the vendor
-
Alias - enter an alias if there is one
-
-
Click Save.
Match rules are the method used to link source inventory to catalog entries. Match rules can be assigned to a specific:
-
Version of a product - typically used if the product is not an edition-based product
-
Edition of a version of a product - typically used if the product is an edition-based product.
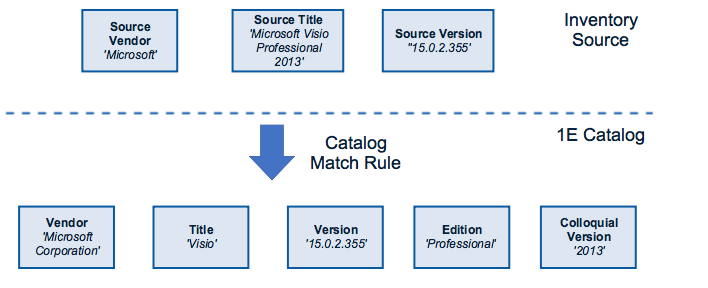
For example, the inventory source holds the following information about a software title:
-
Source Vendor = Microsoft
-
Source Title = Microsoft Visio Professional 2013
-
Source Version = 15.0.2.355
However, the corresponding entry in the Catalog has a different vendor and title resulting in a mismatch. To resolve this, the Catalog contains rules which directly match these types of entries. In this example, the product is edition-based (Visio) so the Catalog match rule is an edition match rule – linking the source to a specific edition of a specific version (15.0.2.355) of this title.
-
Vendor Microsoft resolves to Microsoft Corporation
-
The Microsoft Visio Professional 2013 title resolves to:
-
Title = Visio
-
Edition = Professional
-
Colloquial Edition = 2013
-
-
Version 15.0.2.355 maps directly to 15.0.2.355
This is how the Catalog normalizes the source inventory. The same match rule principles apply equally to devices and processors in the Catalog.
Adding a match rule to a version of a product
To associate a match rule to a version of a product:
-
On the Product screen, click Filtering and enter your search criteria.
-
Click the Versions link to the right of the product.
-
Filter by version number to narrow the list and select the product version you want.
-
Under the Actions column, click the Match Rules link for that specific version.
-
Click the Add a new match rule link.

-
Enter the source inventory data that will be used to link to this product and version combination:

-
Source - the source for this inventory, for example SCCM
-
Source Vendor - the text that's in the Vendor field in the source data
-
Source Title (mandatory) - the text that's in the Title field in the source data
-
Source Version - the text that's in the Version field in the source data
-
Source Colloquial Version - the text that's in the colloquial version field in the source data
-
Source Edition - the text that's in the edition field in the source data.
-
-
Click Save
When a source inventory contains all the information that's recorded in the match rule fields, it's linked to the product version containing that match rule.
To add a match rule to an edition of a version, follow steps 1 through 3, and then:
-
Under the Actions column, click Editions.
-
From the list of editions, choose the one you want and click the Match Rules link to the right of it.
-
Repeat steps 5 to 7 above.
You can add match rules to Devices and Processor by simply following the procedures above in the respective Devices and Processor sections.
Removing an existing match rule
You can disassociate the link between a source inventory and a catalog item by deleting its match rule.
Follow the steps above to navigate to the product or version the current match rule is associated with, or the product, version, or edition.
Click on the Match Rules link on the right-hand side of the specific version, or edition.

Then click delete on the match rule to be removed:

This removes the link between the source inventory from this catalog entry.