Okta Applications
A reference to complete to create and configure the Okta applications required for 1E Platform SaaS instances.
Third-party screenshots and options are correct at time of release but are subject to change outside of our control.
Okta - 1E Client Assertion
The Client Assertion Application will be used to perform directory searches in 1E. This will allow a 1E Administrator to add users to the platform and give them assignments for roles and management groups. These instructions show how to register the Client Assertion Application in Okta.
-
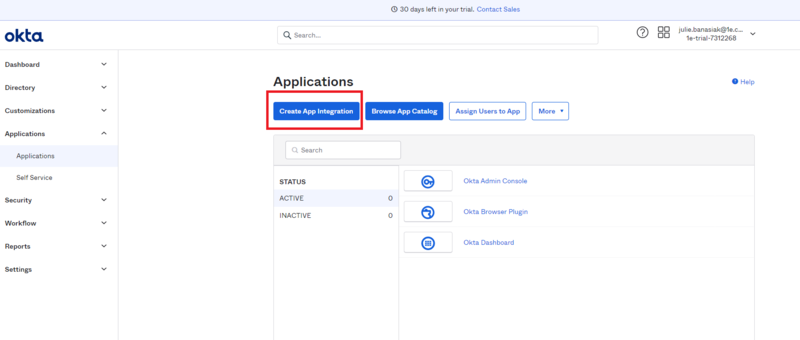
In the Okta admin portal navigate to Applications and select Create App Integration.
-
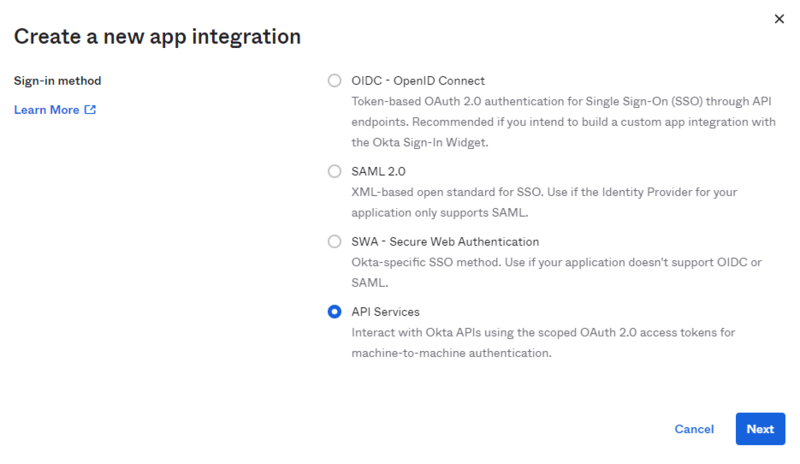
Once that opens select API Services and then click Next.
-
In the New API Services App Integration section, fill in the App integration name field. We suggest you name this 1E Client Assertion and then click on Save.

-
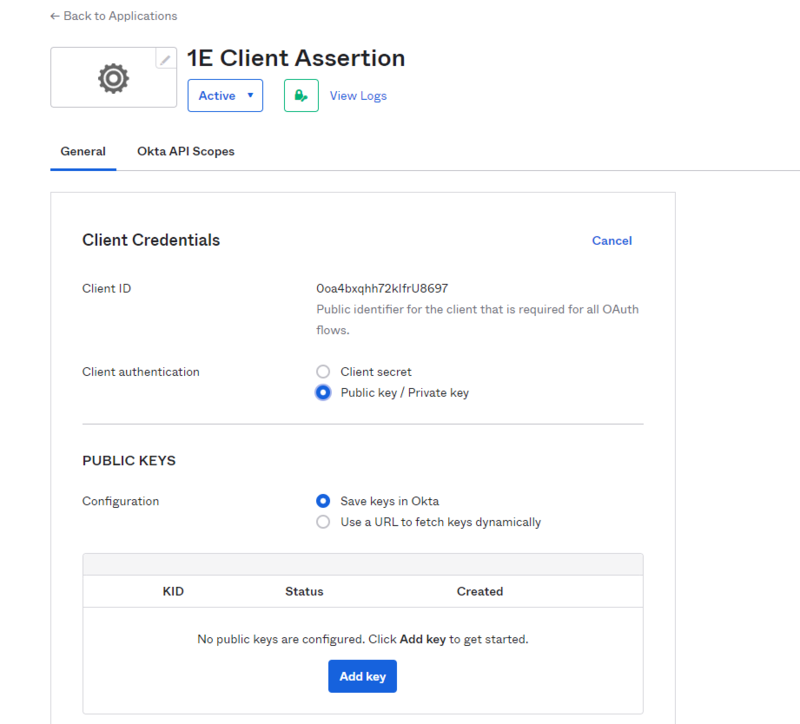
In the Client Credentials section, under Client authentication, select Public key/Private key, and in the PUBLIC KEYS section select the Save keys in Okta option.
-
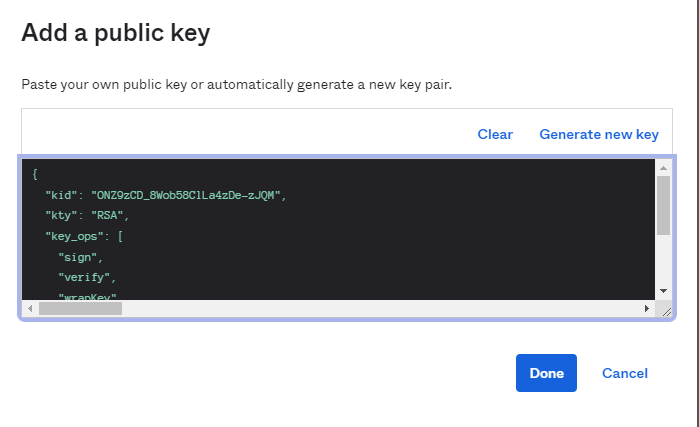
Select Add key, in the black field displayed paste the entire certificate file that was sent to you by 1E, and then click Done. For Okta this needs to be presented in JSON Web Key (JWK) format.
-
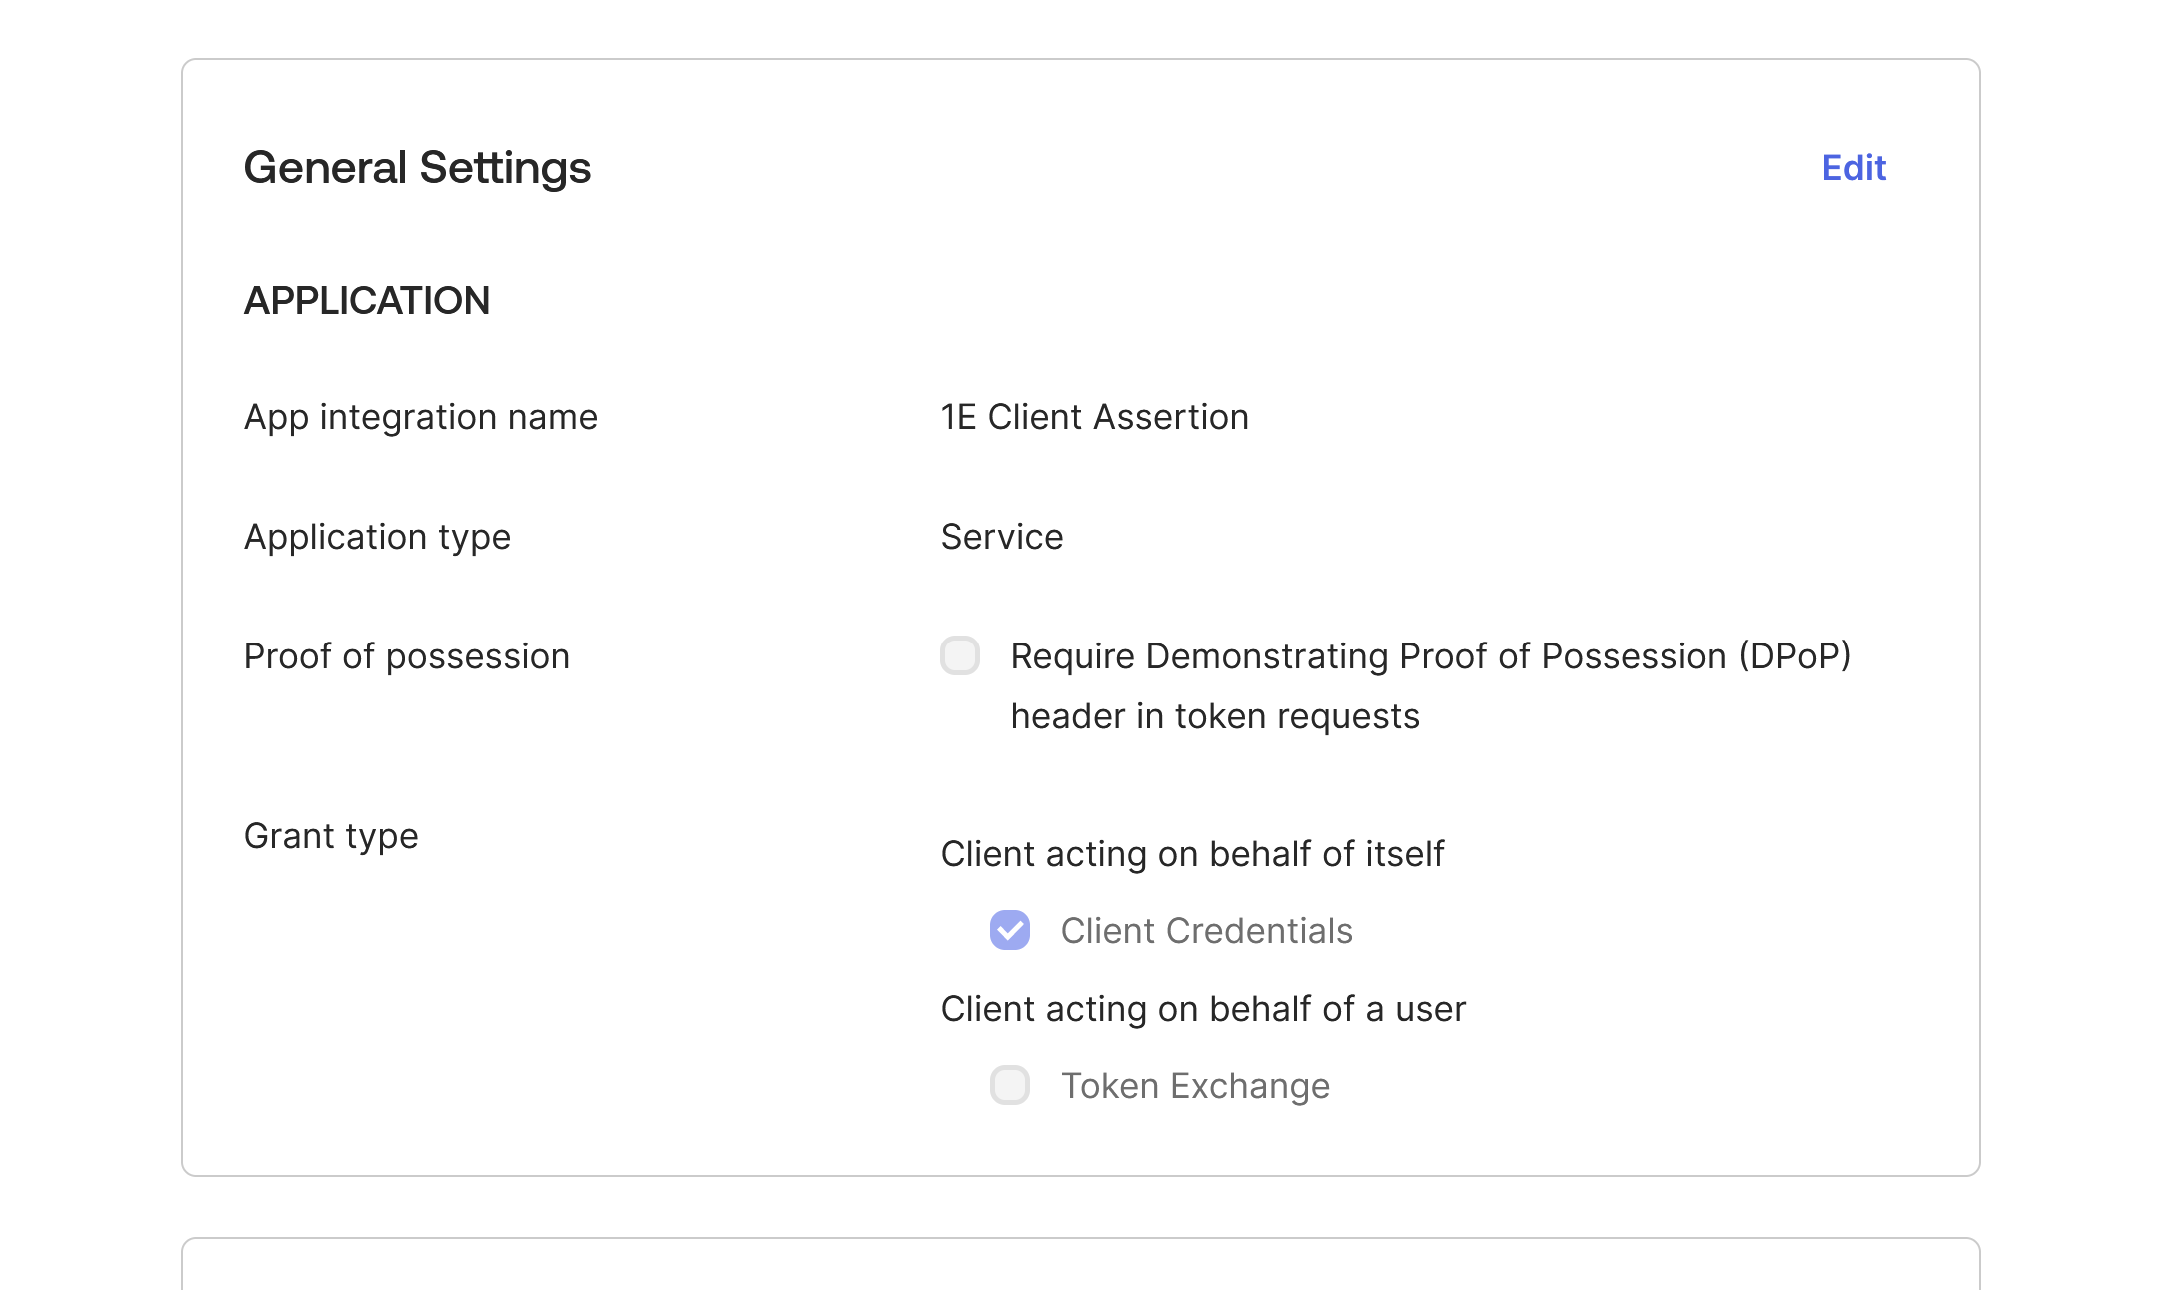
In General Settings the Require Demonstrating Proof of possession (DPoP) header in token requests option is selected by default.
You must deselect this option, as DPoP is not currently supported by 1E for authentication.
Click Edit, deselect Require Demonstrating Proof of possession (DPoP) header in token requests and then click Save.
Okta - 1E PKCE
This application will be used to read the credentials for each account that logs into the 1E portal. These instructions show how to register the PKCE Application.
-
In the Okta admin portal, navigate to Applications and select Create App Integration.
-
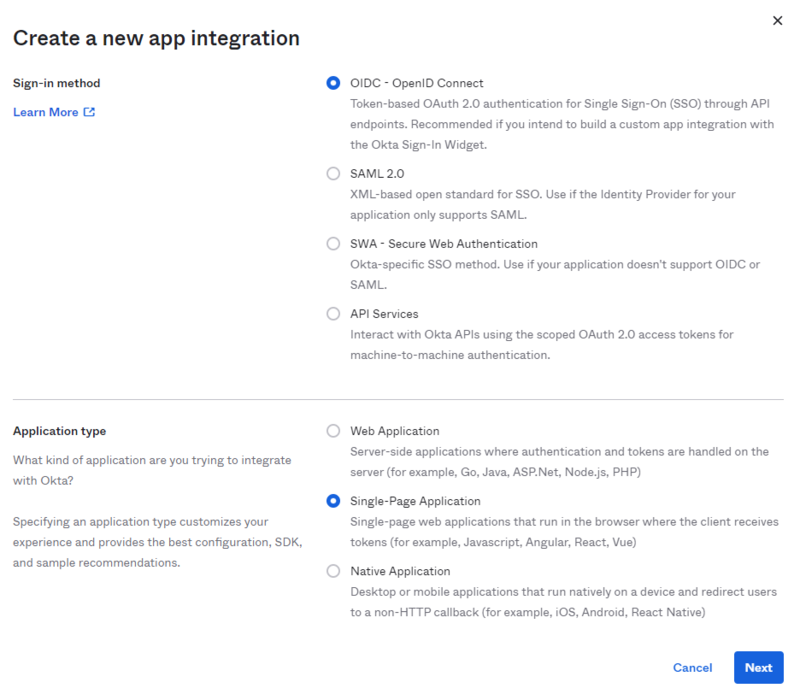
In the new screen displayed, select OIDC - OpenID Connect in Sign-in method, and select Single-Page Application in Application type, then click Next.
-
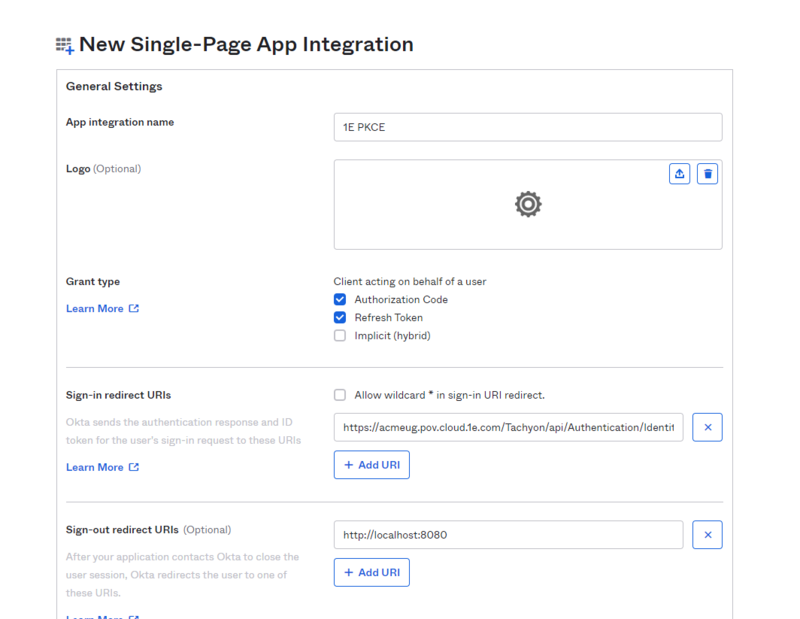
In the App integration name field set the name for the application, we recommend calling this 1E PKCE.
-
In Grant type, check the Authorization Code and Refresh Token checkboxes.
-
In Sign-in redirect URIs input the URL provided by 1E into the field.
The Redirect field is case-sensitive.
For example, the URI will be in the form of https://<TachyonFQDN>/Tachyon/api/Authentication/IdentityProviderRedirect
-
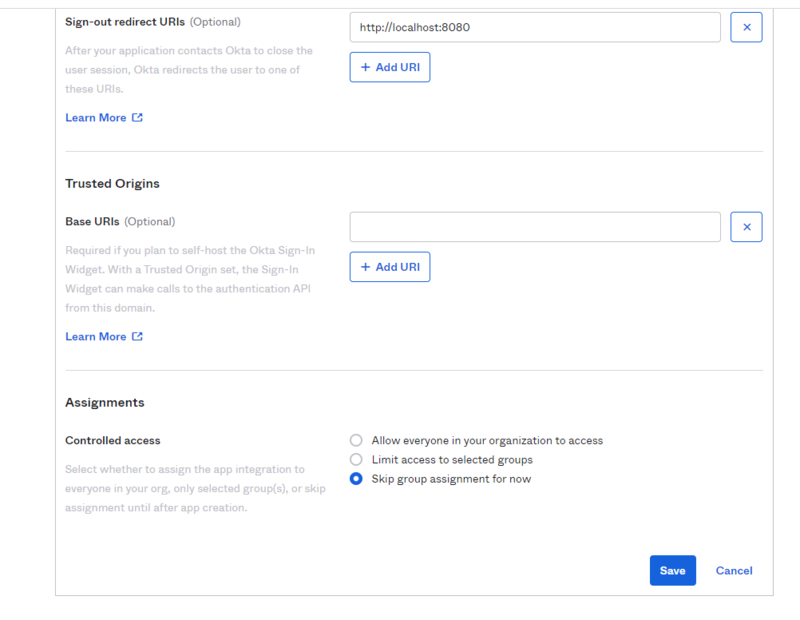
Choose Skip group assignment for now in Controlled access.
-
Click on Save
-
Okta assign permissions to the applications
When the applications have been created you then need to grant the permissions.
-
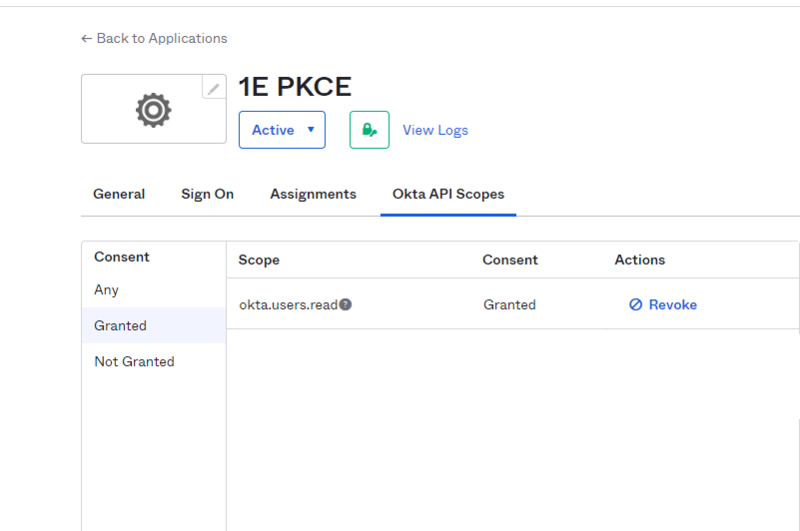
Navigate to the 1E PKCE Application and click on Okta API Scopes.

-
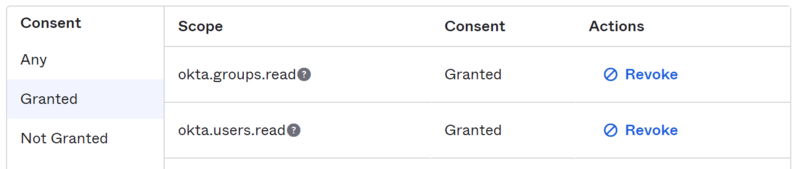
Grant okta.users.read. Click on Grant for this permission, you will see Granted in the Consent column.
-
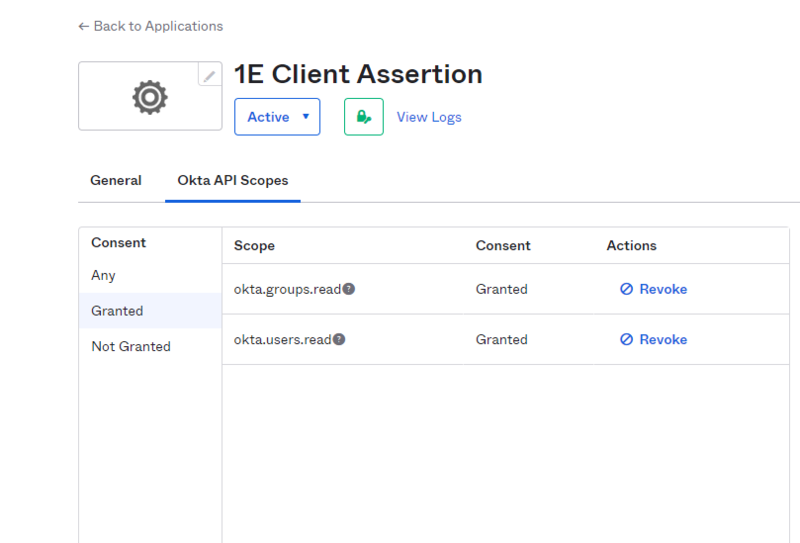
Perform the same steps to add the following permissions for the 1E Client Assertion Application.
- okta.groups.read
- okta.users.read
Okta assign users to the applications
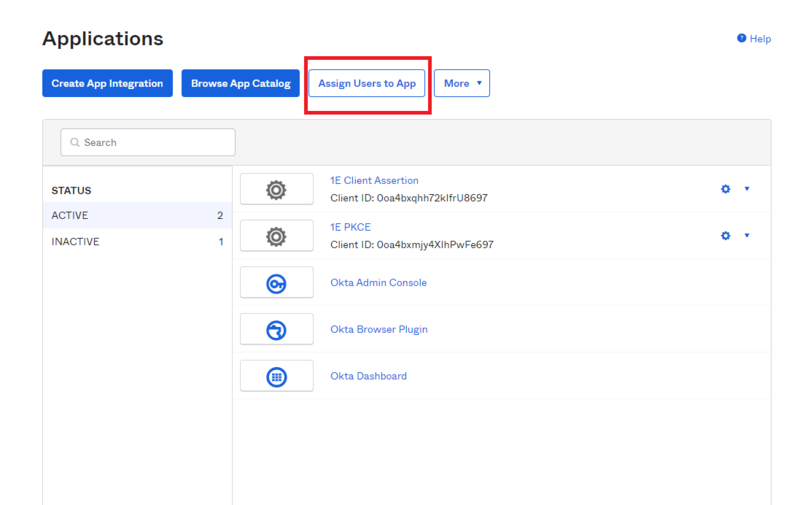
To use the applications and allow users to be added to 1E you also need to first assign those users to the applications you just created in Okta. We recommend that you create a group for this purpose and add the group to the applications. That way user assignment can be via the group.
-
Navigate to the Applications and click on Assign Users to App.
-
Select each application and assign the group you want to use.
-
Subsequently you will only need to modify the group membership to assign or remove users from the applications.
Okta 1E Integrations
This Client Assertion Application is used for non-interactive logins.
-
You will need to get a certificate from your Certificate Authority to use for your non-interactive logins, for Okta this needs to be presented in JSON Web Key (JWK) format.
To get the certificate in this format you can use the 1E Toolkit available from the 1E Support Portal.
On the device where the certificate is installed, run PowerShell as an administrator. Then navigate to the 1E PowerShell toolkit directory and run the following cmdlet, replacing <subjectname> with the name of your certificate.
CopyImport-Module 'C:\Program Files\1E\PSToolkit\ps1etoolkit.psd1'
Get-1EJwkFromCertificate -certsubject CN=<subjectname> -
In the Okta admin portal navigate to Applications and select Create App Integration.
-
Once that opens, select API Services and then click Next.
-
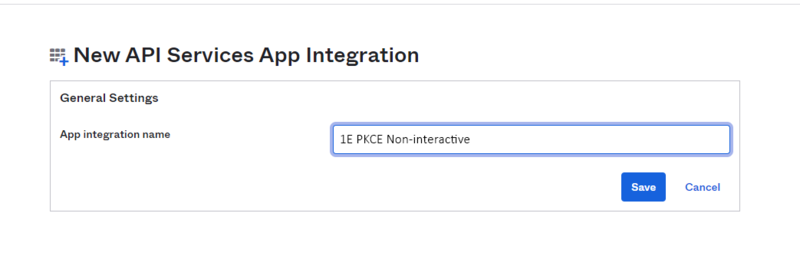
In the New API Services App Integration section, fill in the App integration name field. We suggest you name this 1E PKCE Non-Interactive and then click on Save.
-
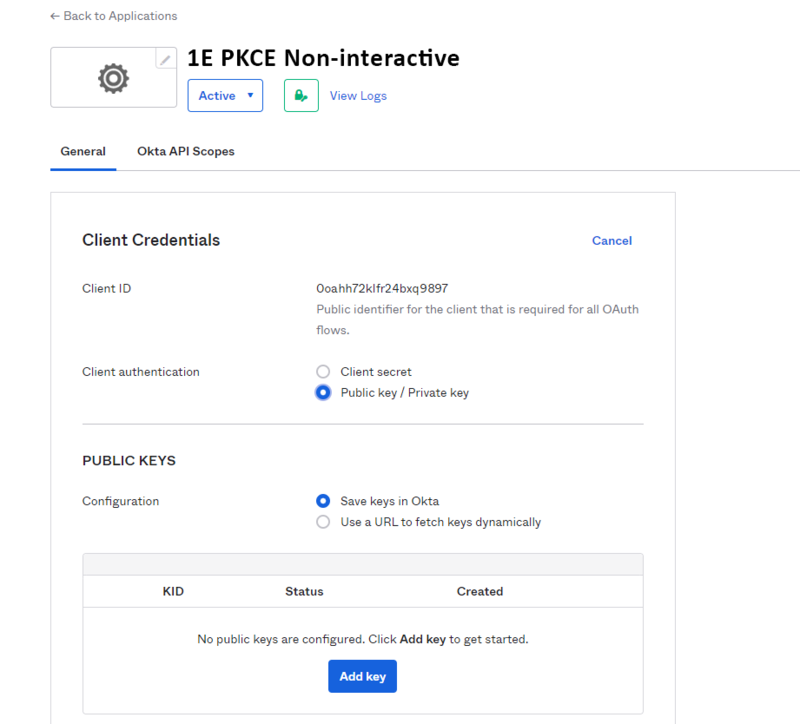
In the Client Credentials section, under Client authentication, select Public key/Private key, and in the PUBLIC KEYS section select the Save keys in Okta option. Take a note of the Client ID, you will need to send this to your 1E Account Team as part of the overall provisioning process.
-
Select Add key, in the black field displayed paste the JWK file you obtained in step 1 and then click Done.
-
The new Okta application will need the following permissions:
Gathering the Okta information
Once you have your applications configured, you will need to send the following information to your 1E Account Team:
-
Tenant Metadata – this can be found by navigating to the metadata endpoint. The URL has the form:
https://<okta instance URL>/.well-known/openid-configuration
Selecting this displays the Okta OpenID MetaData:

-
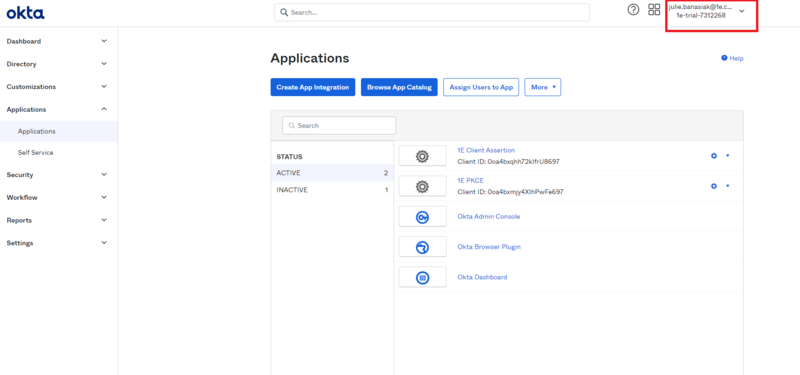
Tenant ID – this can be found at the top-right of the Okta portal
-
Application (client) ID for both of your provisioning applications. These can be copied from the General tab of each application:
-
1E Client Assertion (Directory Search).
-
1E PKCE (PKCE Grant Flow App for Interactive Logins).
-
1E Client Assertion Non-Interactive (Client Grant Flow App for Non-Interactive Logins).
-
-
An Okta user account that will be used as the Setup user during this installation of 1E .