Identity provider setup
Guides on Azure Authentication and Okta Authentication setup for Solutions, detailing step-by-step instructions for seamless integration and user management. Learn to configure applications, manage API permissions, and implement secure authentication practices.
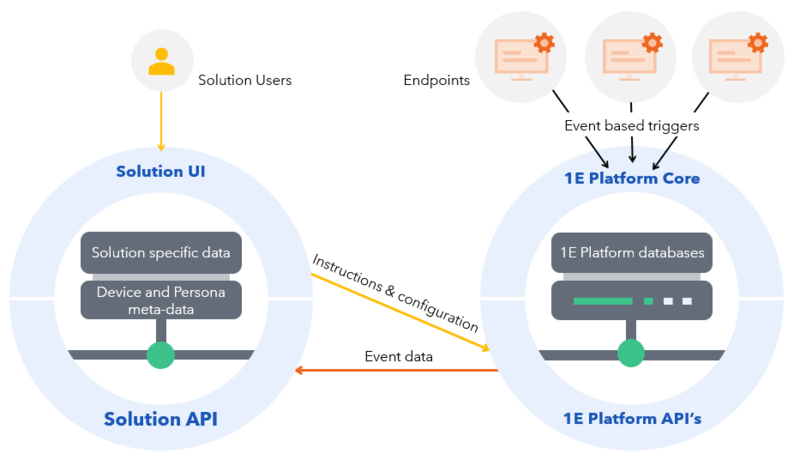
Microsoft Azure AD, integration with Microsoft Azure IDP and Solutions enables authentication using your existing Microsoft Azure AD/Entra ID credentials, in addition:
-
Solutions users manage endpoints using the platform, based on platform role-based access control (RBAC).
-
Endpoints are not connected in any way to Solutions.
-
When solution relevant events happen, data is sent to the Platform. Solutions subscribes to those events and updates device status in real time.
Setting up authentication
Depending on your environment you can either create a new app or use an existing one to authenticate to Solutions.
For more information about creating and configuring the Azure AD applications required for Platform SaaS instances. Refer to Microsoft Entra ID Applications.
Registering a new app
-
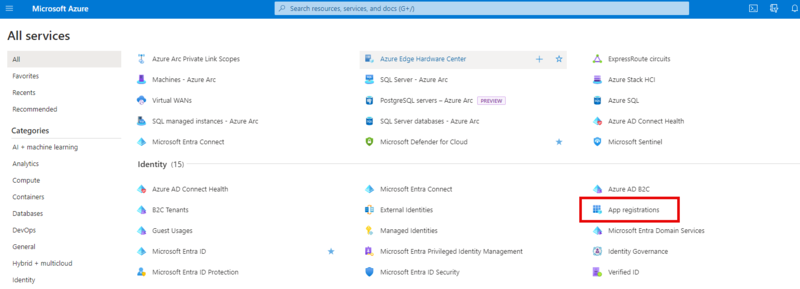
Login to your Microsoft Azure portal, go to App registrations.
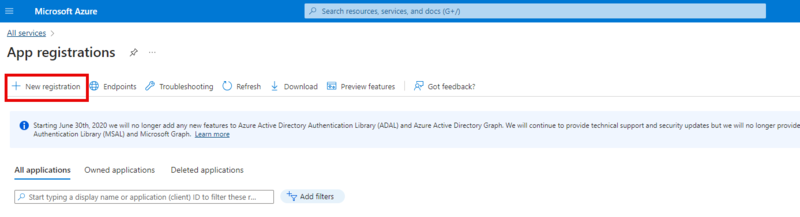
Then click New registration.
-
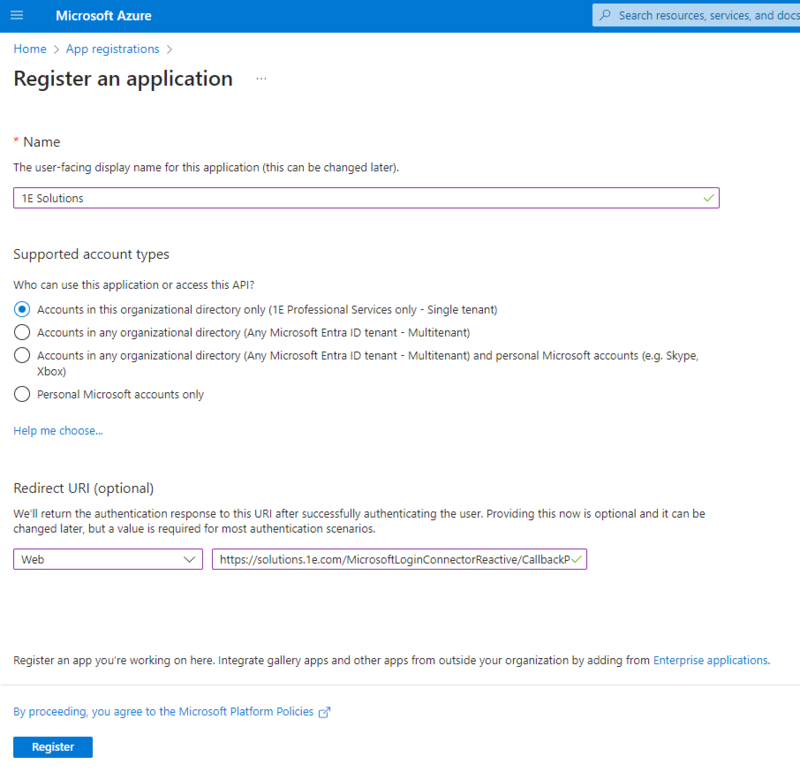
Provide a name for the application and set the supported account type as shown, and add the Redirect URI:
https://solutions.1e.com/MicrosoftLoginConnectorReactive/CallbackPage
-
Click on Register to save the app.
-
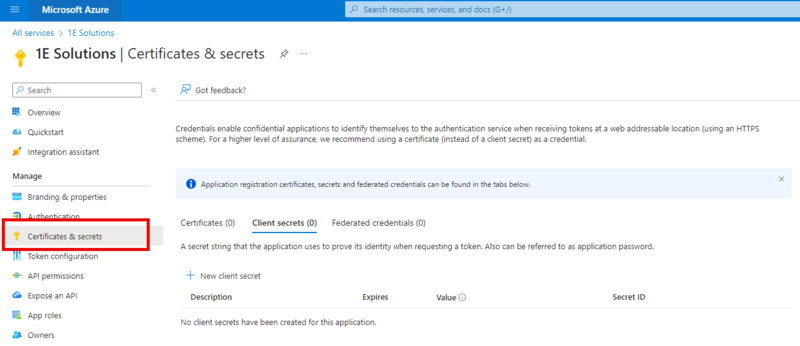
Add a client secret to the application by clicking on Certificates & secrets.
-
Click on New client secret.

-
Add the Secret and copy the value of the newly created Secret.
-
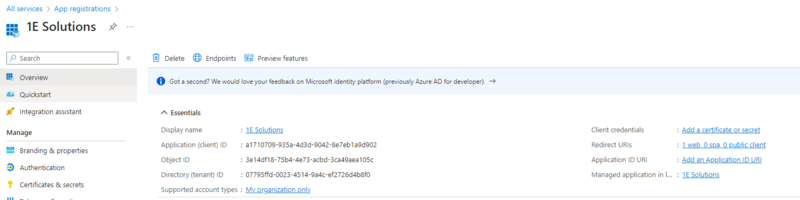
Share the following information with us for tenant registration:
-
Name.
-
Directory (tenant) ID.
-
Application (client) ID.
-
Client Secret value.
-
Admin Email: Email of the user who is going to be the admin for Solutions and also is a Platform admin. We recommend using a service account instead of an individual email address. This approach ensures that administrative access remains uninterrupted, even in the event of internal personnel changes.
Only users with the email domain(s) provided can be added as Admin users in Solutions. For Multitenant SaaS, the DEX SOL team can configure additional domains upon request. We recommend that customers share all relevant email domains for users who may require admin access to avoid delays during setup.
-
Using an existing app
-
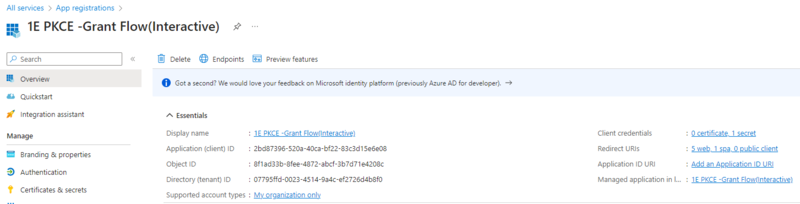
Select an existing registered application.
-
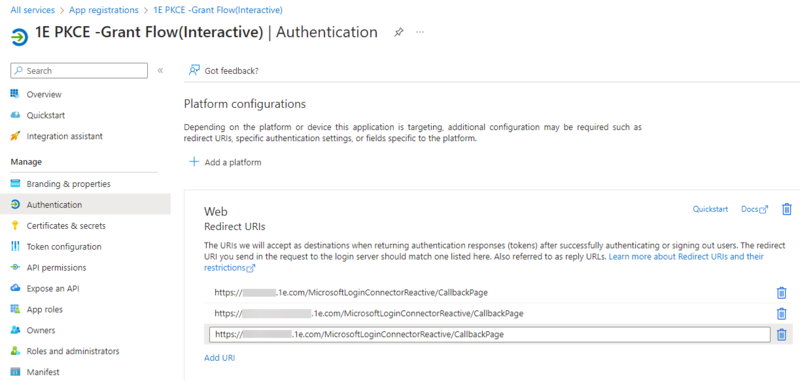
Click on Redirect URIs and add the solutions url under Web Redirect URIs:
https://solutions.1e.com/MicrosoftLoginConnectorReactive/CallbackPage
-
Share the following information with us for tenant registration:
-
Name.
-
Directory (tenant) ID.
-
Application (client) ID.
-
Client Secret value.
-
Admin Email: Email of the user who is going to be the admin for Solutions and also is a 1E admin. We recommend using a service account instead of an individual email address. This approach ensures that administrative access remains uninterrupted, even in the event of internal personnel changes.
-
Identifying Email Domain: <email domain info. eg: @1edemolab.com>
Only users with the email domain(s) provided can be added as Admin users in Solutions. For Multitenant SaaS, the DEX SOL team can configure additional domains upon request. We recommend that customers share all relevant email domains for users who may require admin access to avoid delays during setup.
-
API permissions for sending emails from Solutions
Microsoft Graph API Application permission (Mail.Send) will enable your Solution to send notification emails to admins based on your configured metrics.
-
Navigate to the API permission of the registered App and click on Add a permission.
-
Select Microsoft Graph > Application permission and add Mail.Send.
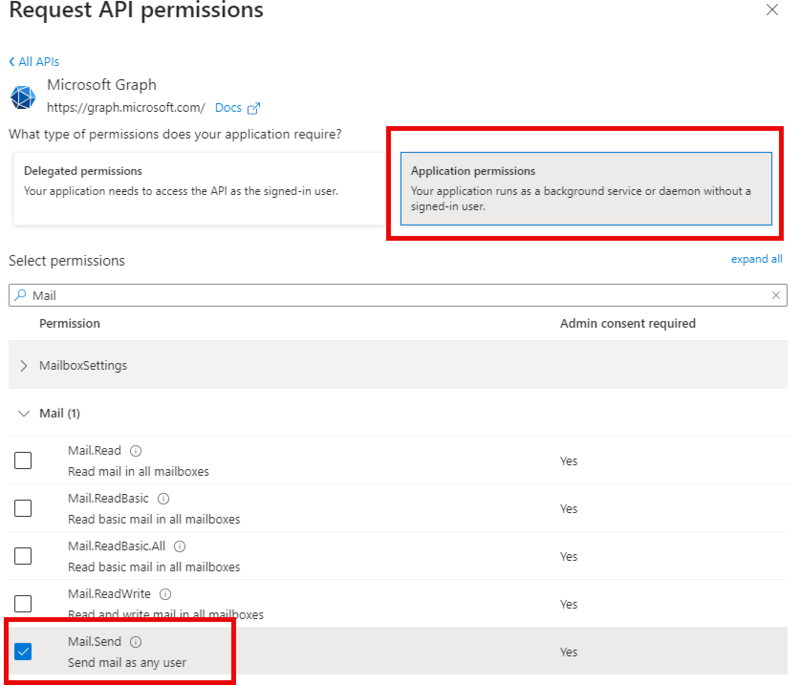
For details about Mail.Send refer to user: sendMail.
-
Click on Add permissions and Grant admin consent.

The Mail.Send API has permission to send emails from any mailbox. It is recommended you limit the application to send email from only one mailbox. Refer to Role Based Access Control for Applications in Exchange Online.
Non-interactive JSON Web Token (JWT) Authentication
You must have an integration AAD app before this part of your setup. Refer to Microsoft Entra ID Applications.
-
You can upload your own certificate to set up the non-interactive JWT authentication and get the KeyID (KID) of your certificate by running the following PowerShell cmdlet. The KID of this certificate must then be mapped to a user (principal).
CopyGet-1ECertificateThumbprint -StoreName LocalMachine\My | Format-List -
The Application (Client) Id of the 1E Integration AAD application must be registered with the Solution.

-
The Application (Client) Id should be added as a ClientAssertionId in Platform. You will need to contact your customer representative to complete this process.
Extracting Private Key of the Certificate
-
Export the certificate with its private key.
-
Use Powershell or OpenSSL to extract the encrypted private key. For this example we have used Open SSL to extract the key.
Copyopenssl pkcs12 -in file.pfx -out file.pem -nodes -clcerts -passout pass:12345
-
Keep the .pem file safe and extract the private key.
JWT Principal Mapping
Once the certificate is added, you will need to use the 1E Toolkit to add a mapping between users in the Platform and the certificate used for non-interactive login.
You can also automatically add and remove JWT mappings for your users in Configuration > Application User Management, refer to Application User Management.
-
Prepare the PowerShell toolkit by running:
Copyimport-module .\ps1etoolkit.psd1 -force -
Add-1EJWTPrincipalMapping passing in the KID for the cert as the Identifier and the user you want to map to as the Principal, for example:
CopyPS C:\Program Files\1E\PowerShellToolkit> Add-1EJWTPrincipalMapping
cmdlet Add-1EJwtPrincipalMapping at command pipeline position 1
Supply values for the following parameters:
Identifier: <KID of the certificate obtained>
Principal: <User principal name> Eg. firstname.lastname@test.com -
You can view existing associations by running:
Copyget-1EJWTPrincipalMapping
Solutions support Okta IdP for authentication purpose. For this to work, an application is required in Okta.
Setting up an application
Depending on your environment you can either create a new app or use an existing one to authenticate to Solutions.
For more information about creating and configuring the Azure AD applications required for Platform SaaS instances. Refer to Okta Applications.
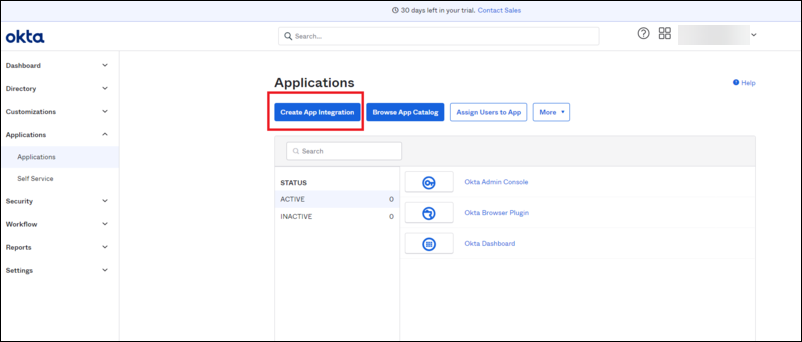
Follow the below given steps to setup an application in Okta for Solutions:
-
In the Okta admin portal navigate to Applications and select Create App Integration as shown.
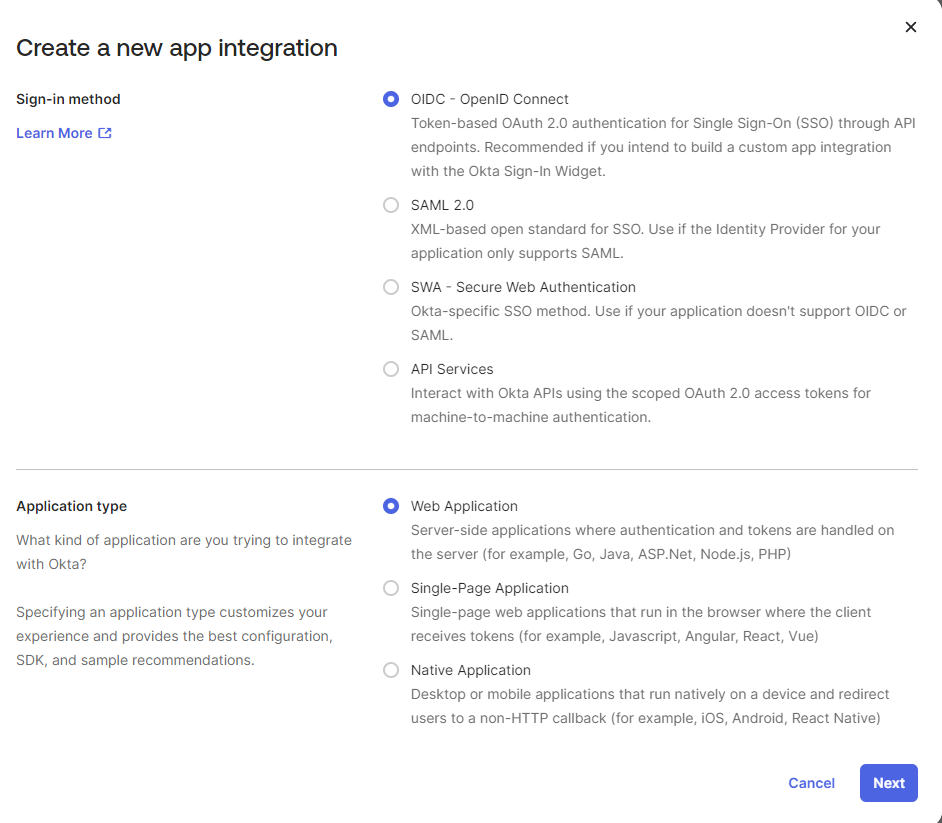
- On Create a new app integration page, select Sign-in method as OIDC-OpenID Connect and Application type as Web Application and click Next.
-
In the App integration name field provide the name for the application.
-
In the Grant type, check both the Authorization Code and Refresh Token checkboxes.
-
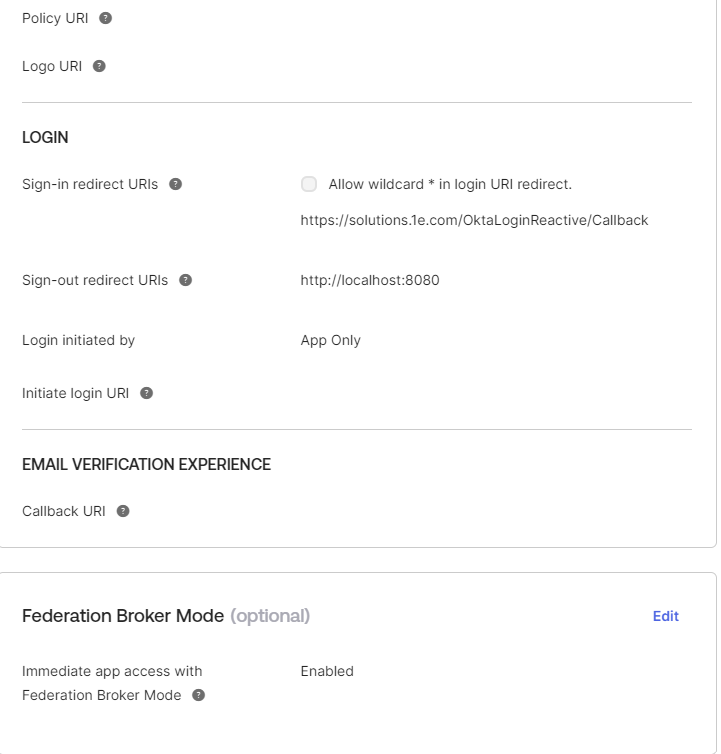
In Sign-in redirect URIs input the URL provided by 1E into the field.
-
https://solutions.1e.com/OktaLoginReactive/Callback for US East.
-
https://soleu1.cloud.1e.com/OktaLoginReactive/Callback for EU West.
-
-
In Assignments, select Allow everyone in your organization to access. Leave the Enable immediate access check box to its default state.
-
Click Save to save the application.
-
-
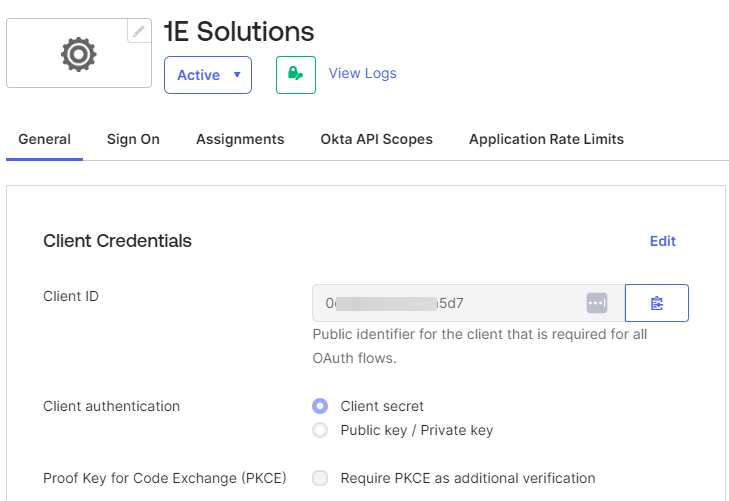
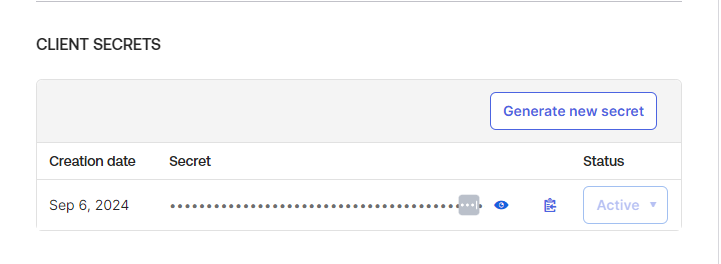
From the Client Credentials page Copy the Client ID and select Client authentication as Client secret.
-
Get the Client secret from the Client secret section.
-
The General Settings of the application should look like below:
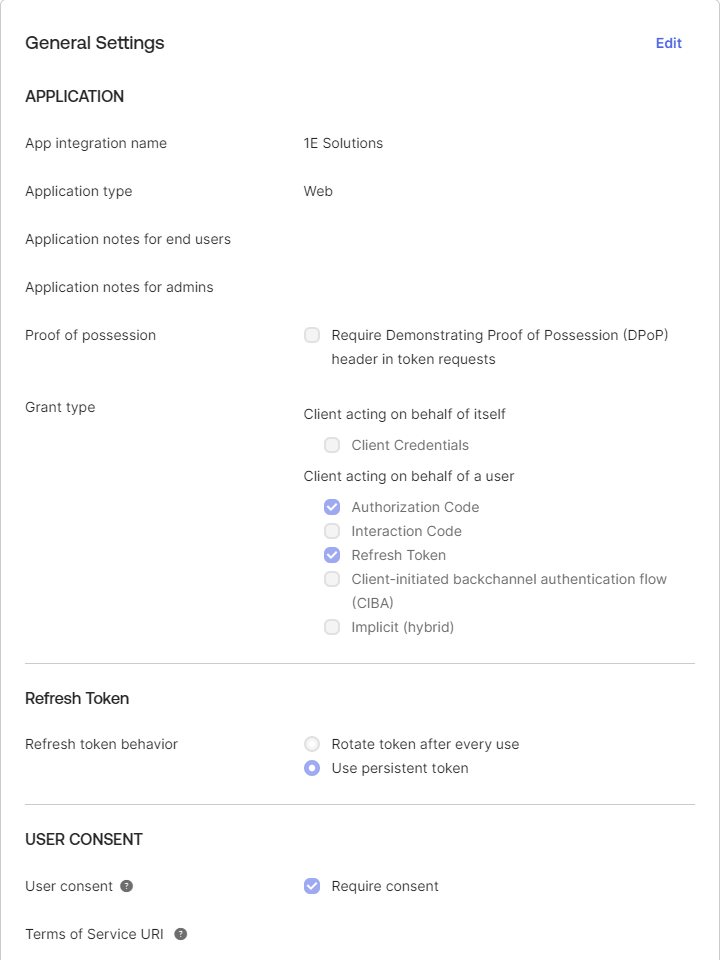
-
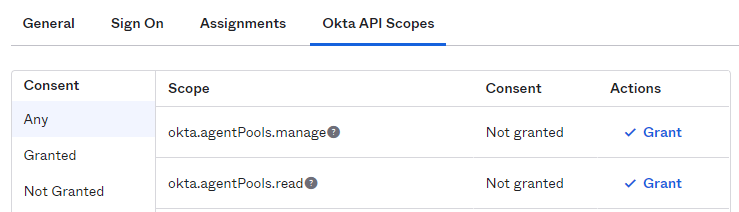
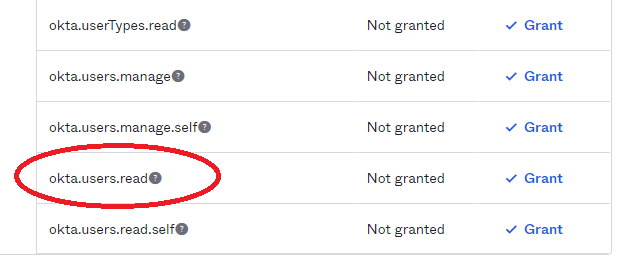
To assign permissions to the applications, click the Okta API Scopes tab and ensure that the okta.users.read scope is granted to the app.
-
The following information to be shared with us to configure support for Okta in Solutions:
-
Customer Name
-
Okta Url
-
Client ID of the application
-
Client secret of the application
-
Admin email
-
Okta support for non-interactive auth
For non-interactive authentication, create an application for integration as mentioned in Okta integrations. Refer to Okta Applications.