Installing 1E Content Distribution Tools
A step-by-step guide to installing Nomad Branch Tools which contains the Configuration Manager console extensions and OSD tools.
Before you start
Nomad Branch Tools is available as NomadBranchTools.msi in the 1econtentdistributiontools.vx.x.x.zip. You can download it from the TeamViewer DEX Support portal.
The NomadBranchTools.msi installer contains:
-
Nomad OSD tools
-
Nomad Configuration Manager console extensions
Nomad Branch Tools uses 64-bit architecture, and can only be installed on 64-bit operating systems. Previous versions of the Configuration Manager console extensions (NomadBranchAdminUIExt) supported 32-bit operating systems. However, this is no longer supported from Nomad 8.0.
Nomad OSD tools
The tools required for integrating 1E Content Distribution with Nomad OSD task sequences in Configuration Manager.
Each Nomad tool executable has a corresponding .pdb file.
|
Nomad tool |
Description |
|---|---|
|
NBCacheActions.exe |
Performs specific functions on the Nomad cache. |
|
NomadBranch.exe |
The Nomad service. |
|
NomadPackageLocator.exe |
Locates content in local Nomad caches. |
|
SMSNomad.exe |
The Nomad executable. |
|
SMSTSNomad.exe |
Nomad executable used in task sequences. |
|
SnoItfPS.dll |
The Nomad Enterprise COM/DCOM interface. |
|
TSEnv2.exe |
Sets environment variables in task sequences. |
Nomad Configuration Manager console extensions
The Nomad Configuration Manager console extensions provide the following capabilities in the Configuration Manager Console:
|
Configuration Manager capability |
Description |
|---|---|
|
Configure Nomad settings |
In software deployment and client settings policies associated with packages, applications and software updates. Refer to Distributing software with Content Distribution and Configuration Manager. |
|
Buttons to pause and resume Nomad downloads, monitoring report to view paused content. |
|
|
Menu item to start the Pre-cache Wizard, monitoring report to view pre-cached content. |
|
|
Menu items to create and edit baseline configuration items. |
Install permissions
All users require the following to install and use the Nomad Configuration Manager console extensions component of the Nomad Branch Tools:
-
Local administrator rights on the computer to install the console extensions.
-
The Configuration Manager Console, installed on the computer to install and use the console extensions.
-
A Configuration Manager user with Full Administrator rights to be able to use the Download Pause feature.
-
1E installed and working, you must know and enter the full URL for the 1E website in the installer.
Nomad Download Pause
Before installing or upgrading Nomad Branch Tools, you should consider that the feature requires:
-
1E Platform
-
Uploaded 1E instructions
-
Permissions allowing Configuration Manager (CM) administrators to execute the uploaded instructions
These steps should be completed by a user that has the Full Administrator role in 1E, refer to Setting up the Content Distribution app for details about setup, Nomad Administrator role and the 1E Nomad product pack.
Upgrading
If you are upgrading 1E Content Distribution or 1E Platform and you have previously installed Nomad Download Pause then you can continue using your existing setup, you do not need to do anything further, and you can ignore the information and steps below.
However, you are recommended to rename the old instruction set from Nomad Core Instructions to 1E Nomad to match the name used in the steps below for new installations. The renamed set will retain the permissions you previously configured.
The installation steps below use the Settings app to create the 1E Nomad instruction set and upload instructions for a new installation. However, if you instead use the 1E Product Pack Deployment Tool to upload the 1E Nomad product pack, the tool will create an instruction set called 1E Nomad and place new instructions there. If the instruction set Nomad Core Instructions has not been renamed, any existing instructions in it will remain or be updated if they are new versions. You may end up with two instruction sets. You can keep both sets, or you can do the following, which will retain the permissions you previously configured:
-
Move the new instructions from 1E Nomad to Nomad Core Instructions.
-
Delete the now empty instruction set 1E Nomad.
-
Rename the old instruction set from Nomad Core Instructions to 1E Nomad.
The 1E-Nomad product pack is available from 1E Exchange, and includes new versions of the same instructions.
A list of these instructions is provided in 1E-Nomad product pack, which include the two instructions required by Nomad Download Pause.
Installing Nomad Branch Tools
In previous versions of Nomad, you installed Nomad Configuration Manager console extensions and Nomad OSD tools with two separate installers, now these are included in one installer, NomadBranchTools.msi. When you run the NomadBranchTools.msi installer it will upgrade any currently installed tools by removing older versions of Nomad Configuration Manager console extensions (NomadBranchAdminUIExt) and Nomad OSD tools (Nomad Branch Tools), and installing the newer versions.
Before running the installation, you should check that you have:
-
Elevated Administrative privileges on the server where you're running the installation.
-
The Configuration Manager Console installed on the server where you want to use the Nomad Configuration Manager console extensions.
-
The Site server or SMS Provider configured on the server, so you can install and use the Operating System Deployment support (OSD Tools).
If you want to use both tools on the same server, you will need to have configured both Configuration Manager Console and Site Server/SMS Provider on that server. The installer will deploy either, or both the OSD Tools or Nomad Configuration Manager console extension depending on the above conditions.
Installing interactively
Install Nomad Branch Tools on the same device as the Configuration Manager Console, you can do this by running NomadBranchTools.msi from an elevated command prompt.
The Configuration Manager Console must not be running when you run NomadBranchTools.msi.
To install:
-
Download the 1econtentdistributiontools.vx.x.x.zip from the Support Portal.
-
Extract NomadBranchTools.msi from the downloaded ZIP file.
Start a Command Prompt with elevated rights, navigate to the location where you extracted NomadBranchTools.msi and run it with the following command-line:
> msiexec /i NomadBranchTools.msi /l*v NomadBranchInstall.log REBOOT=REALLYSUPPRESSThe following describes each of the screens in the installation wizard:
-
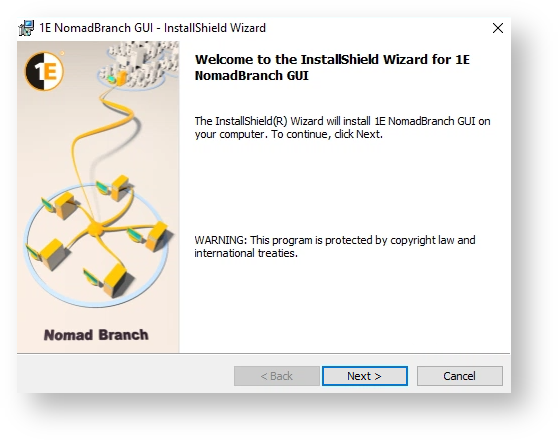
On the welcome screen, click Next.
-
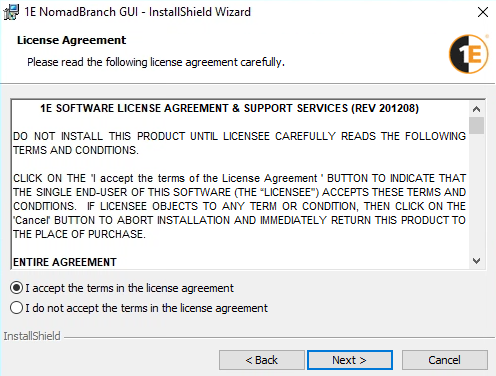
You must read and then accept this license information by clicking the I accept the terms in the license agreement option before you can continue with the installation. Once this is done click Next.
-
Before installing this feature, please refer to Download Pause, for steps on configuring the prerequisites.
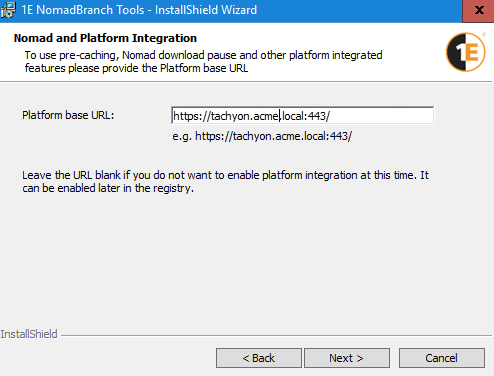
There is support for providing alternate credentials to authenticate with the 1E Platform. If your 1E Platform instance resides in another domain or the cloud, you will be prompted to enter alternate credentials for that location, which get stored in the credential store for any future requests.
Click Next to continue.
-
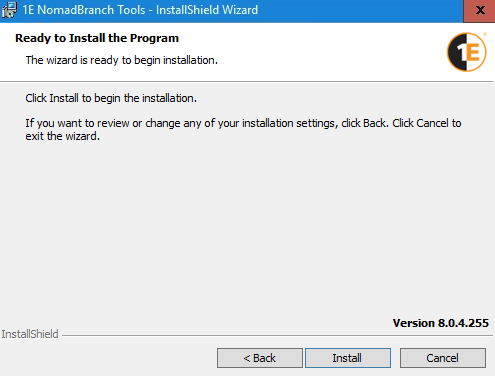
Click Install to start the installation process
-
This screen shows the current progress of the installation. If a User Account Control dialog pops-up, click Yes to continue.
-
If the installation has succeeded, the InstallShield Wizard Completed will be displayed.
Here, you can check the Show the Windows Installer log checkbox to view the installer log. Click Finish to close the installer wizard.

Installing from the command line
To install from the command line:
-
Download the 1econtentdistributiontools.vx.x.x.zip from the Support Portal.
-
Extract NomadBranchTools.msi from the zip.
-
Start a Command Prompt with elevated rights, navigate to the location where you extracted NomadBranchTools.msi and run it with a command-line similar to the following. Where <TCNserver> must be set to the DNS alias FQDN for your 1E Platform. This command-line will also enable the 1E integration to support the Nomad Download Pause feature.
Copy> msiexec /i NomadBranchTools.msi /qn PLATFORMURL=https://<TCNserver> REBOOT=REALLYSUPPRESS /l*v install.log
Verifying installation
Nomad Configuration Manager console extensions
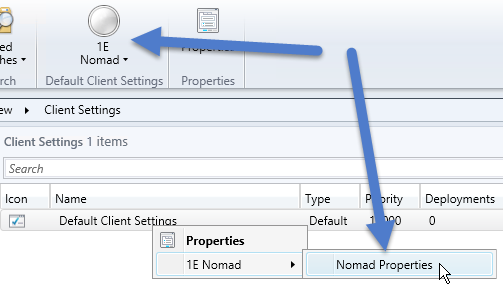
To confirm the extensions have been successfully installed follow these steps. Start the Configuration Manager console, check Nomad extensions have been added for Default Client Settings and Package Properties.
Default Client Settings
-
Open the Administration workspace and select the Client Settings node.
-
The ribbon has a 1E Nomad button. Click it and choose Nomad Properties (as shown in the image) or, right-click the Default Client Settings and choose 1E Nomad > Nomad Properties.
-
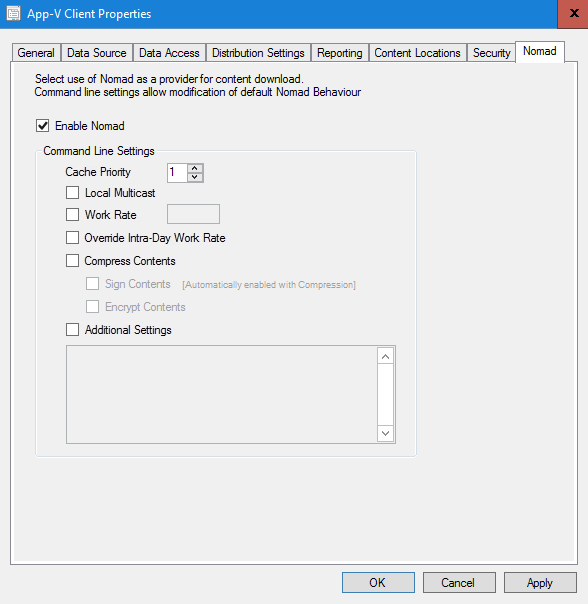
The Nomad Settings dialog allows you to configure settings for Application Management and Software Updates. Click Cancel to close the dialog without making any changes.

For details about the available options for setting Nomad as a download provider for applications and software updates in Configuration Manager, refer to Distributing software with Content Distribution and Configuration Manager and Enabling Content Distribution for Applications and Software Updates.
Package Properties
-
Open the Software Library workspace and select the Packages node under the Application Management node.
-
Right-click a package and from the context menu, choose Properties.
-
A Nomad tab has been added to the Package Properties dialog box. Click Cancel to close the dialog without making any changes.
For more details about the available options for setting Nomad as a content provider for Configuration Manager Packages, refer to Nomad tab.
Nomad tools for Operating System Deployment OSD
If you upgrade Configuration Manager after installing the Nomad OSD tools, you will need to reinstall them as the Configuration Manager upgrade overwrites the osdinjection.xml and TaskSequenceProvider.mof files that are updated by Nomad OSD tools.
To verify that the tools have been successfully installed:
-
Open the Configuration Manager console.
-
Navigate to Software Library > Operating Systems > Task Sequences.
-
Choose an existing Task Sequence or create a temporary one. Right-click on an existing Task Sequence and click Edit.
-
In the Task Sequence Editor, click Add – note the new Nomad tasks that can be added to a task sequence.
-
Click Cancel to close the Task Sequence editor without saving any changes.
-
Browse to C:\Program Files\Microsoft Configuration Manager\OSD\bin\i386 and \x64 folders.
To list the files together, you can sort by Date modified. Or you can add sort columns for Company or Product name.
-
Open C:\Program Files\Microsoft Configuration Manager\bin\x64\osdinjection.xml in Notepad.
This manifest defines the files that are to be added into the Windows PE boot image when it is updated on a distribution point. The additional tools are added to this manifest, ensuring that they are included in all boot images that are updated on a distribution point from this point on.
Updating boot images
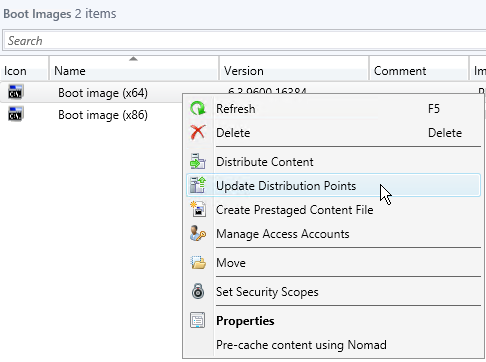
After installing the tools into your Configuration Manager environment, you must update any existing boot images that have been distributed to a Distribution Point or Distribution Point Group so that the tools will be included in those images.
-
In the Configuration Manager Console, navigate to the Software Library > Operating Systems > Boot Images.
-
Select an existing boot image.
-
Right-click the boot image and from the context menu, choose Update Distribution Points.
-
On the Update Distribution Points Wizard, click Next.
-
Verify that the wizard completed successfully and click Close. The selected boot image will now contain the latest Nomad Tools for OSD.
-
Repeat this process for any other boot images that are used.
Uninstalling Nomad Branch Tools
To uninstall Nomad Branch Tools:
-
Start a Command Prompt with elevated rights, navigate to the location where you extracted the NomadBranchTools.msi and run it with the following command-line:
Copy> msiexec /x NomadBranchTools.msi /l*v NomadBranchToolsUninstall.log REBOOT=REALLYSUPPRESS
-
On the Welcome screen, click Next.
-
Click Finish when the uninstallation is done.