Executing instructions in Native UI
The 1E ITSM Connect app allows an Information Technology Infrastructure Library (ITIL) user in ServiceNow to investigate and remediate any issues faced by a user on their machine. This can be achieved by triggering the appropriate 1E instructions from the ITSM module in ServiceNow. This means, that an ITIL user can resolve issues without needing to visit their desktop or with minimal interaction with the affected user.
In order to investigate an incident, and run 1E instructions, the ITIL user needs to go to the incident form. To do this:
-
Open the incident you are working on by navigating to 1E ITSM Connect→Incidents in the application navigator. This displays the Incidents list on the right, as shown in the picture below.

-
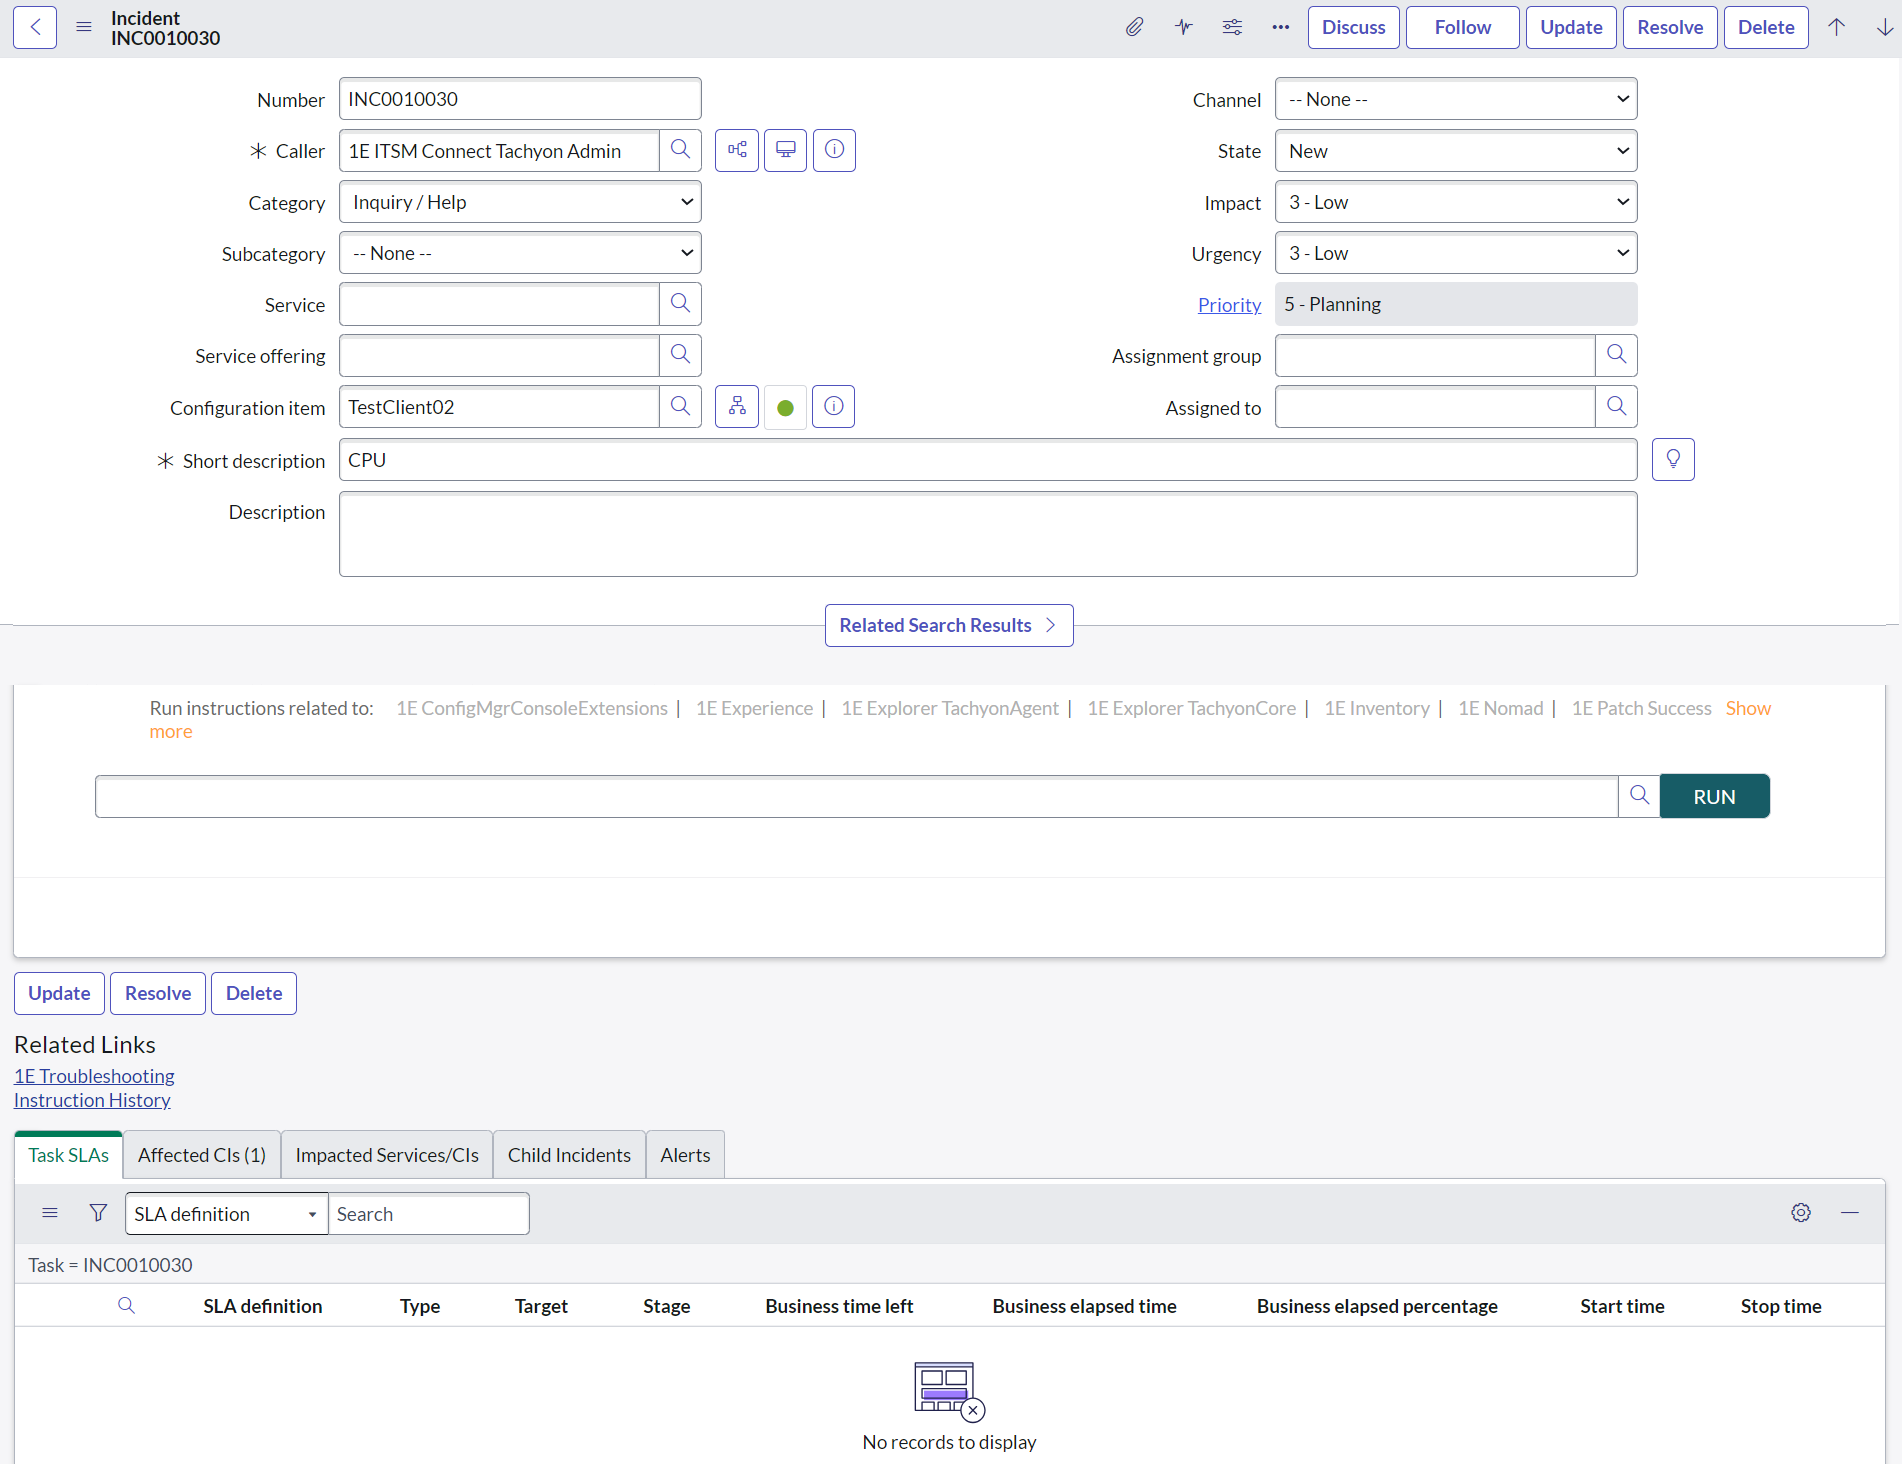
When you open the target incident, investigation and remediation actions can be accessed from the 1E ITSM Connect tab on the incident form, as shown in the picture below. Ensure that the configuration item field contains the end-user's device name to execute the 1E instruction on it.
-
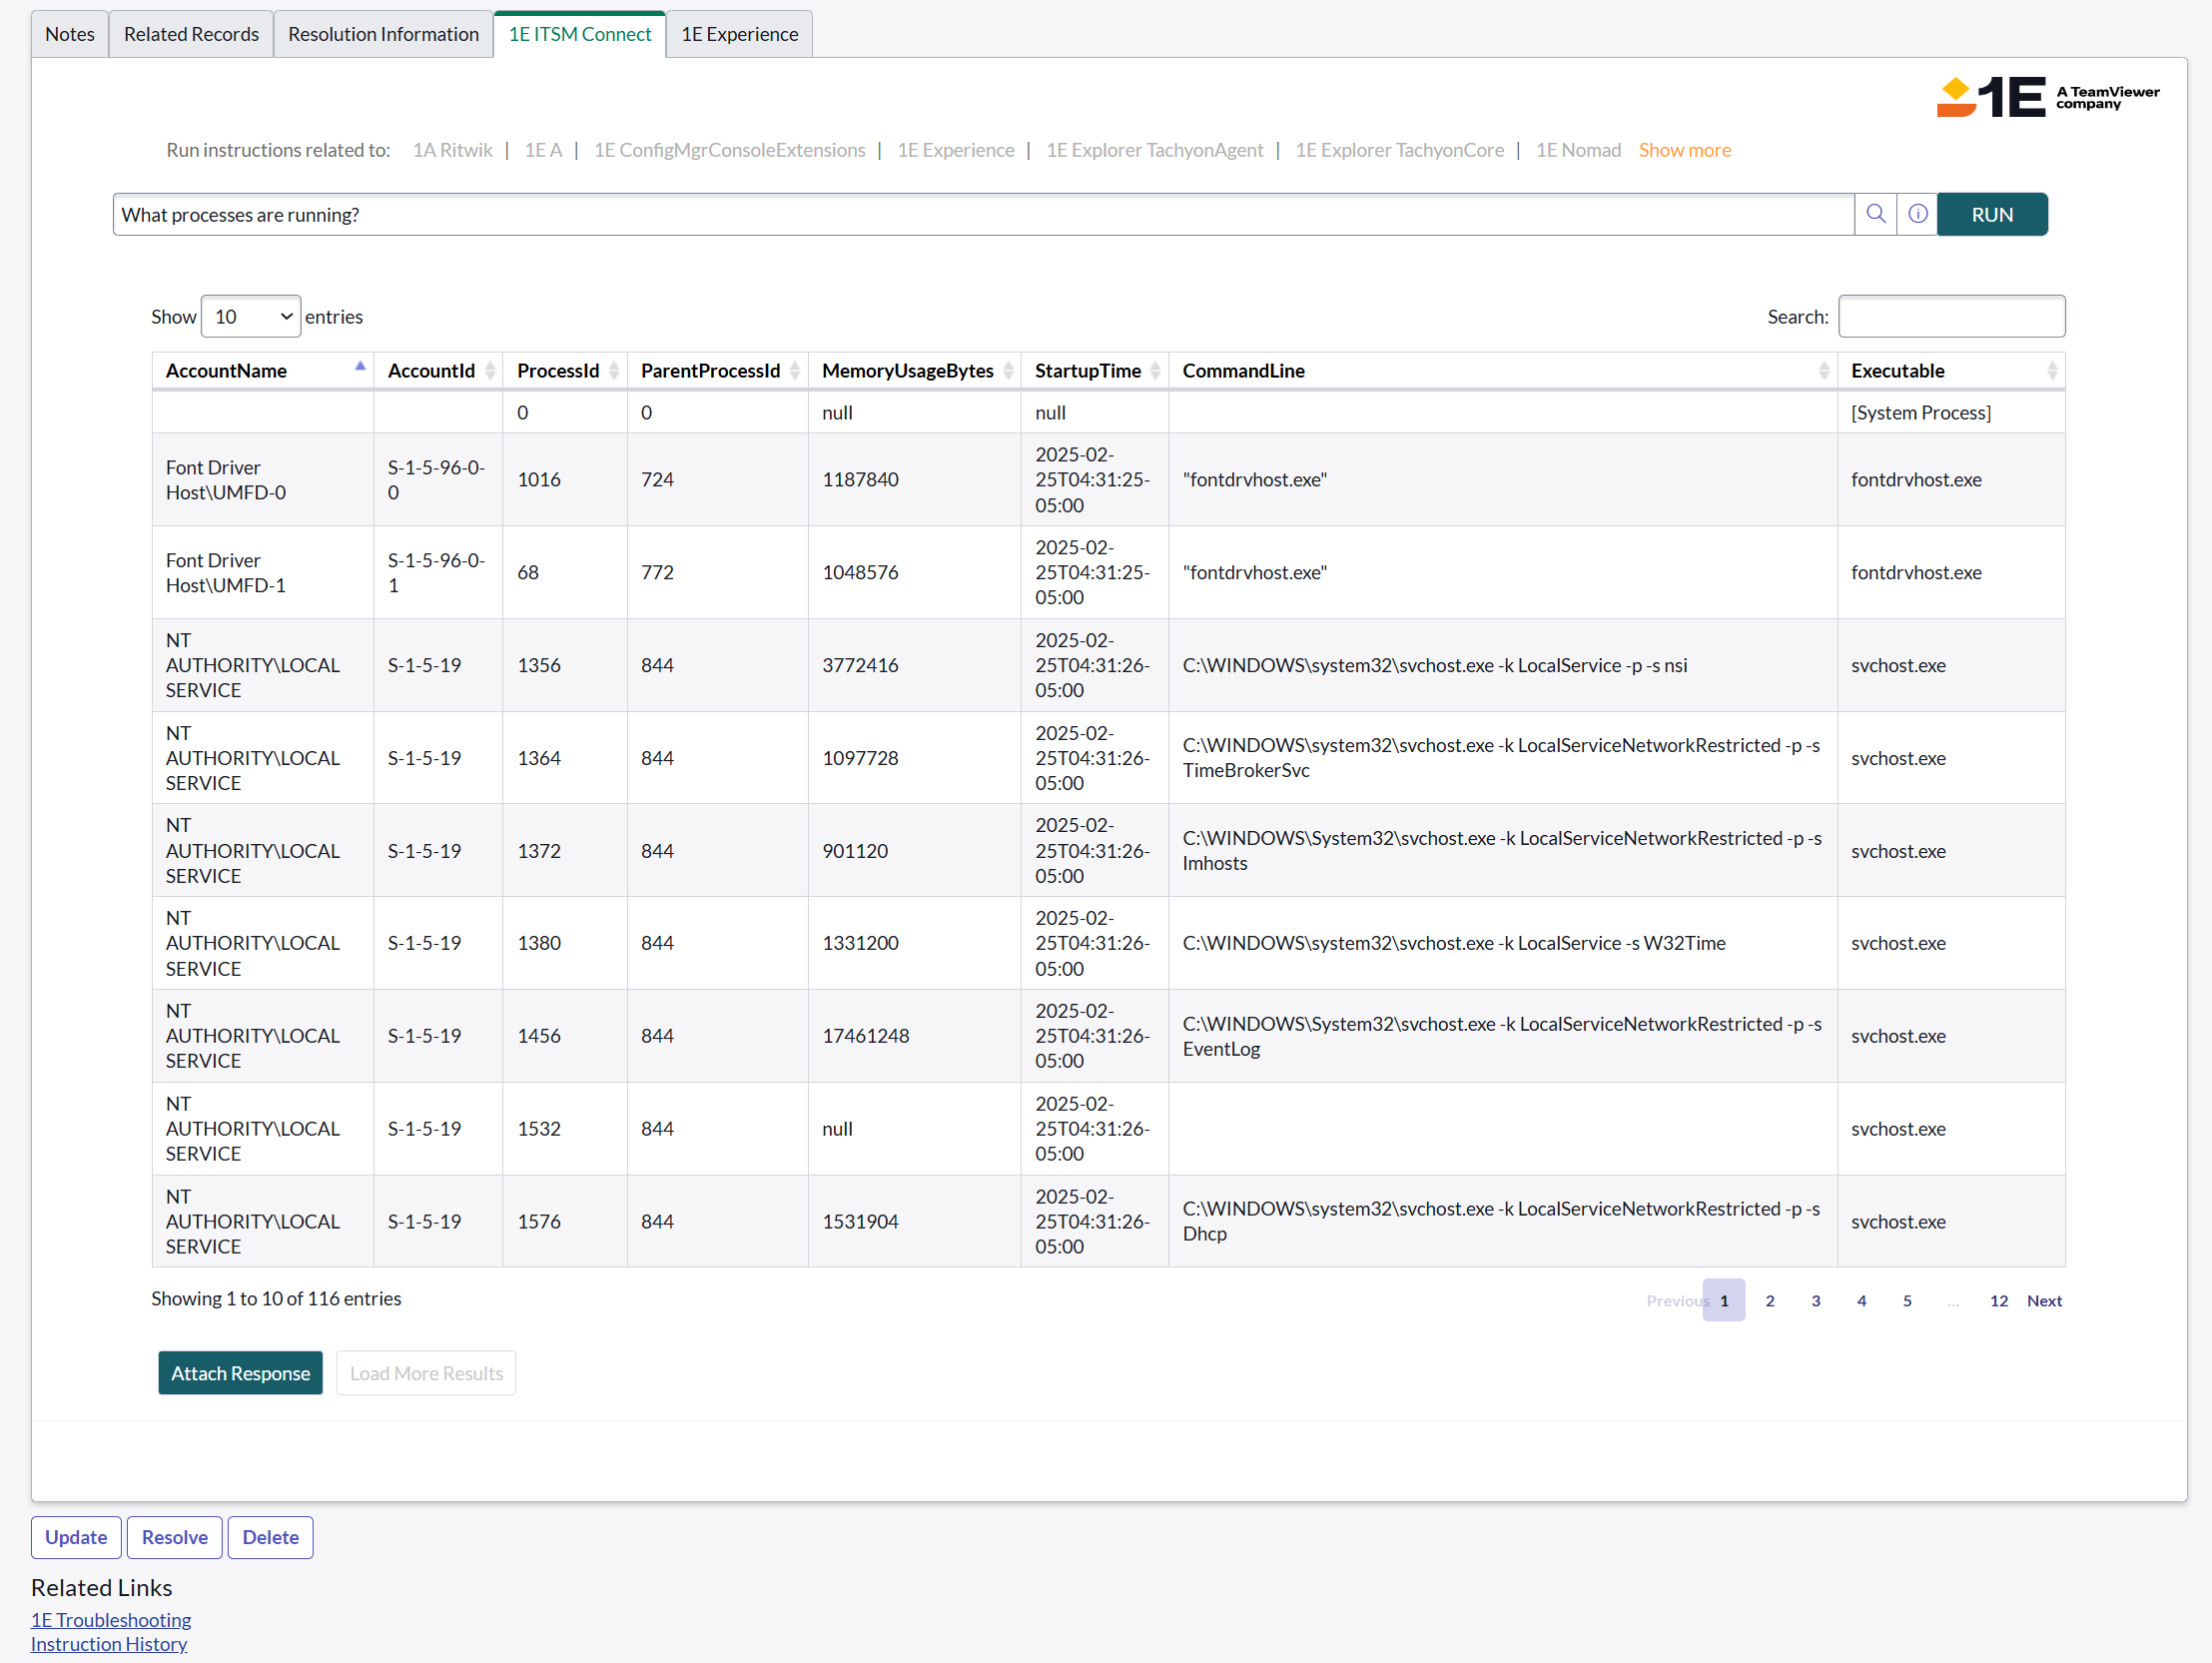
1E instructions are accessed by an imitation of the 1E Troubleshooting home page provided on the 1E ITSM Connect tab.
-
Any instruction you want to run can be selected in one of two ways, either by clicking an Instruction set link (located immediately above the Instructions field) and selecting the instruction from the popup window, or by using the typeahead search in the Instructions field box. You can also select an instruction from the available list by clicking the lens icon next to the typeahead search.
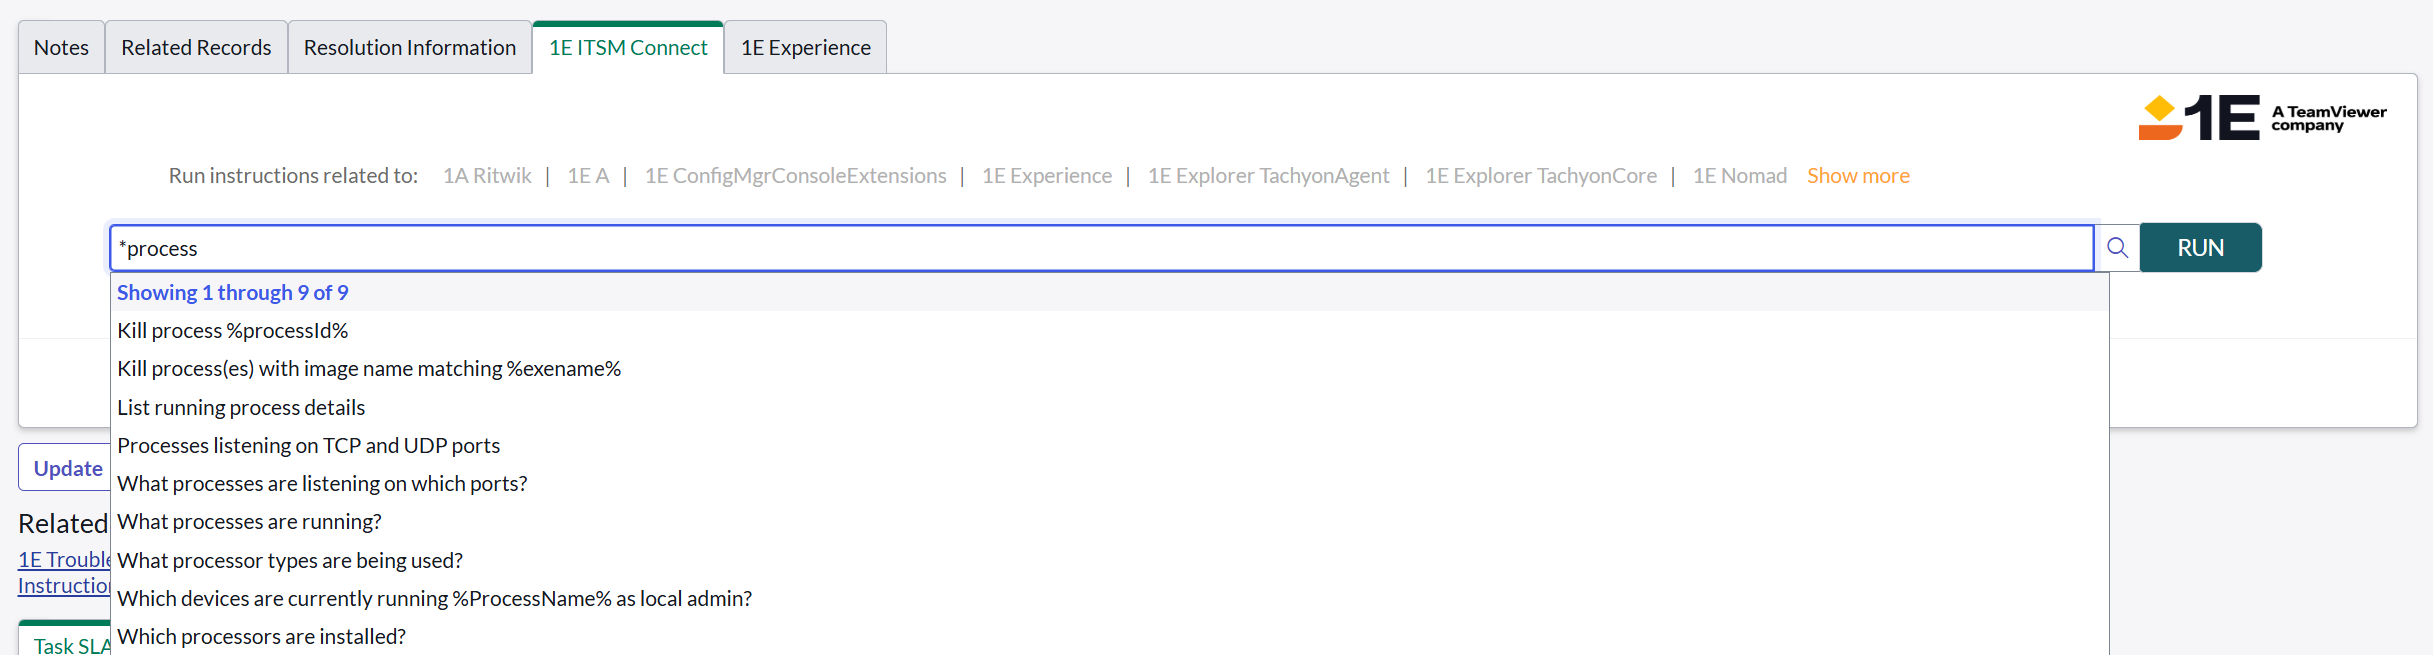
Type-ahead search is useful if you know any word or portion of the instruction title. For example, you can search for instructions that contain the text process, as shown in the picture below.
-
When you start to type the text, a popup will appear showing any matches for the text you've typed. In our example, three questions are shown to match the process text. Select the instruction you want to use from the list.
-
When you select the instruction you want to run, the below message shows the Instruction Description and Average execution time.
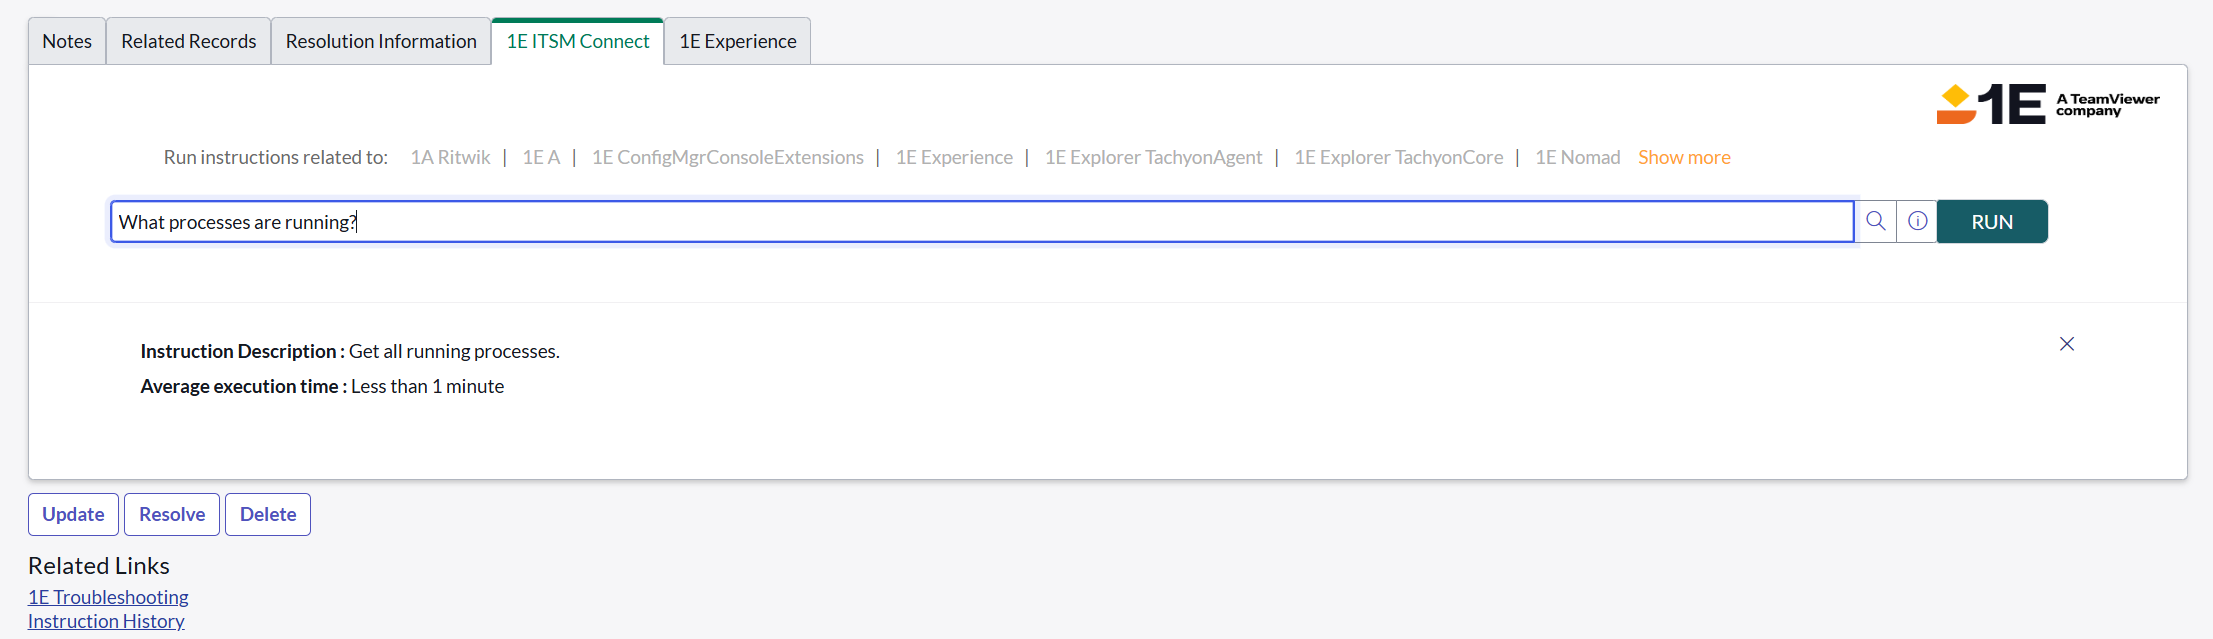
The detailed Instruction Description and Average execution time is available for users on 1E ITSM Connect 5.1.0 and later versions.
There are two types of instructions: questions and actions. Typically, questions don't require approval and actions do require approval, which is the case for all the 1E Product Packs. You can download these 1E Product Packs from the 1E Exchange portal. If you are developing your own instructions in 1E, we recommend that you stick to the same convention. The general procedure for running questions and actions therefore is different:
Running a question
To execute the selected instruction, click RUN.
The responses for a question can be seen almost instantly after you click RUN.
A retry message is displayed when the response takes longer than expected as shown below. Here is an example to show how the retry message will look like. Refer to Managing instruction retry message.

After the instruction is executed successfully, the responses are displayed as shown below.
You can also click Click here to see the responses, if the instruction has taken a little longer to execute. This link redirects you to the instruction history record instead of the list view like above.
There are two buttons given at the bottom of the responses. These are Attach Response and Load More Results.
Running an action
Actions requiring approval will not be executed immediately upon clicking the Run button. Instead, a notification will appear indicating that the instruction is in the approval workflow and it will only be executed once an approval is granted.
Approving an instruction
Any ServiceNow user with the x_1e_connect.Tachyon_Approver role can approve instructions that are pending approval. To do this, the approver needs to navigate to the 1E ITSM Connect→1E Approvals page. This page displays a list of all the approval requests along with their current status. See the Enabling or disabling approval for a 1E Instruction guide to learn how to set an approval workflow for any instruction.
To process an approval request, the approver clicks on the link in the State column to display the Approval page for that instruction, as shown below. There are a number of options that let the approver Update, Approve, Reject or Delete the approval request.
The configuration item (CI) owner also has the authority to approve an approval record which can affect any CI they own even if they don't have the x_1e_connect.Tachyon_Approver role.

Once an action has been approved, it gets run by 1E. A user with the x_1e_connect.Tachyon_Admin or x_1e_connect.Tachyon_User roles can view the instruction responses by following the steps below:
-
Navigate to the Incidents page.
-
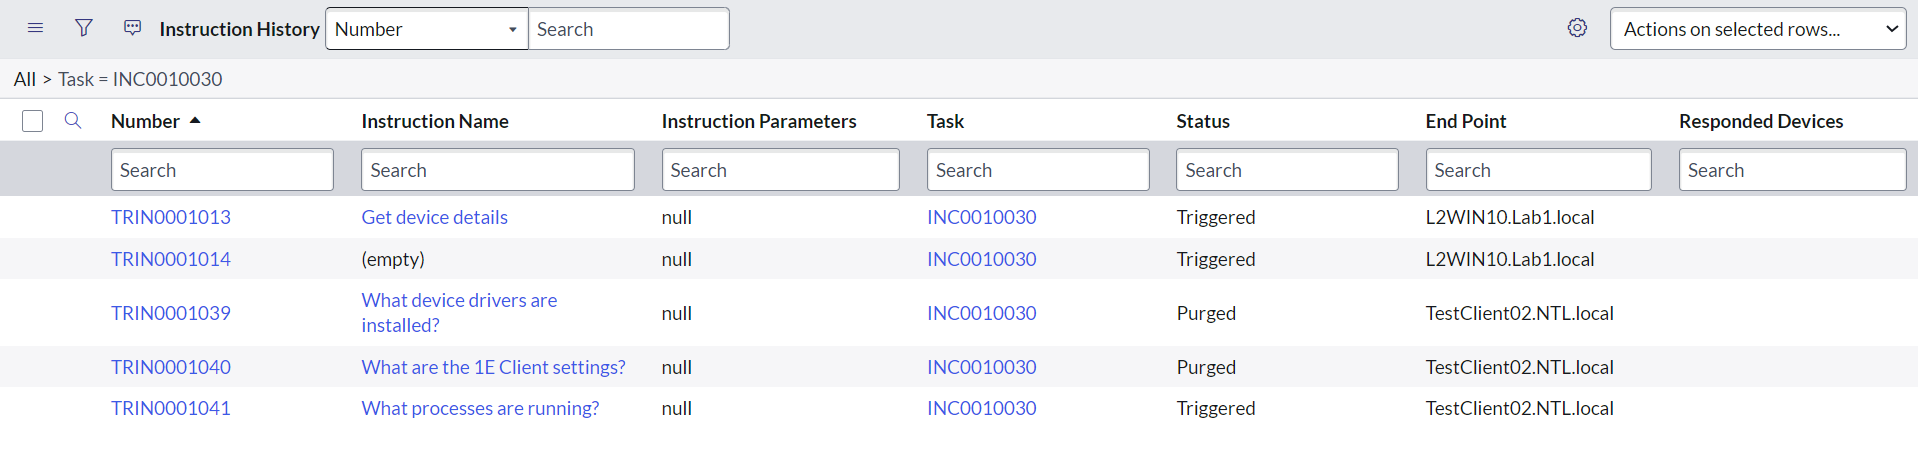
Click the Instruction History link under Related Links to open the history of all the instructions associated with the incident.
-
This opens the Instruction History page for the incident in a new tab of the browser. The picture below shows the Instruction History page for the INC0010030 incident.
-
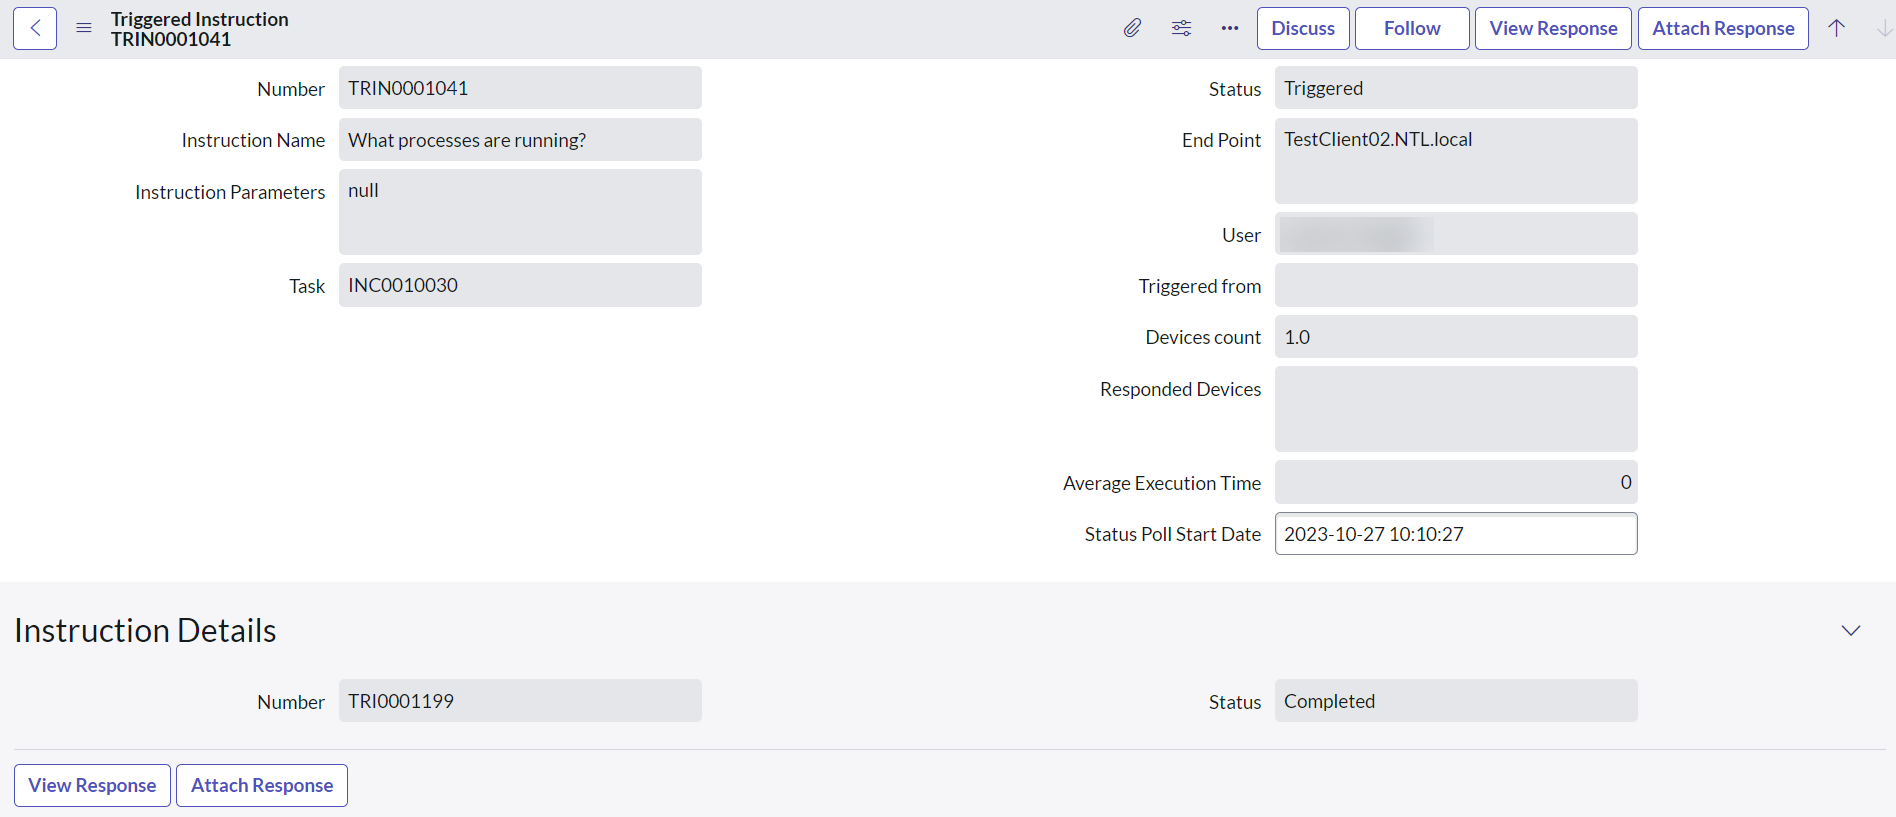
Click the instruction id link in the Number column for the instruction record, to open the details of the executed instruction. Then click View Response to check the responses. The picture shows the details for the instruction TRIN0001041.
Associating instruction responses with an incident
The responses to 1E instructions run by a user are saved in ServiceNow so that they can be viewed at any time. The responses can be viewed by going to the instruction history associated with an incident. However, 1E responses are not kept in ServiceNow permanently. They are purged after a configured duration of time. To avoid losing instruction responses data, you can associate the responses with the incident permanently using the Attach Response button that is displayed on the incident form after the 1E responses are displayed.
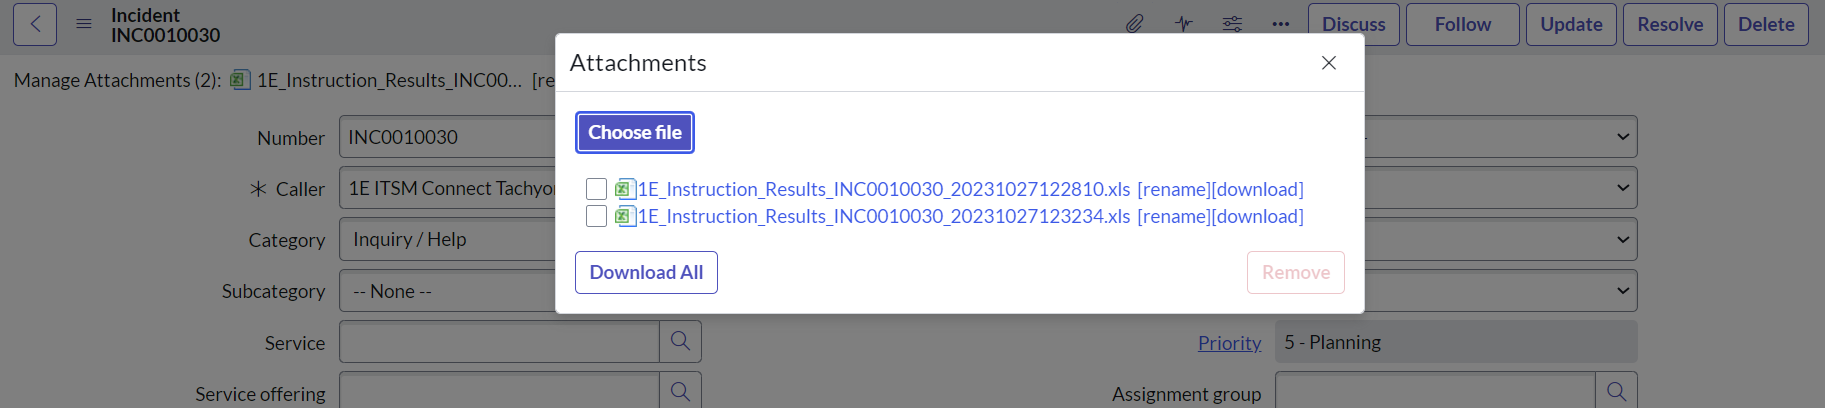
Clicking the Attach Response button exports the entire response data for the 1E instruction to an excel spreadsheet and then attaches it to the current incident as a file attachment. The attached spreadsheet contains details of the instruction that was run, its parameters and response details.
All the responses attached to the incident can then be viewed and downloaded for offline viewing from the Manage Attachments link from the incident toolbar.