Managing client groups
By supporting the construction and manipulation of location and organization client group hierarchies, NightWatchman Console lets you model your business appropriately. The groups can be used to enables the application of power policies to business units or locations, not just specific computers.
Refer to Using NightWatchman group hierarchies.
Using NightWatchman Console you can do the following:
Reporting
Location and organization groups can be used in the NightWatchman Agility Framework reports to enable power consumption statistics to be analyzed in terms of their effect on the business.
Refer to Reporting.
Adding groups
-
Select either the Location Groups or Organization Groups tab.
-
Select an existing node in the Groups tree for the new group to be under.
-
Right-click the node and from the context menu, choose Add Group...
-
Enter the name for the new group in the Add Group dialog and click OK.
-
The new group appears under the previously selected group node.
In this tutorial, we are going to:
-
Add the country Spain to the EMEA group.
-
Add a region for the newly created country.
-
Add a city for newly created region.
-
Add a building for the city.
To add Spain to the EMEA group:
-
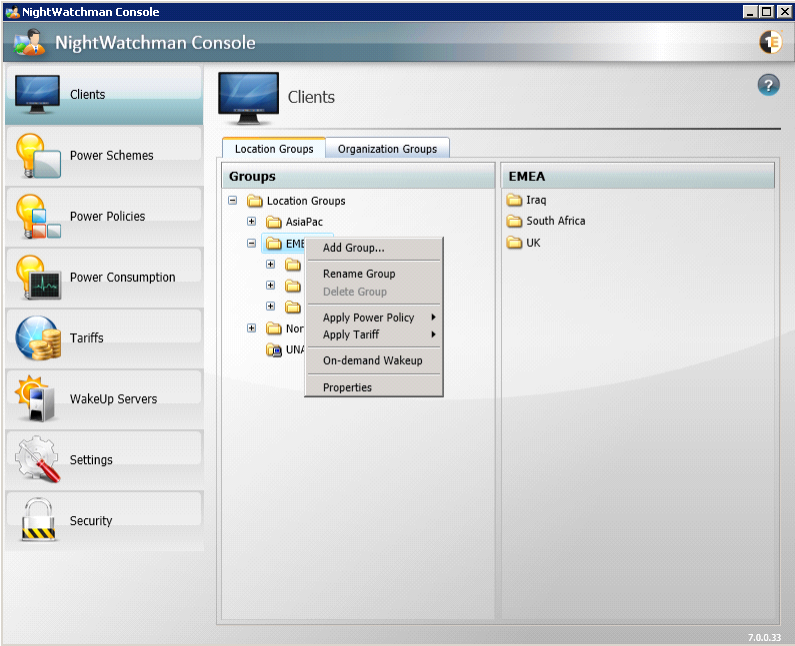
Select the EMEA node and right-click with the mouse to display the context menu.
-
From the context-menu, select Add Group...
-
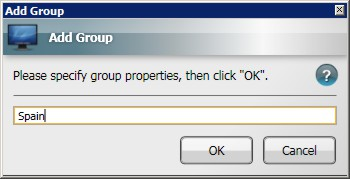
In the Add Group dialog, enter the name Spain.
-
Click OK.
To add the region Madrid to the newly created country group:
-
Select the Spain node and right-click with the mouse to display the context menu.
-
From the context-menu, select Add Group...
-
In the Add Group dialog, enter the name Madrid.
-
Click OK.
To add the city Madrid to the newly created region group:
-
Select the Madrid node and right-click with the mouse to display the context menu.
-
From the context-menu, select Add Group...
-
In the Add Group dialog, enter the name Madrid.
-
Click OK.
To add the building 35 Castellana to the newly created city group:
-
Select the Madrid node and right-click with the mouse to display the context menu.
-
From the context-menu, select Add Group...
-
In the Add Group dialog, enter 35 Castellana.
-
Click OK.
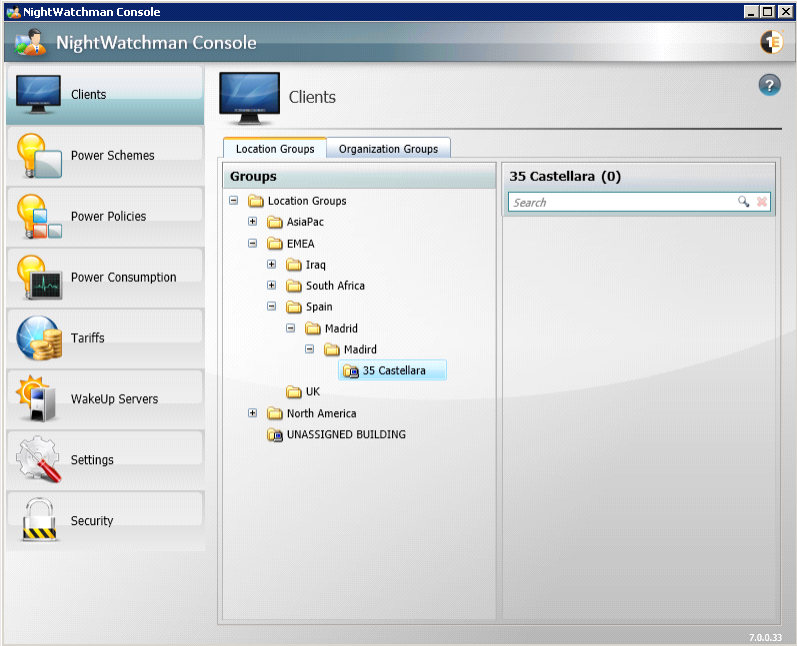
The completed tree is illustrated below.
Renaming groups
-
Select the group node to rename.
-
Right-click the group node and select the Rename Group option from the context menu.
-
The group name will turn into an edit field, type in the new name.
-
Click Enter to accept the change or ESC to cancel.
In this tutorial, we are going to rename the existing building node from 35 Castellana to 35 Paseo de la Castellana as the it was not entered correctly in our Adding groups example.
To rename the building node:
-
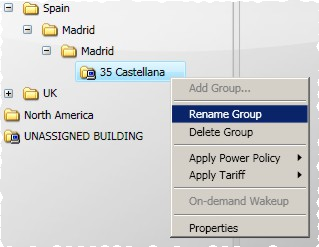
Select the 35 Castellana node and right-click with the mouse to display the context menu.
-
On the context menu, select Rename Group.
-
In the edit field, rename the node to 35 Paseo de la Castellana.
-
Press Enter to save your changes.
Deleting groups
-
Select the group node to delete.
-
Right-click the group node and on the context menu, choose Delete.
-
You are prompted to confirm your actions. Click Yes to confirm or No to cancel. If you previously ticked the Don't ask me again checkbox, you will not be prompted and the group is removed from the NightWatchman Console immediately.
As a precaution, NightWatchman Console prevents the deletion of groups that contain sub-groups.
When a building node gets deleted computers associated with it are reassigned to the UNASSIGNED BUILDING group. Similarly, when a department node gets deleted, computers associated with it are reassigned to the UNASSIGNED DEPARTMENT group.
When groups are deleted, their records persists in the the database but are marked as deleted (soft-delete) and is not displayed in the NightWatchman Console. Computers associated with that group are re-classified as UNASSIGNED. Reporting data for the deleted groups are not affected.
Companies change, new buildings are opened and others are shut down. NightWatchman Console provides complete control over your Location and Organization hierarchies with safeguards in place to prevent you from deleting groups that have sub-groups thus forcing you to delete the hierarchy from the bottom up.
Only empty nodes can be deleted, and even then, you get a prompt to confirm your actions.
In this tutorial, we are going to:
-
Delete 6 The Stubbings which has no child nodes but has computers associated with it.
-
Show you where to find the computers that were associated with it.
To delete 6 The Stubbings:
-
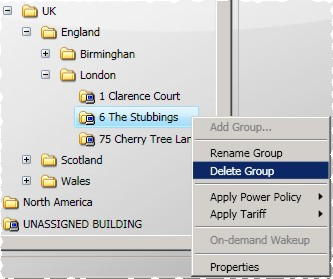
Select the 6 The Stubbings node and right-click with the mouse to display the context menu
-
On the context menu, select Delete Group.
-
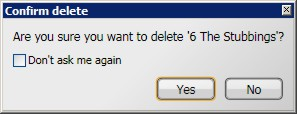
In the Confirm delete dialog, click Yes to delete the group or No to cancel. You can choose not to be prompted again for future deletions by checking the Do not ask me again checkbox.
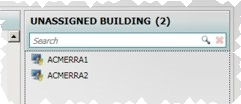
Computers associated with the recently deleted 6 The Stubbings group are reassigned to the UNASSIGNED BUILDING group.
When groups are deleted, their records persists in the the database but are marked as deleted (soft-delete) and is not displayed in the NightWatchman Console. Computers associated with that group are re-classified as UNASSIGNED. Reporting data for the deleted groups are not affected.
Assigning computers to departments and buildings
To assign or move computers to specific departments and buildings:
-
Computers cannot be moved between the Location and Organization group hierarchies. Select which hierarchy you want to modify by clicking either the Location Groups or Organization Groups tab.
-
In the Groups tree, navigate to the current location of the computers you want to assign. Unassigned computers reside in the UNASSIGNED BUILDING node for Location groups and UNASSIGNED DEPARTMENT for Organization groups.
-
Select the computers to move to a particular department or building.
-
Scroll the Groups tree view and expand nodes until the department or building node is visible.
-
Drag your selection into the new department or building node. You can only drag computers to a building or department group, i.e. one that is at the fifth tier of the organization or location hierarchies.
In this tutorial, we are going to:
Assign a computer from the UNASSIGNED BUILDING or UNASSIGNED DEPARTMENT groups to an existing location or building group.
To associate an unassigned computer with an existing group:
-
Select the unassigned group to display a list of unassigned computers.
-
Locate the group you want to assign computers to by scrolling down the list of groups on the left pane.
-
Select the computers to move from the right pane by:
-
If moving a single computer, just click to select.
-
If moving a contiguous selection, use <shift>-click.
-
If moving a non-contiguous selection, use <ctrl>-click.
-
-
Drag and drop the computers in the group on the left pane.
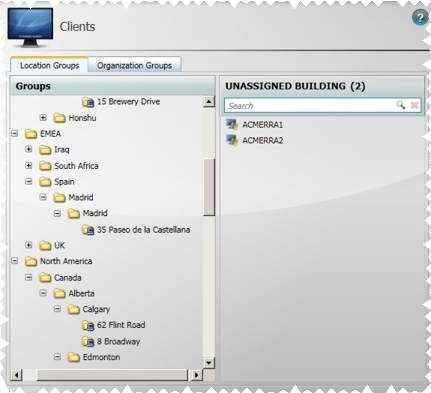
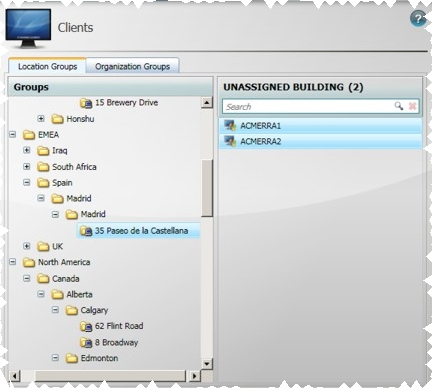
Selecting computers ACMERRA1 and ACMERRA2 from the UNASSIGNED BUILDING to associate with 35 Paseo de la Castellana is illustrated below.
Removing computers from departments and buildings
To remove computers from specific departments and buildings:
-
In the Groups tree view, navigate to the building or department you want to remove computers from.
-
Select the computers to remove.
-
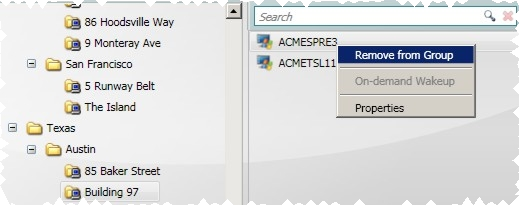
Right-click and from the context menu, choose Remove from Group.
-
The selected computers are disassociated from their current node and reassigned the UNASSIGNED BUILDING group or the UNASSIGNED DEPARTMENT group.
There are certain instances where you may want to move a computer to the UNASSIGNED GROUP without deleting the group that it is associated with.
In this tutorial, we are going to:
Remove the computer ACMESPRE3 from the Building 97
To remove ACMESPRE3 from Building 97:
-
In the Clients section, select Building 97.
-
Right-click ACMESPRE3 to display the context menu.
-
On the context menu, select Remove from Group.
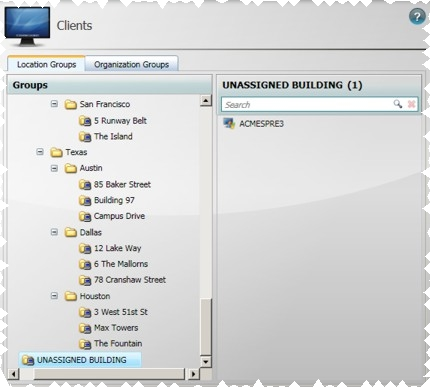
ACMESPRE3 is removed from Building 97 and re-assigned to UNASSIGNED BUILDING group.
