Users and Groups
The Users and Groups page lets you view and manage current 1E Platform users, from this page you can do the following.
-
Add new users and groups
-
Reactivate deactivated users and groups
-
Deactivate selected users and groups
-
Remove users and groups
-
View the details for particular users, groups and set their roles
How to define 1E Platform users and set their access rights
1E Platform users are added using 1E Client Assertion. The Client Assertion Application will be used to perform directory searches in 1E Platform. This will allow a 1E Platform Administrator to add users to the platform and give them assignments for roles and management groups. Refer to Okta Applications or Microsoft Entra ID Applications.
Once a user or group has been added to 1E Platform, you can then set any 1E roles to define what access they have to 1E features. The following sections outline the steps to create a user and assign their access rights, for more details refer to Configuring Access Rights tutorial.
Adding 1E Platform users
-
Log on to the 1E portal using a user account with the Full Administrator, or the Installer role if it is a new installation.
-
Navigate to the Settings > Permissions > Users and Groups page.
-
Click on Add , doing this displays the Add user popup.
-
In the Select user or group field, type the name, or part of the name, for the user or group that you want to add, then click the search icon.
-
Select the user or group from the list of matching names displayed in the drop-down list and click Add.

Adding 1E Platform roles to users or groups
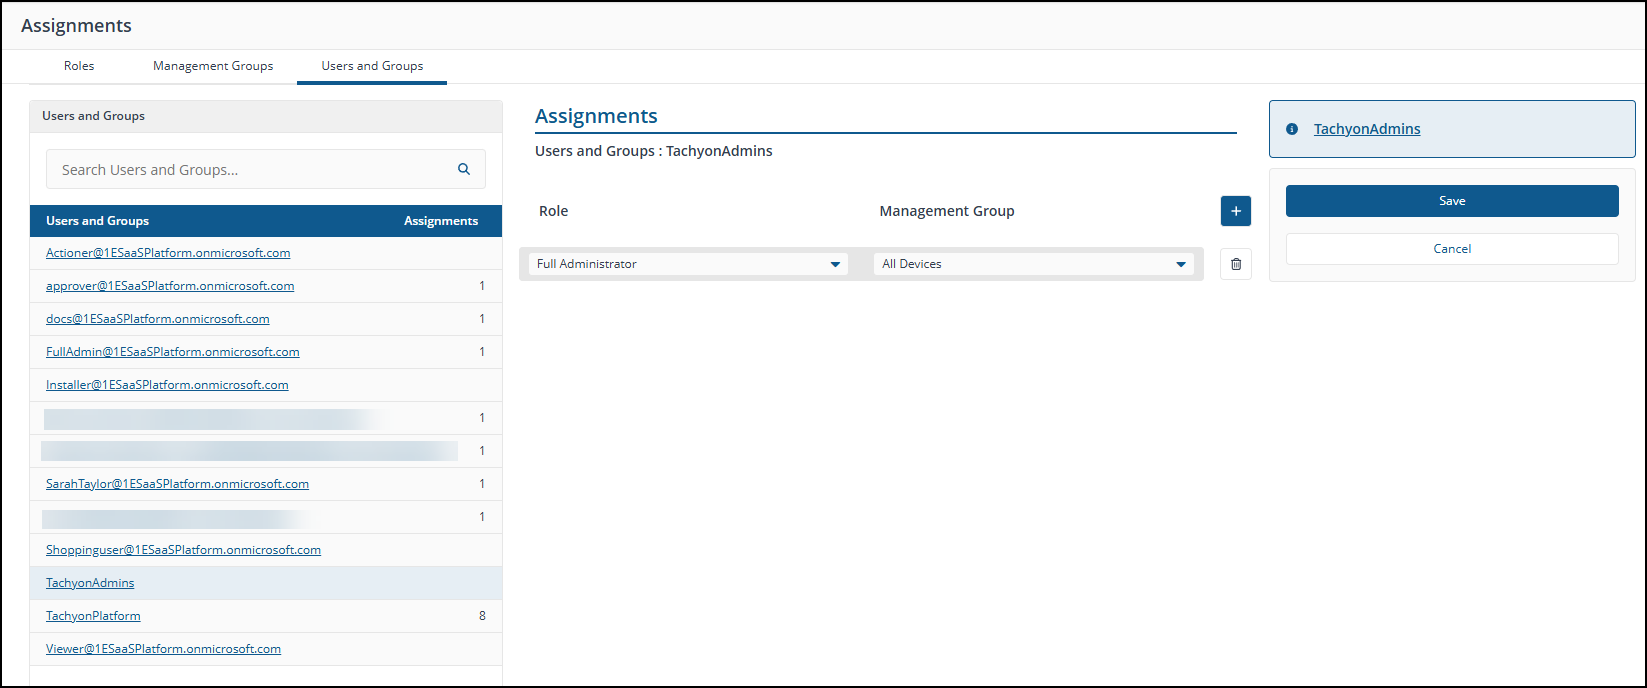
Once added to 1E Platform, you can use Assignments to edit the roles for a 1E user or group. Refer to the Assignments page
-
On the Settings > Permissions > Users and Groups page, click on the Assignments link for the user or group you want to add the role to, this displays the Assignments page focused on the selected user.
-
On the Assignments page, the focus is on Users and Groups.
-
Click the plus sign to add a Role and your choice of associated Management Group.
-
Once you've selected your 1E Roles and Management Groups, click Save.
Refer to the Management Groups for details about using Management Groups to determine the following:
-
Targets for questions, actions and reporting.
-
User permissions for targeting to particular devices based on management group membership.
Deactivating or removing 1E Platform users or groups
1E lets you add users or security groups as users. It also provides a means for deactivating and removing those users. It's worthwhile discussing when you should use deactivate and when you should use remove.
Deactivating 1E Platform users or groups
You can deactivate existing users if you need to temporarily prevent them from using the 1E portal without permanently removing all of their set roles.
To deactivate a user:
-
Navigate to the Settings > Permissions > Users and Groups page.
-
Check the checkbox at the left-hand end of one or more users you want to deactivate.
-
Click Deactivate.
-
The icon in the Activation column will change to the following, indicating that the user is now deactivated.

-
After deactivating, the selected user will no longer be able to perform further actions in the 1E portal (for any current sessions) and will not be able to log in to the portal for any subsequent sessions.
Deactivated users can be re-activated at a later date and all of their set roles will be re-instated. This does not affect any other 1E roles associated with the user or group by virtue of their membership of other 1E groups.
Re-activating 1E Platform users or groups
You can re-activate currently deactivated users or groups to grant them access to the 1E portal.
To re-activate a user:
-
Navigate to the Settings > Permissions > Users and Groups page.
-
Check the checkbox at the left-hand end of the user entry you want to re-activate.
-
Click Activate.
-
The icon in the Activation column will change to the following, indicating that the user is now activated.

-
After activating, the selected user will be able to log in to the 1E portal and perform their permitted functions as before.

Removing users
Use remove to delete the particular associations for the specific user or group with their roles. This does not affect any other roles associated with the user or group by virtue of their membership of other groups. You can permanently remove one or more users or groups if they are no longer needed. Doing this removes any associations to roles.
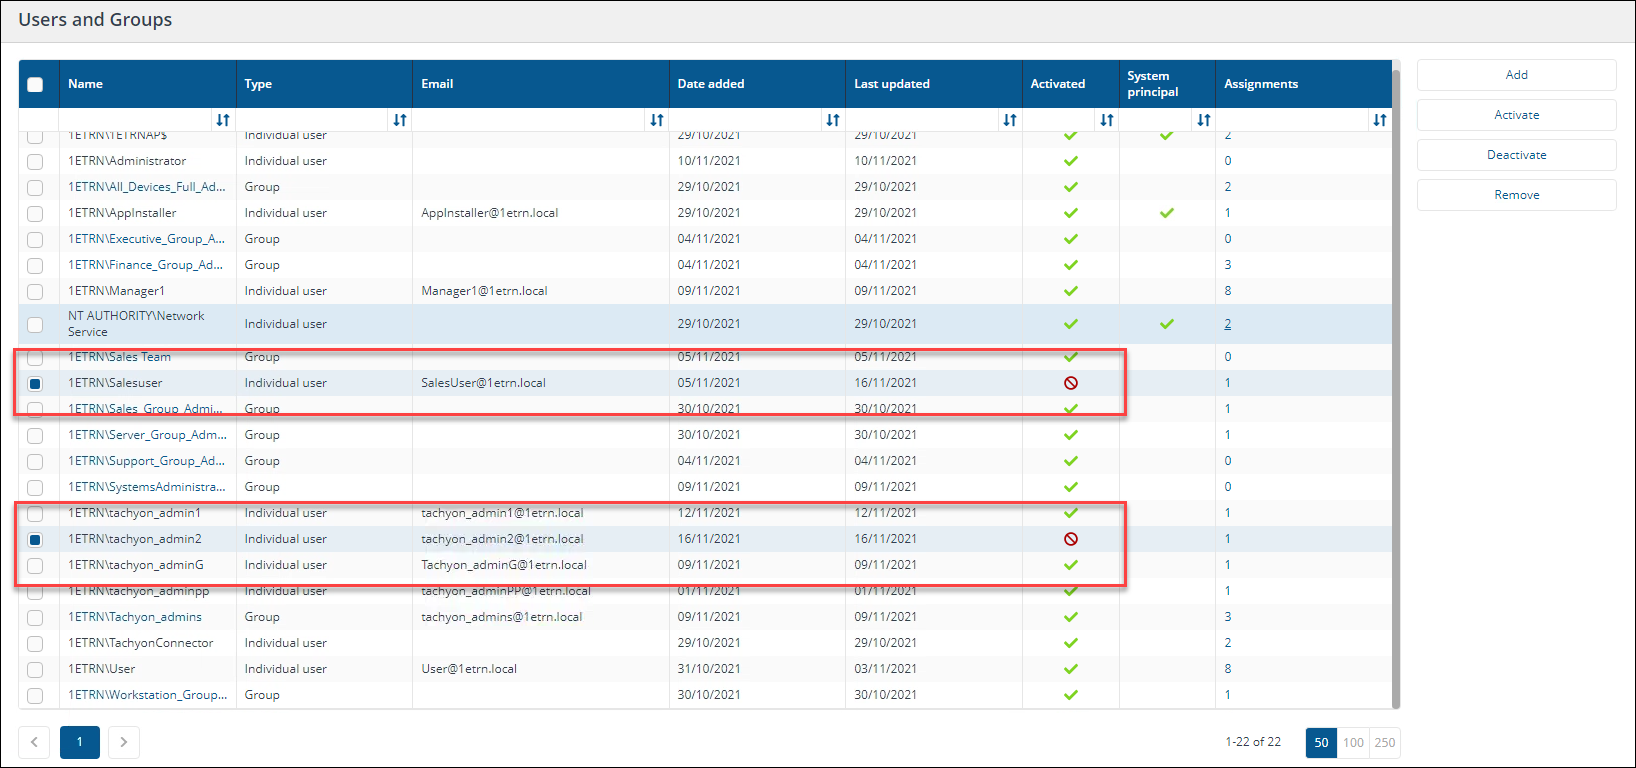
To remove a user:
-
Navigate to the Settings > Permissions > Users and Groups page.
-
Check the checkbox at the left-hand end of the users you want to remove.
-
Click Remove.
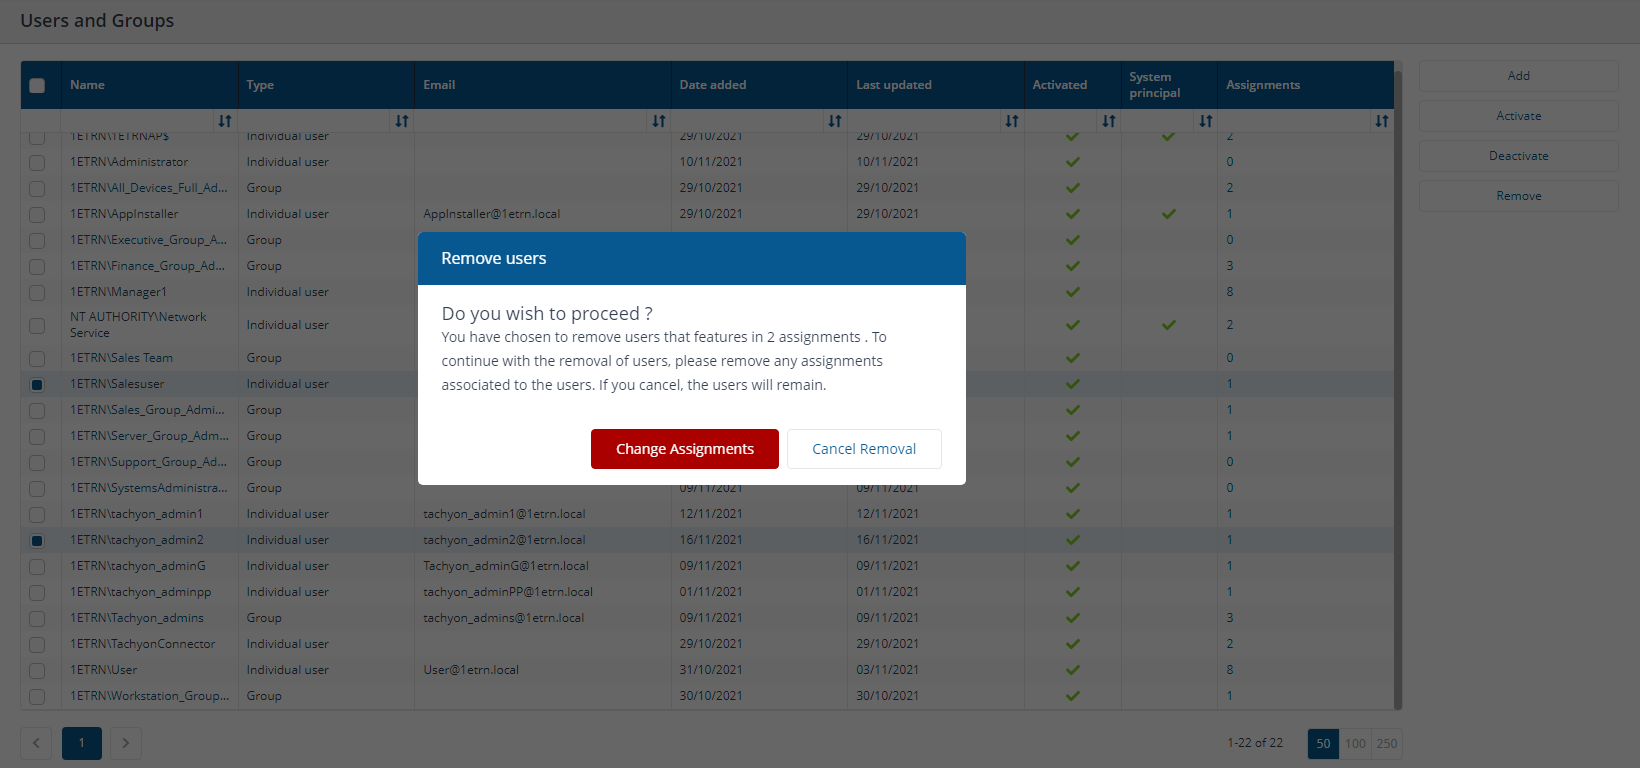
-
A Remove group or Remove user popup will be displayed asking if you want to proceed with the removal of the selected group or user.
-
To proceed and remove them from 1E Platform, you will need to remove any associated assignments, click Change Assignments or Cancel Removal.
-
Change Assignments launches the Assignments page, select the user or group you want to remove and delete any assignments they have using the trash can icon, click Save.
-
Navigate back to the Users and Groups page, re-select the user or group you want to remove, click Remove.
-
Click Yes, remove group or Yes, remove user, depending on whether it was a group or user being removed.
From this point on, all the associations for that user or group and their roles will be removed from 1E Platform. If you did want to add them back in at a later date, you would have to rebuild them step by step.