Integrations
Learn how to configure and manage integrations within the Platform's Enhanced Settings. This guide covers setup steps, supported systems like ServiceNow, and best practices for seamless IT automation and endpoint management.
TeamViewer enables remote control of your devices, enhancing your organization's remote management and support capabilities. This integration brings the following features to the Platform:
-
An authentication process that handles API key usage; otherwise, manual authentication with TeamViewer is required.
-
The ability to create TeamViewer sessions for your devices.
-
Ensuring the end-user device has the TeamViewer client installed and configured for the session.
To take advantage of the TeamViewer integration, note the following:
-
To enable this feature in your organization, you will need a TeamViewer Client ID and Client Secret.
-
You need to be an Enterprise or Enterprise Plus customer to utilize the TeamViewer DEX Pack included with the Platform.
Role-Based Access Control (RBAC) requirements
The Platform supports a granular and flexible role-based access control system that allows you to control the actions that can be performed by users.
The Platform includes a Remote Support system role with permissions restricted to installing TeamViewer, initiating sessions, and managing only the groups and devices assigned to them. This is a system role and cannot be delegated. Administrators must specifically assign this role to specific Management Groups or users. The restriction on delegation ensures that only Full Administrators can assign this role.
For more information, refer to Roles page and Roles and Securables.
TeamViewer DEX Pack
The DEX Pack used for the TeamViewer integration is included with the Platform and is required by the following features:
-
To check if the TeamViewer full client is installed on Windows systems.
-
To initiate a TeamViewer remote session using the Session ID through TeamViewer Quick Support.
A full breakdown of the TeamViewer instructions is available using the TeamViewer DEX Hub in the Platform, or online at Hub (Exchange).
Enabling TeamViewer
To enable the TeamViewer integration, follow these steps:
-
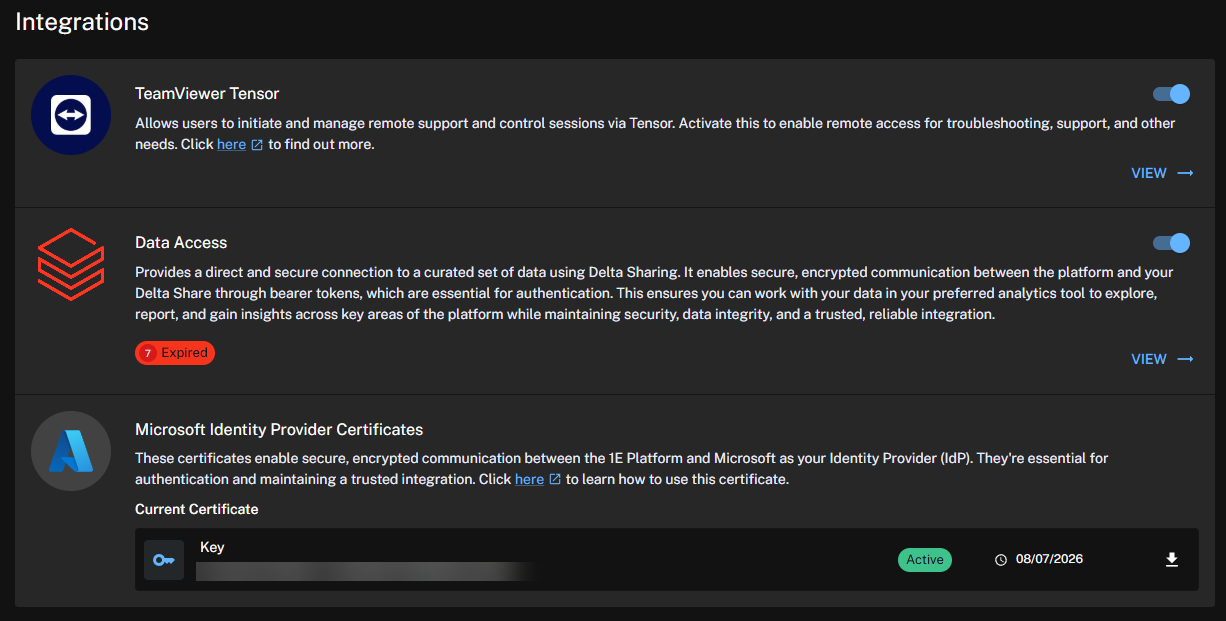
Navigate to Settings > Integrations > TeamViewer Tensor.
-
Select the toggle to enable the feature. Once enabled, you will have the option to use TeamViewer to connect to a device.
-
Enter your existing TeamViewer Client ID and Client Secret, and click Save.
If you do not already have an existing Client ID and Client Secret, you will need to log in to your TeamViewer account and create a PKCE application for the integration. Refer to TeamViewer PKCE app.

-
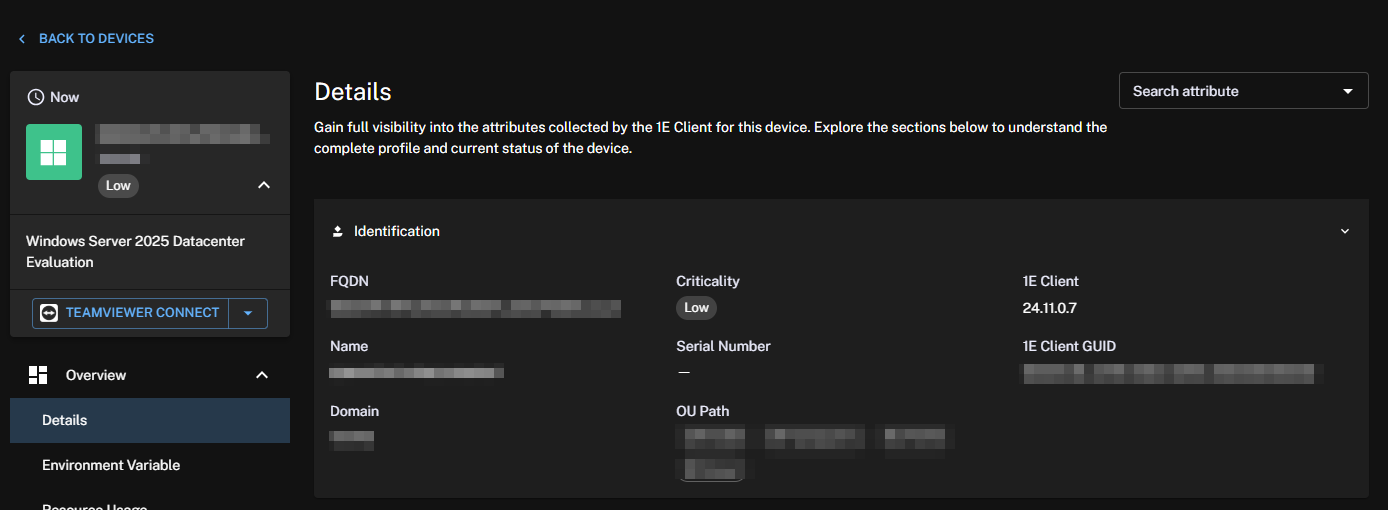
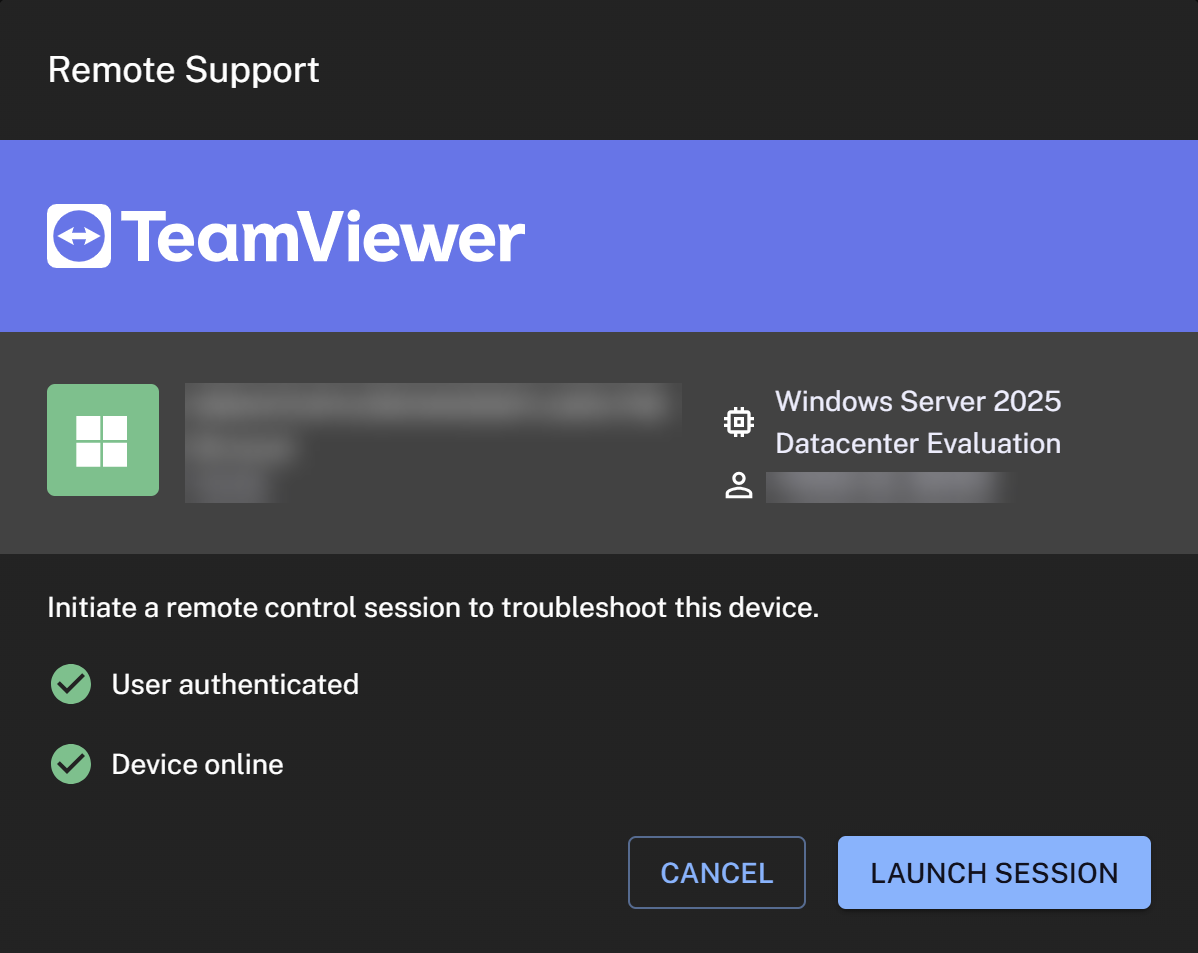
When you click TeamViewer connect, you will connect through to that device using a browser-based remote session.
If TeamViewer is not installed on the target device, then TeamViewer QuickSupport will be used. TeamViewer QuickSupport is a small module that does not require installation or administrator rights.
TeamViewer PKCE app
Follow the steps below to create a PKCE application for your TeamViewer integration.
-
Log in to your TeamViewer account at web.teamviewer.com. Ensure that the client app is created at the user level.
-
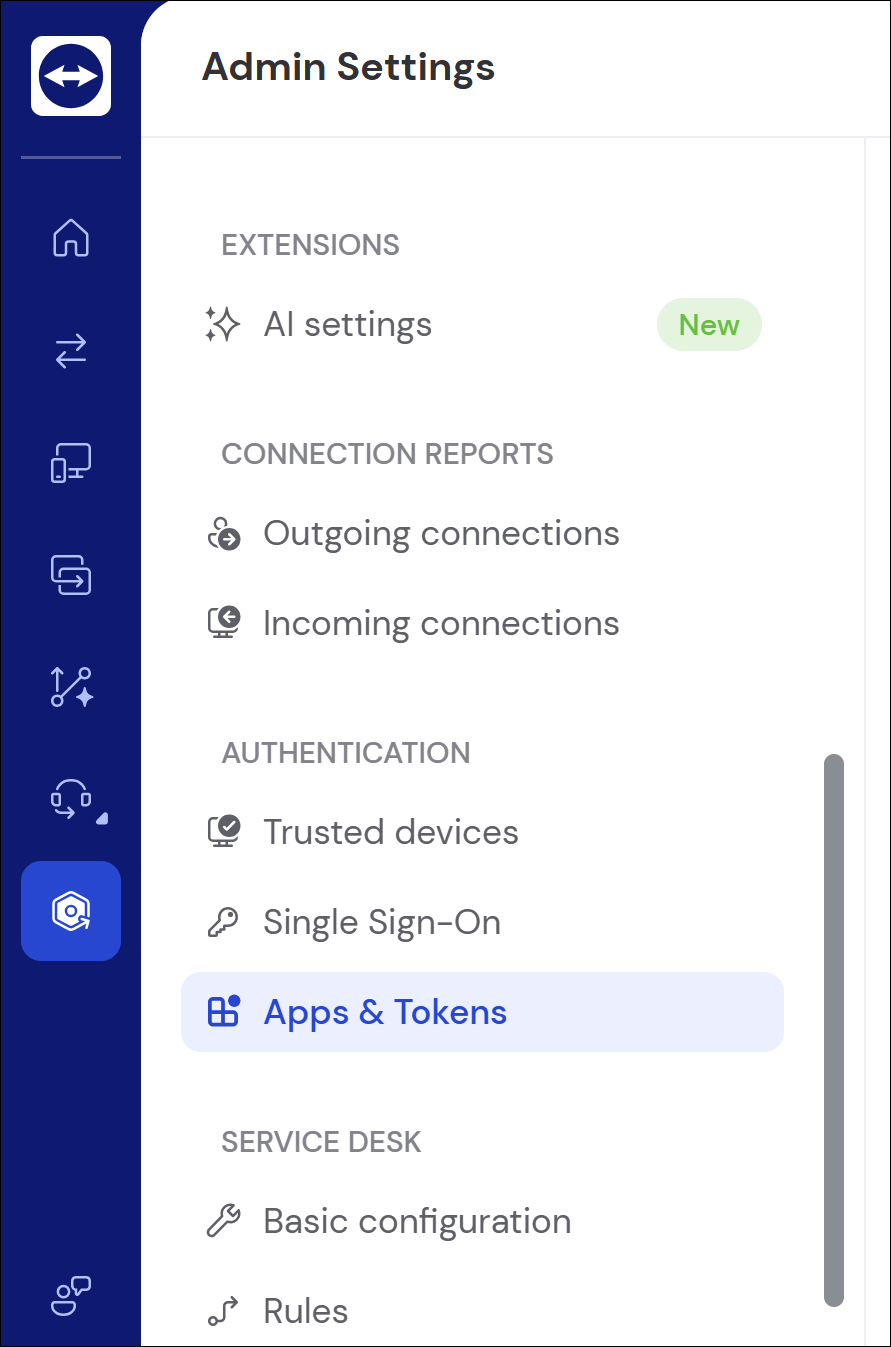
Go to Settings > Apps & Tokens.
-
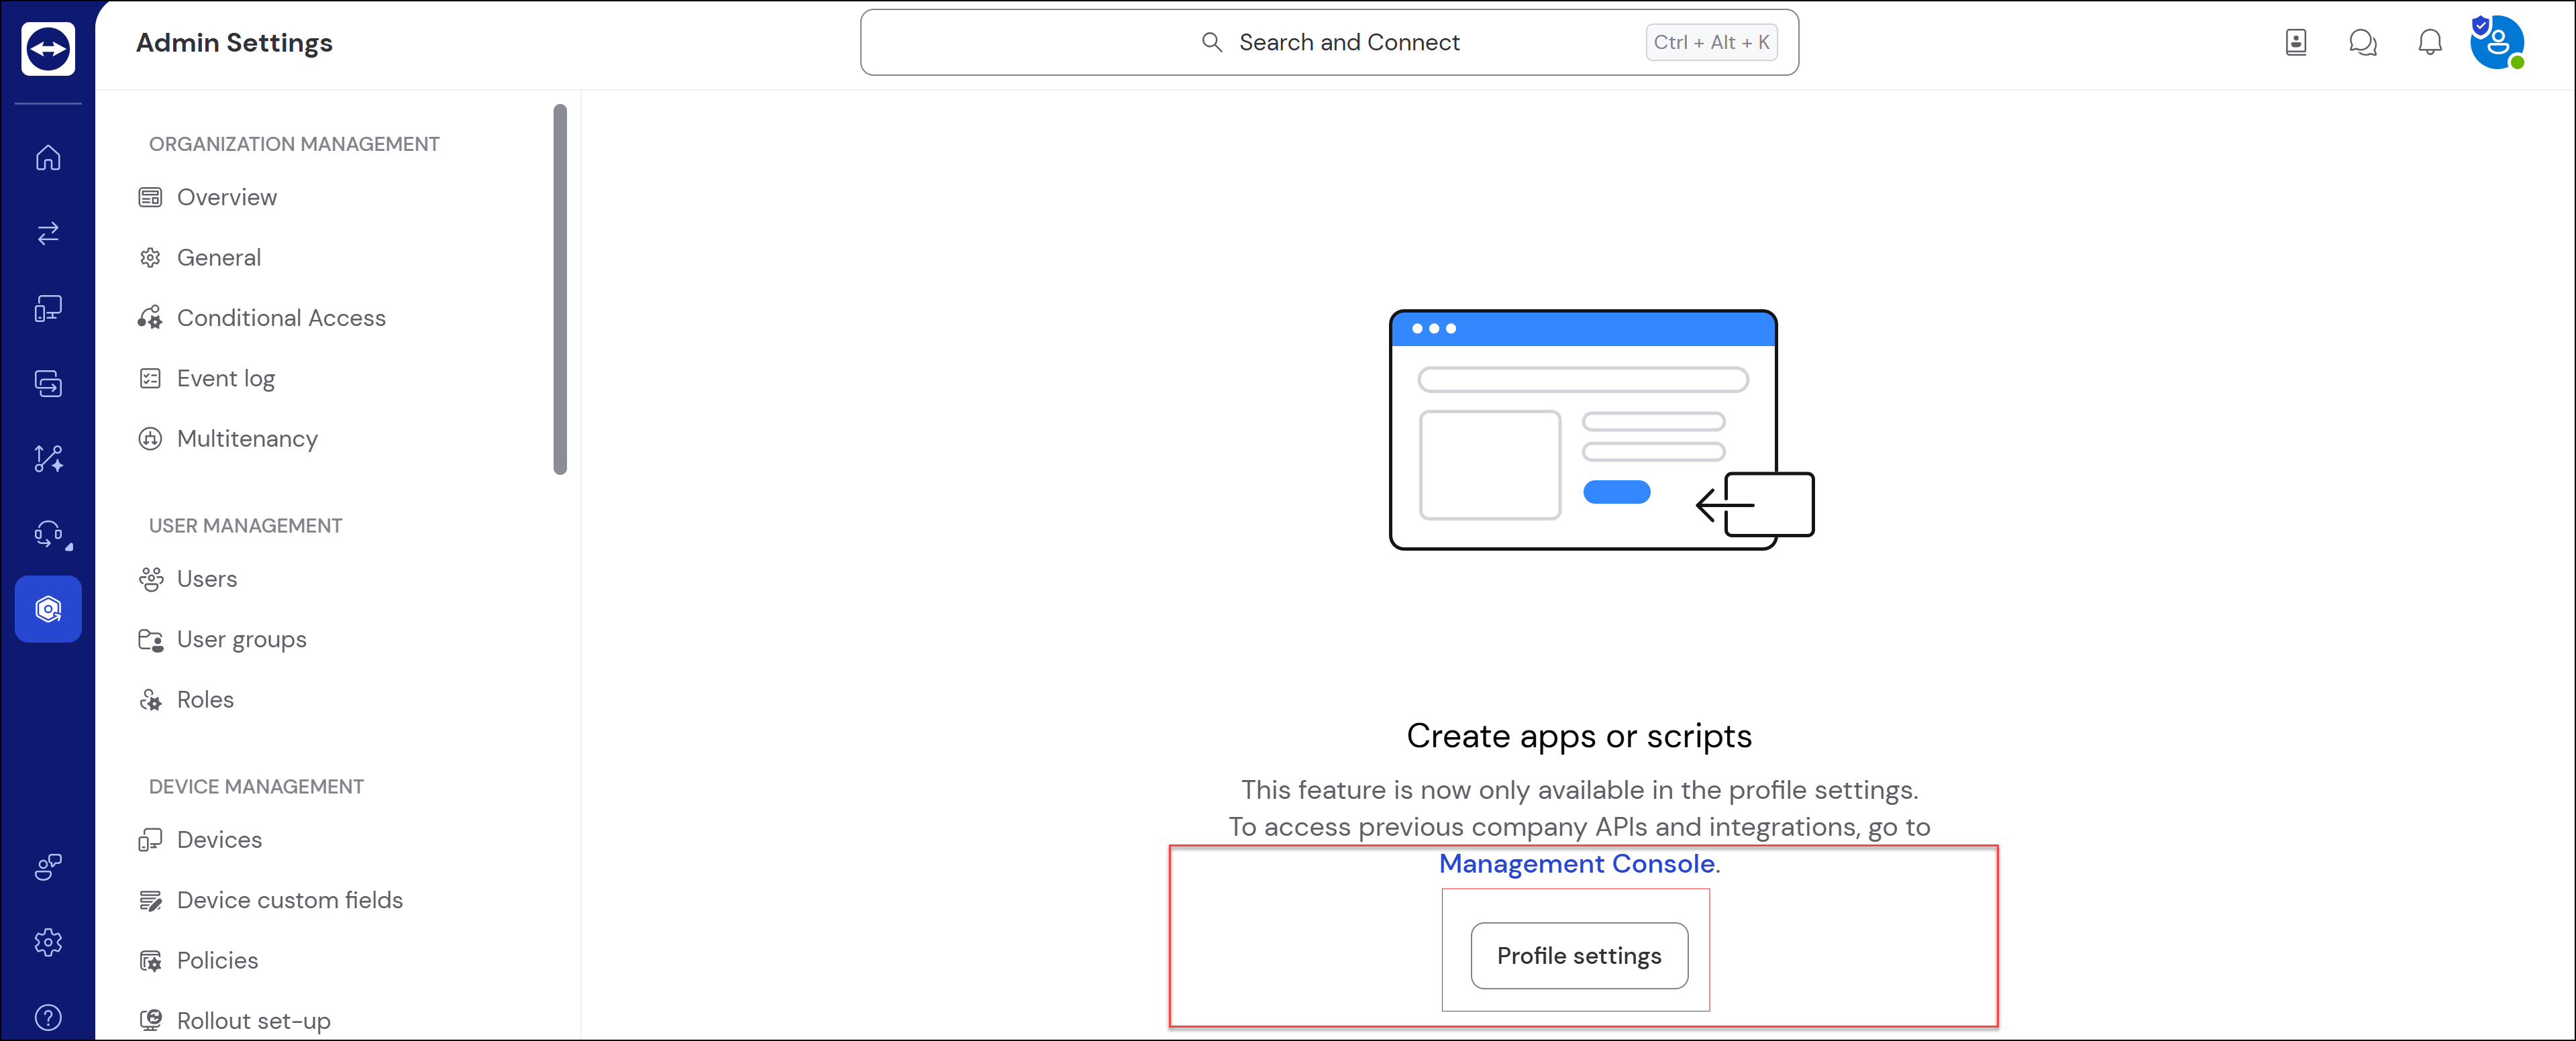
Click Profile settings.
-
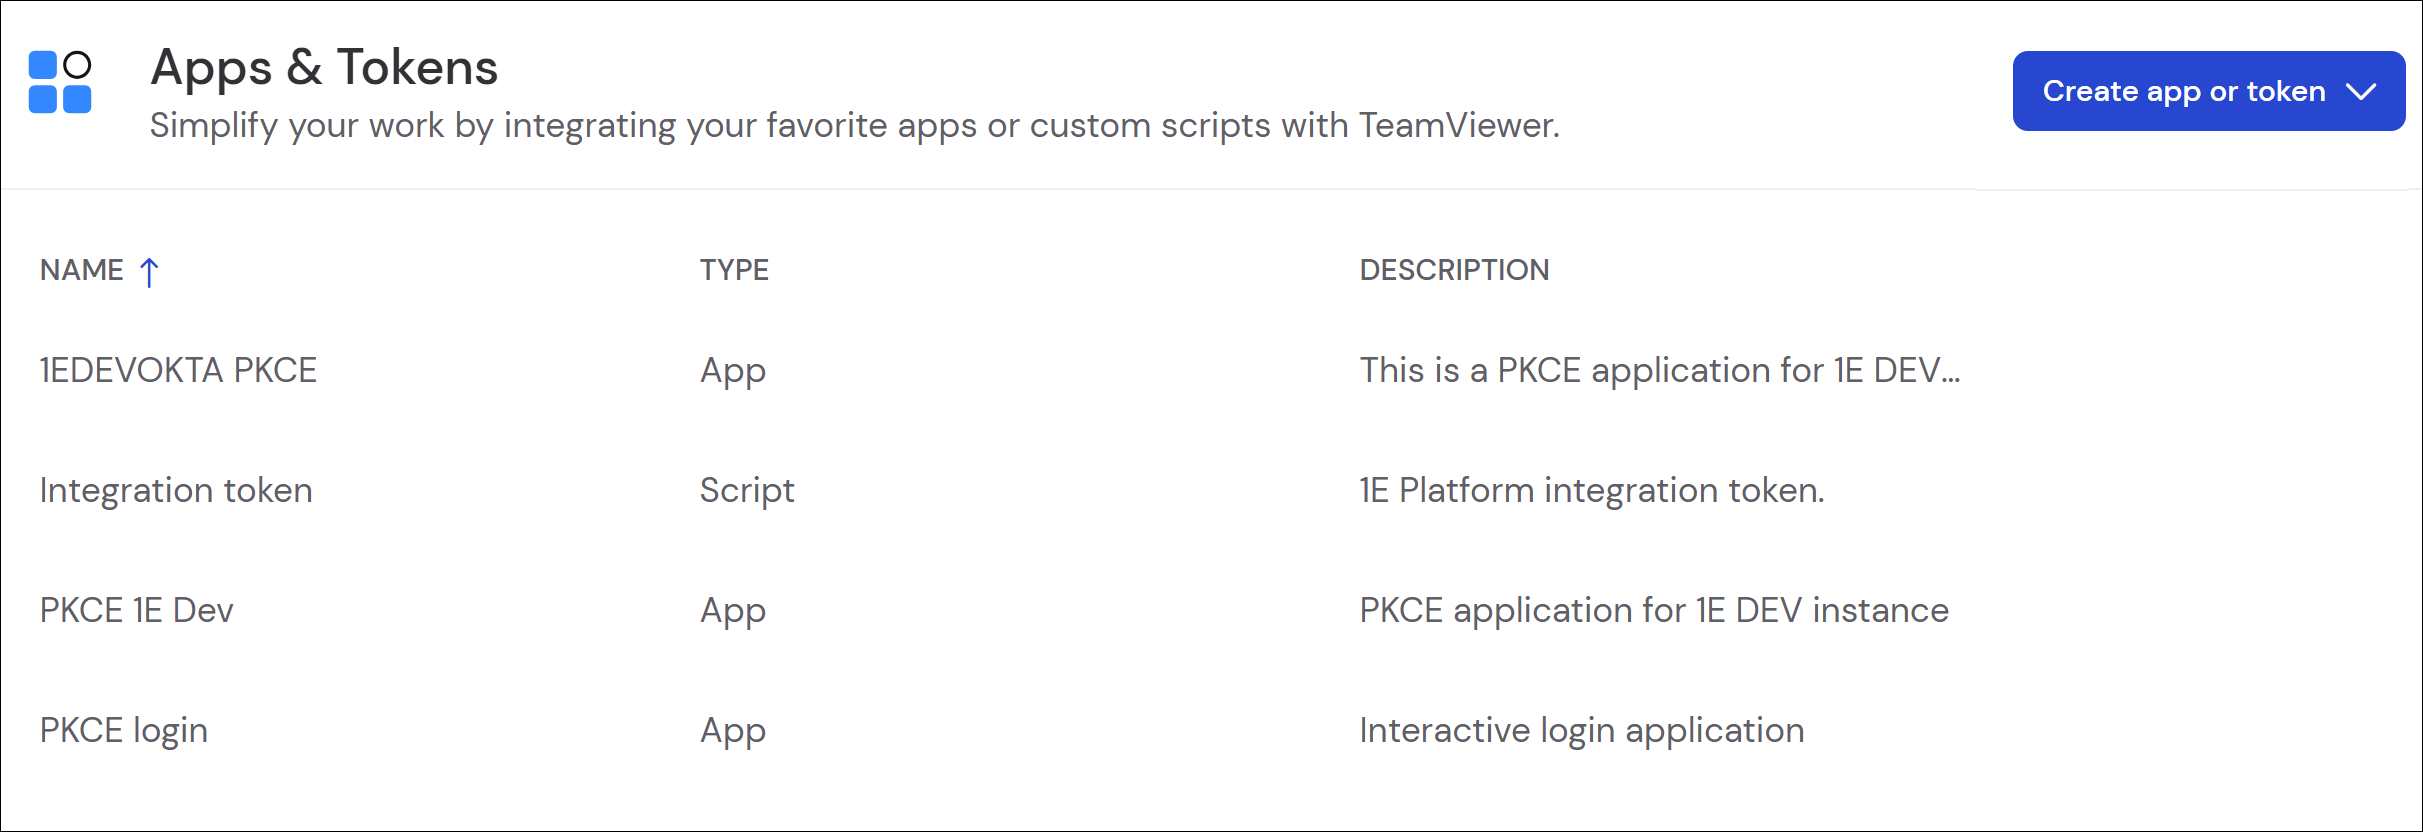
You should see a list of Apps & Tokens, although it might be empty in your account.
-
Click Create app or token > Create App.
-
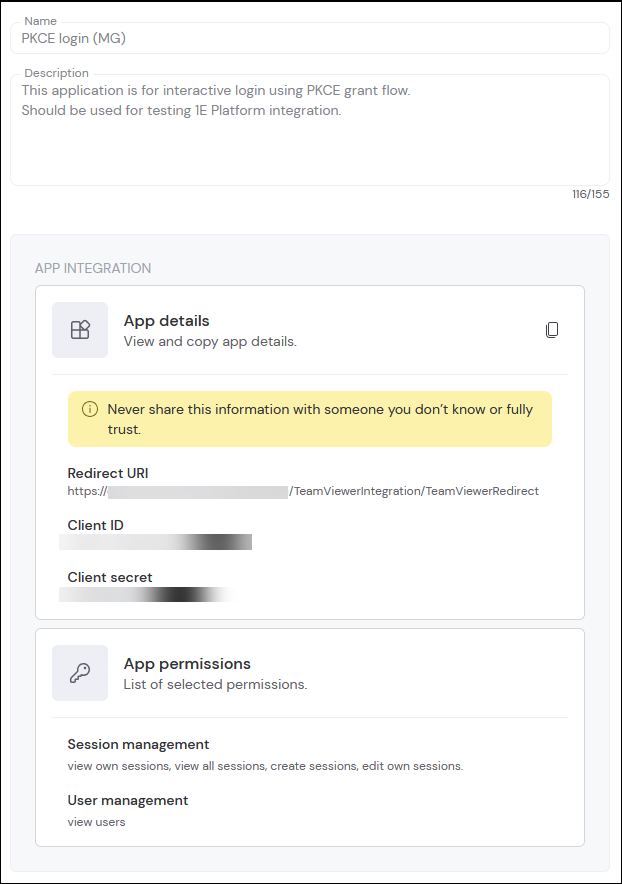
On the displayed form, fill in the Name, Description, and Redirect URI fields. The redirect will reflect your environment and be similar to this example: https://CustomerName.UKSouth.cloud.1e.com:443/Consumer/TeamViewerIntegration/TeamViewerRedirect
-
For the application to function, you need to assign the following App permissions to it:
-
Session management: Select view own sessions, view all sessions, create sessions, edit own sessions.
-
User management: Select view users.
-
-
Click Save.
You can now take the Client ID and Client Secret and use them for your deployment configuration.
Audit logs
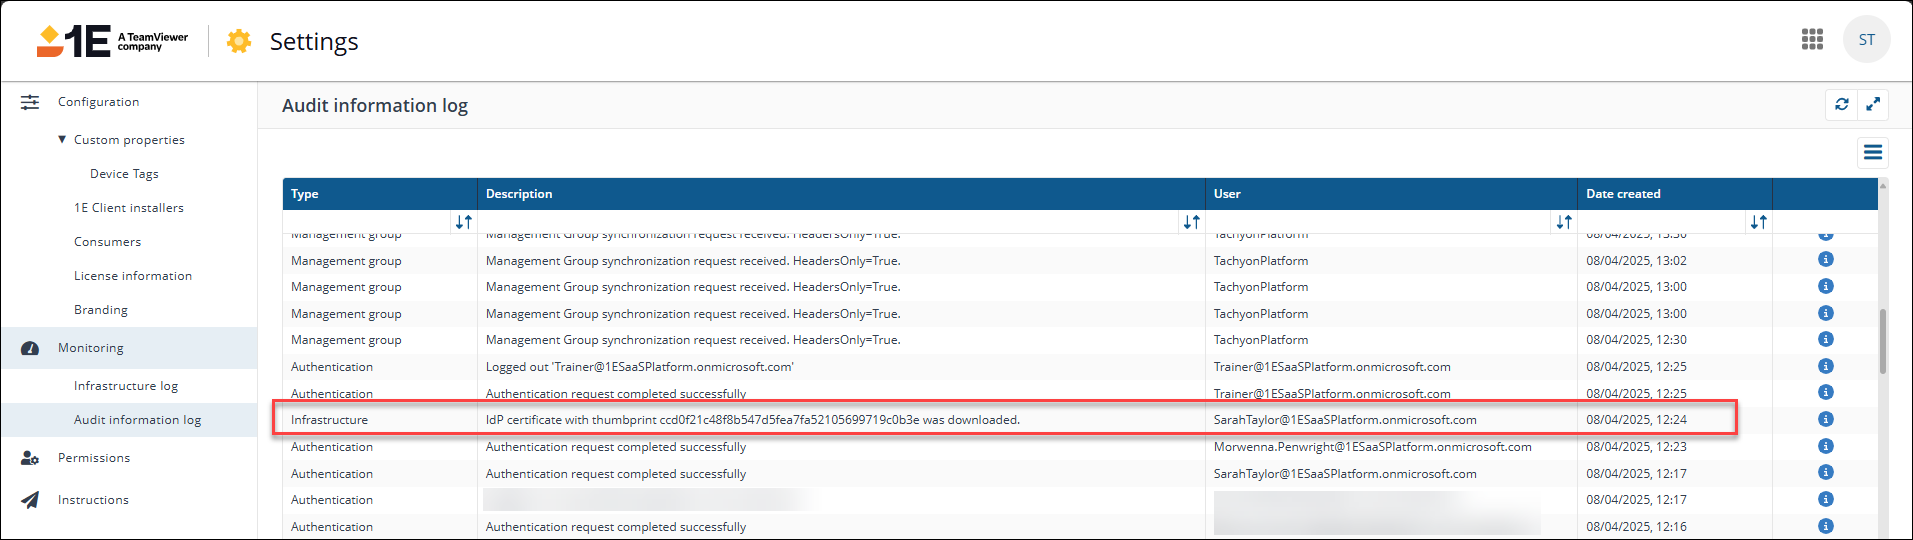
When a remote session is initiated, the action is logged both on the Platform and in TeamViewer. The Audit Information Log includes timestamps, user activity, and status of a session:
-
Who initiated the session.
-
When the session started.
-
Which device the session was created on.
Refer to Monitoring menu.
The Data Access feature is a separate, licensable feature currently available in the Enterprise tier.
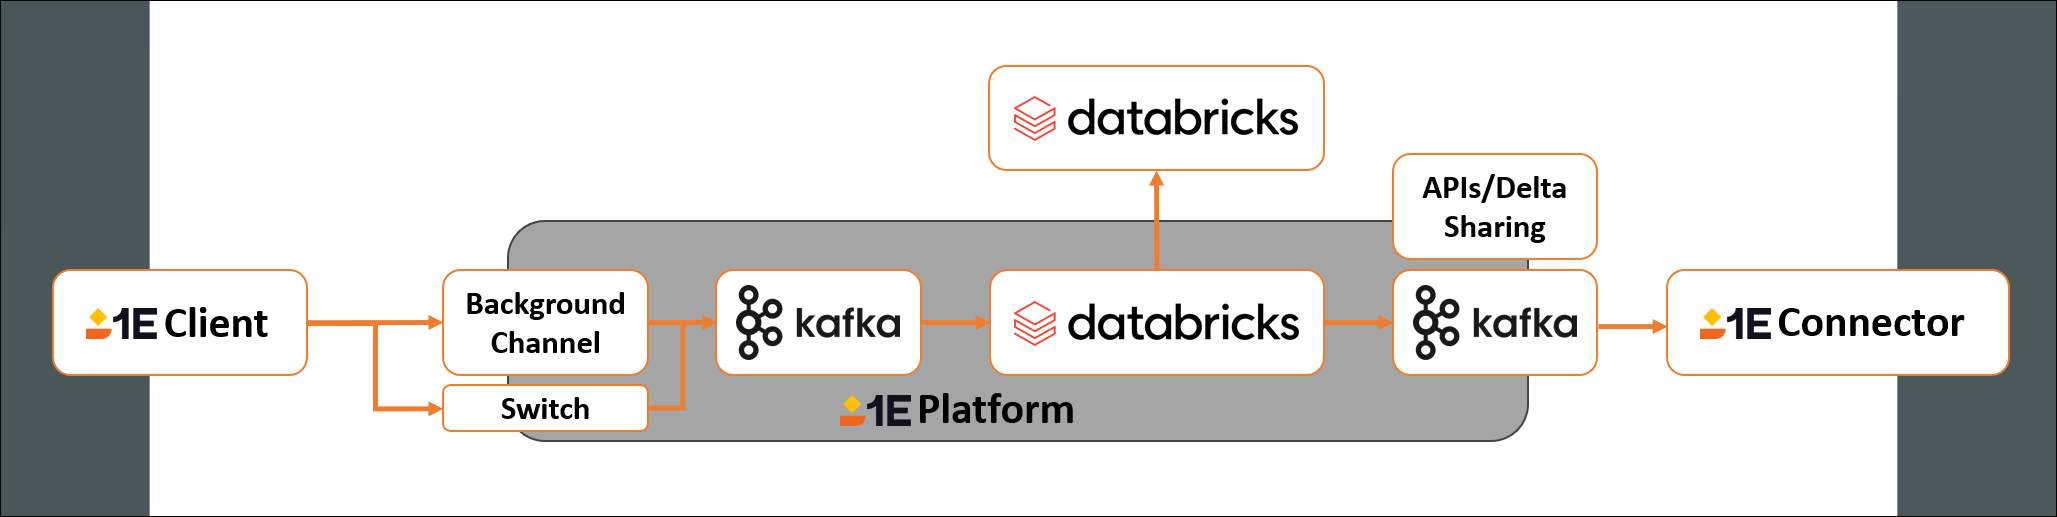
Data Access enables you to securely connect your own analytics tools to 1E data using Databricks Delta Sharing. This gives you direct access to selected datasets from the DEX Platform, allowing you to build custom reports, dashboards, and insights using tools like Power BI, Tableau, or Databricks. These datasets are designed to help you explore performance, usage, and user experience across your environment. All data is read-only and shared according to your tenant’s permissions.
Getting started
The Data Access feature is disabled by default. To access this feature, follow these steps:
-
You must have an Enterprise tier license. To find out more about licensing and get the complete Digital Employee Experience Platform, contact your account Team.
-
When you have a license for Data Access, you must first explicitly enable it before you can use it. To do this, you will need to use the 1E PowerShell Toolkit. Refer to Databricks integration
-
Once you have enabled Data Access, you can create and manage tokens.
If you use Databricks in your environment, you can initiate a Databricks > Databricks connection. To set this up, contact your account team.
Available datasets
You can review the available datasets using the Data Access feature on the TeamViewer Support Portal. Each dataset is refreshed every 24 hours. Any changes, such as new, deprecated and removed data attributes or datasets are communicated through our monthly release notes.
Enabling Data Access
Once you have access to the Enterprise+ tier and have enabled Data Access using the 1E PowerShell Toolkit, you can use the feature in the Platform UI.
-
Data Access is available from Settings > Integrations > Data Access in the new UI. The feature can be toggled on or off. When the feature is toggled on, you will see the following message.
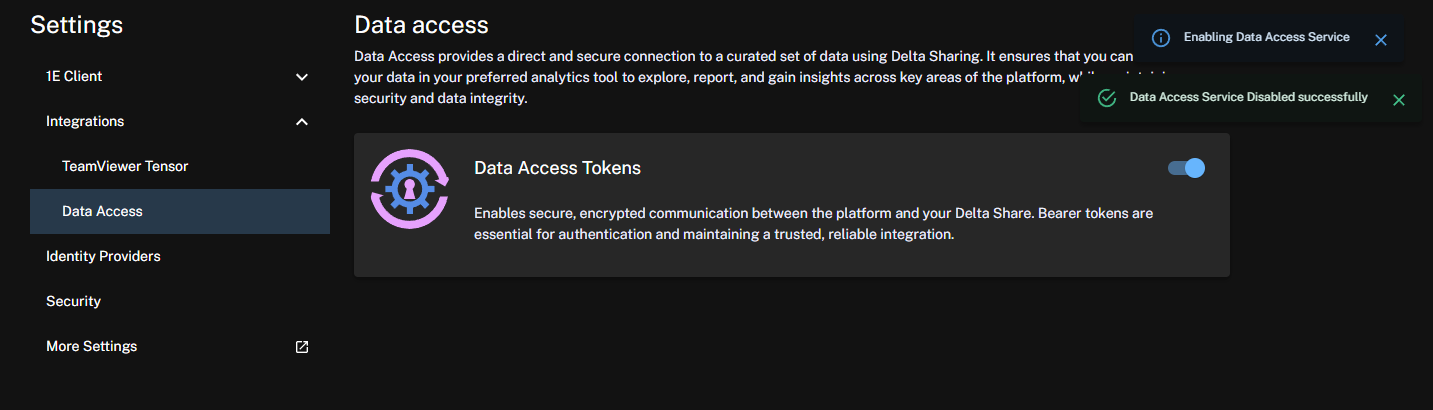
Once enabled, you will need to wait a minimum of 24 hours before data becomes available for download.
Creating your first token with Data Access
-
Click View to create and manage your first token.
-
In the Tokens area, click Generate Token and complete the form:

-
User Name or Email: Enter a name or email address to identify the token.
-
Description: Enter a suitable description for the token.
-
Expiration: Choose the token expiration date from one of the following options: one, three, or six months, or one year.
The token creator will receive email alerts about the impending expiry of their Data Access tokens. The email notification feature sends expiration alerts to the email address associated with a token generator's account which has either Full Administrator or DataAccess.Write permissions. The email also includes tenant details to help identify the related tenant. The alerts will be sent at intervals of fourteen, seven, three, and one day(s) before the token expiry date. Email alerts do not currently support distribution lists unless the list is tied to the generating account.
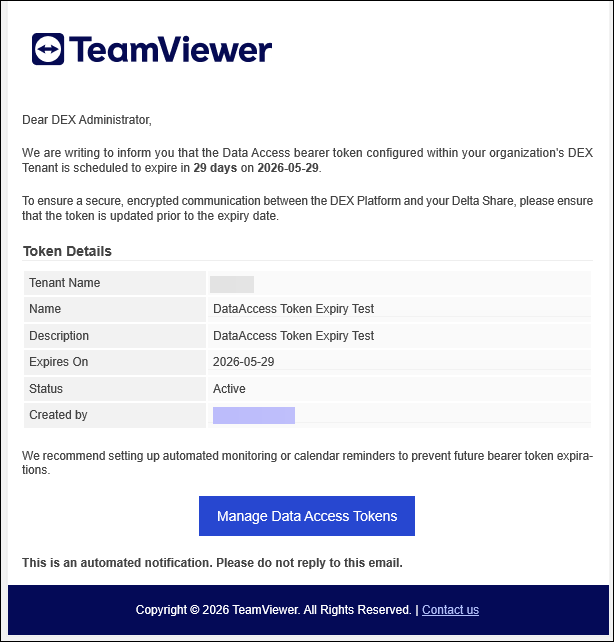
To disable and re-enable these alerts, or adjust their default frequency, contact your Professional Services or Customer Success representative.
-
-
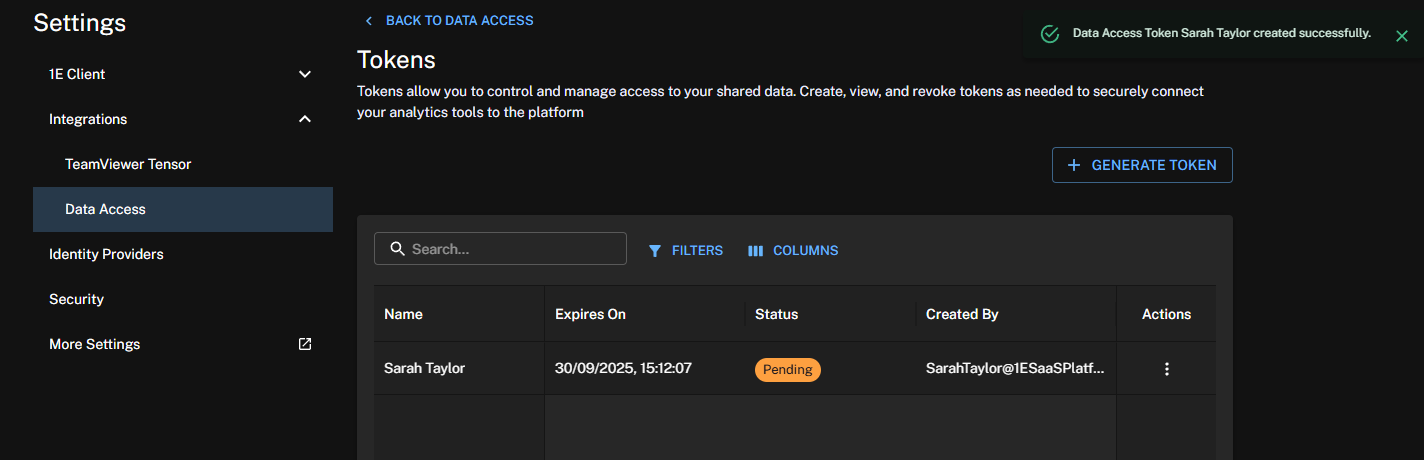
Click Generate Token. You will see a message that the token has been generated successfully and that its status is Pending. The Pending status remains until you download the token.
-
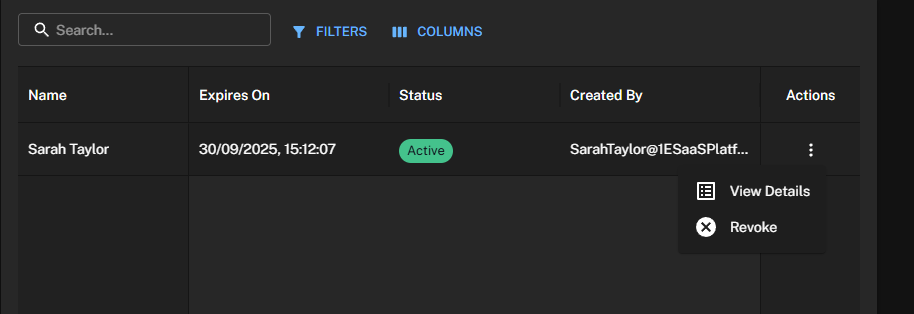
To use the token, click Download under the Actions column. This opens a new tab in your browser and changes the token status to Active.
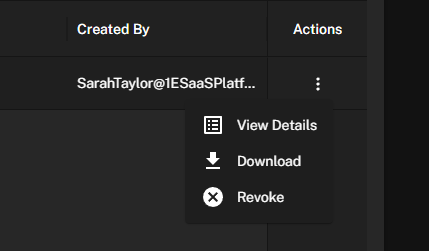
-
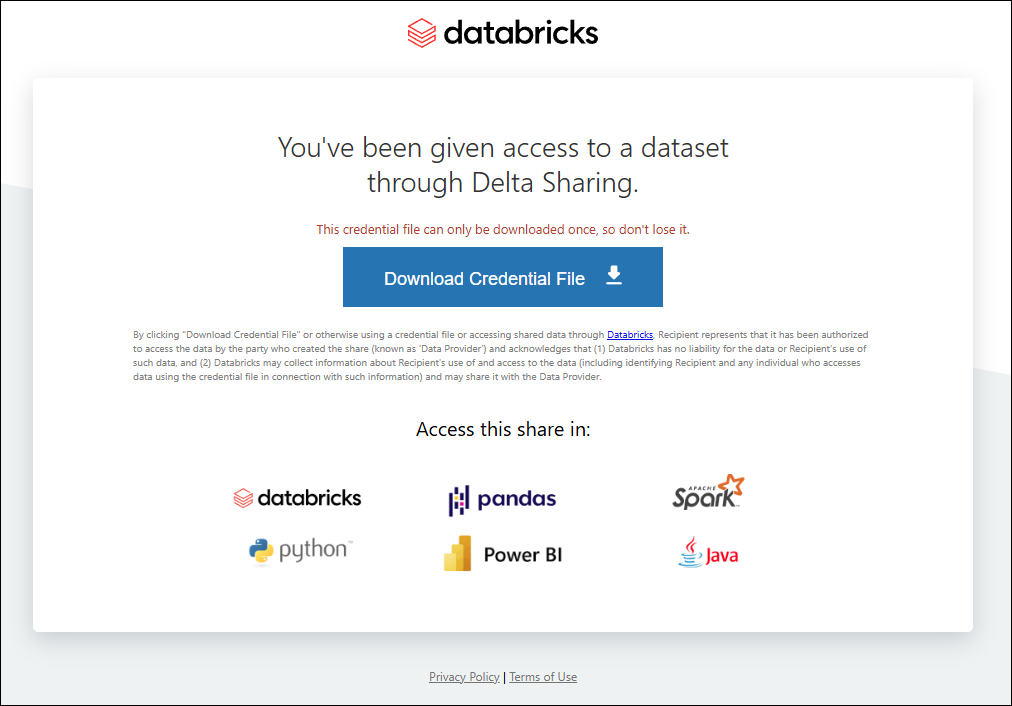
You can use the Databricks link to download the data file for use in tools like PowerBI. Refer to Databricks Delta Sharing.
Each credential file can only be downloaded once, so don't lose it.
Managing your tokens
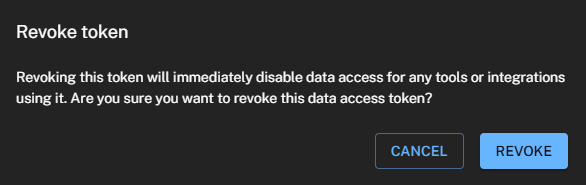
Platform administrators can create tokens and revoke tokens on demand. The token list is searchable and filterable.
-
Click View to manage your tokens.
-
Under Actions, click Revoke. You will see the following confirmation message:

Disabling Data Access
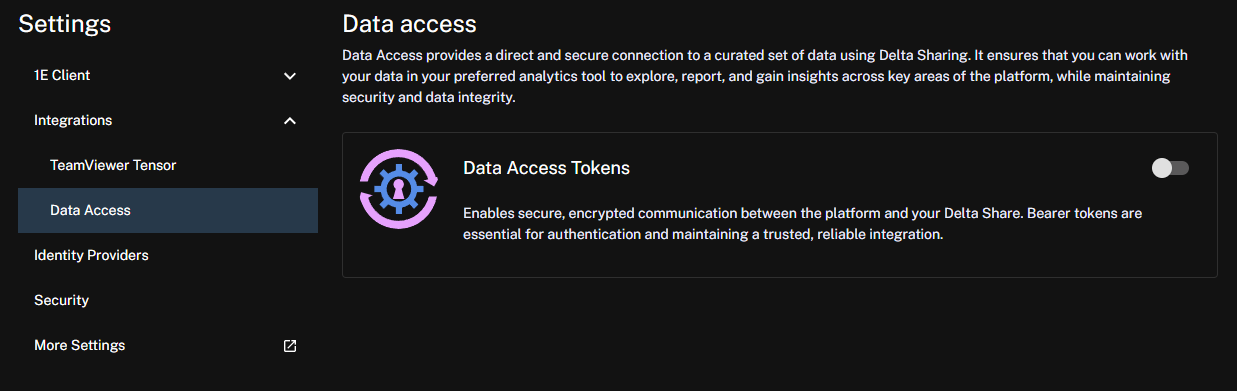
-
Slide the toggle for Data Access Tokens to the off position.
-
All active tokens and associated data are deleted.
If you then re-enable Data Access, you will need to wait for a minimum of 24 hours before data is available again.
To maintain secure communication between the Platform and the Identity Provider, TeamViewer issues a public certificate when tenant provisioning occurs. This certificate is valid for one year. When 90 percent of the certificate's validity period has elapsed, a new certificate is issued and must be added to your Identity Provider. During activation, the Platform ensures that authentication with the new certificate is successful.
Third-party screenshots and options are correct at time of release but are subject to change outside of our control.
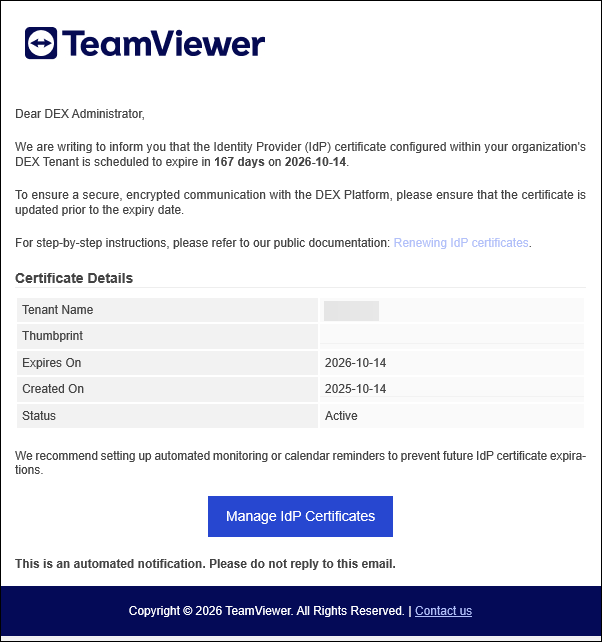
Admins with the Infrastructure.Write permission will receive email notifications 14, 7, 3, and 1 days before an IdP certificate expires, allowing them to initiate and complete the renewal process. The email also includes tenant details to help identify the related tenant.
Using Identity Providers you can do the following:
-
Download certificates: Download a certificate to upload to your Identity Provider (IdP) to ensure continued access to the Platform.
-
Manage certificate renewal: Keep track of your certificate's renewal date to plan ahead and avoid any disruptions.
-
Access logging and auditing: Access logs related to certificate renewal and download them for security and audit purposes.
Permissions
To use the features offered by Identity Providers you will need the following:
-
Infrastructure.Write: To select a new IdP certificate.
-
Infrastructure.Read: To view the list of certificates and download the public key.
By default, the Enhanced Settings module is visible only to users with the Full Administrator role or to a custom role that includes the Security.Read permission. For more information, refer to Roles and Securables and Roles page.
Azure IdP certificates
To renew your Azure IdP certificate follow these steps:
-
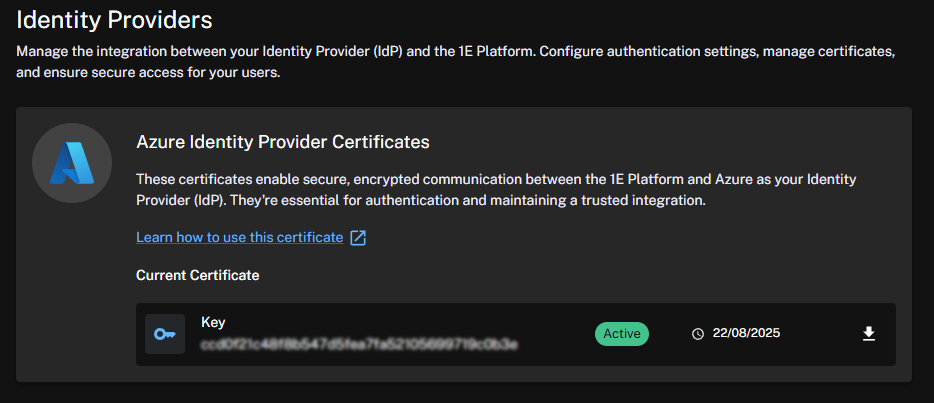
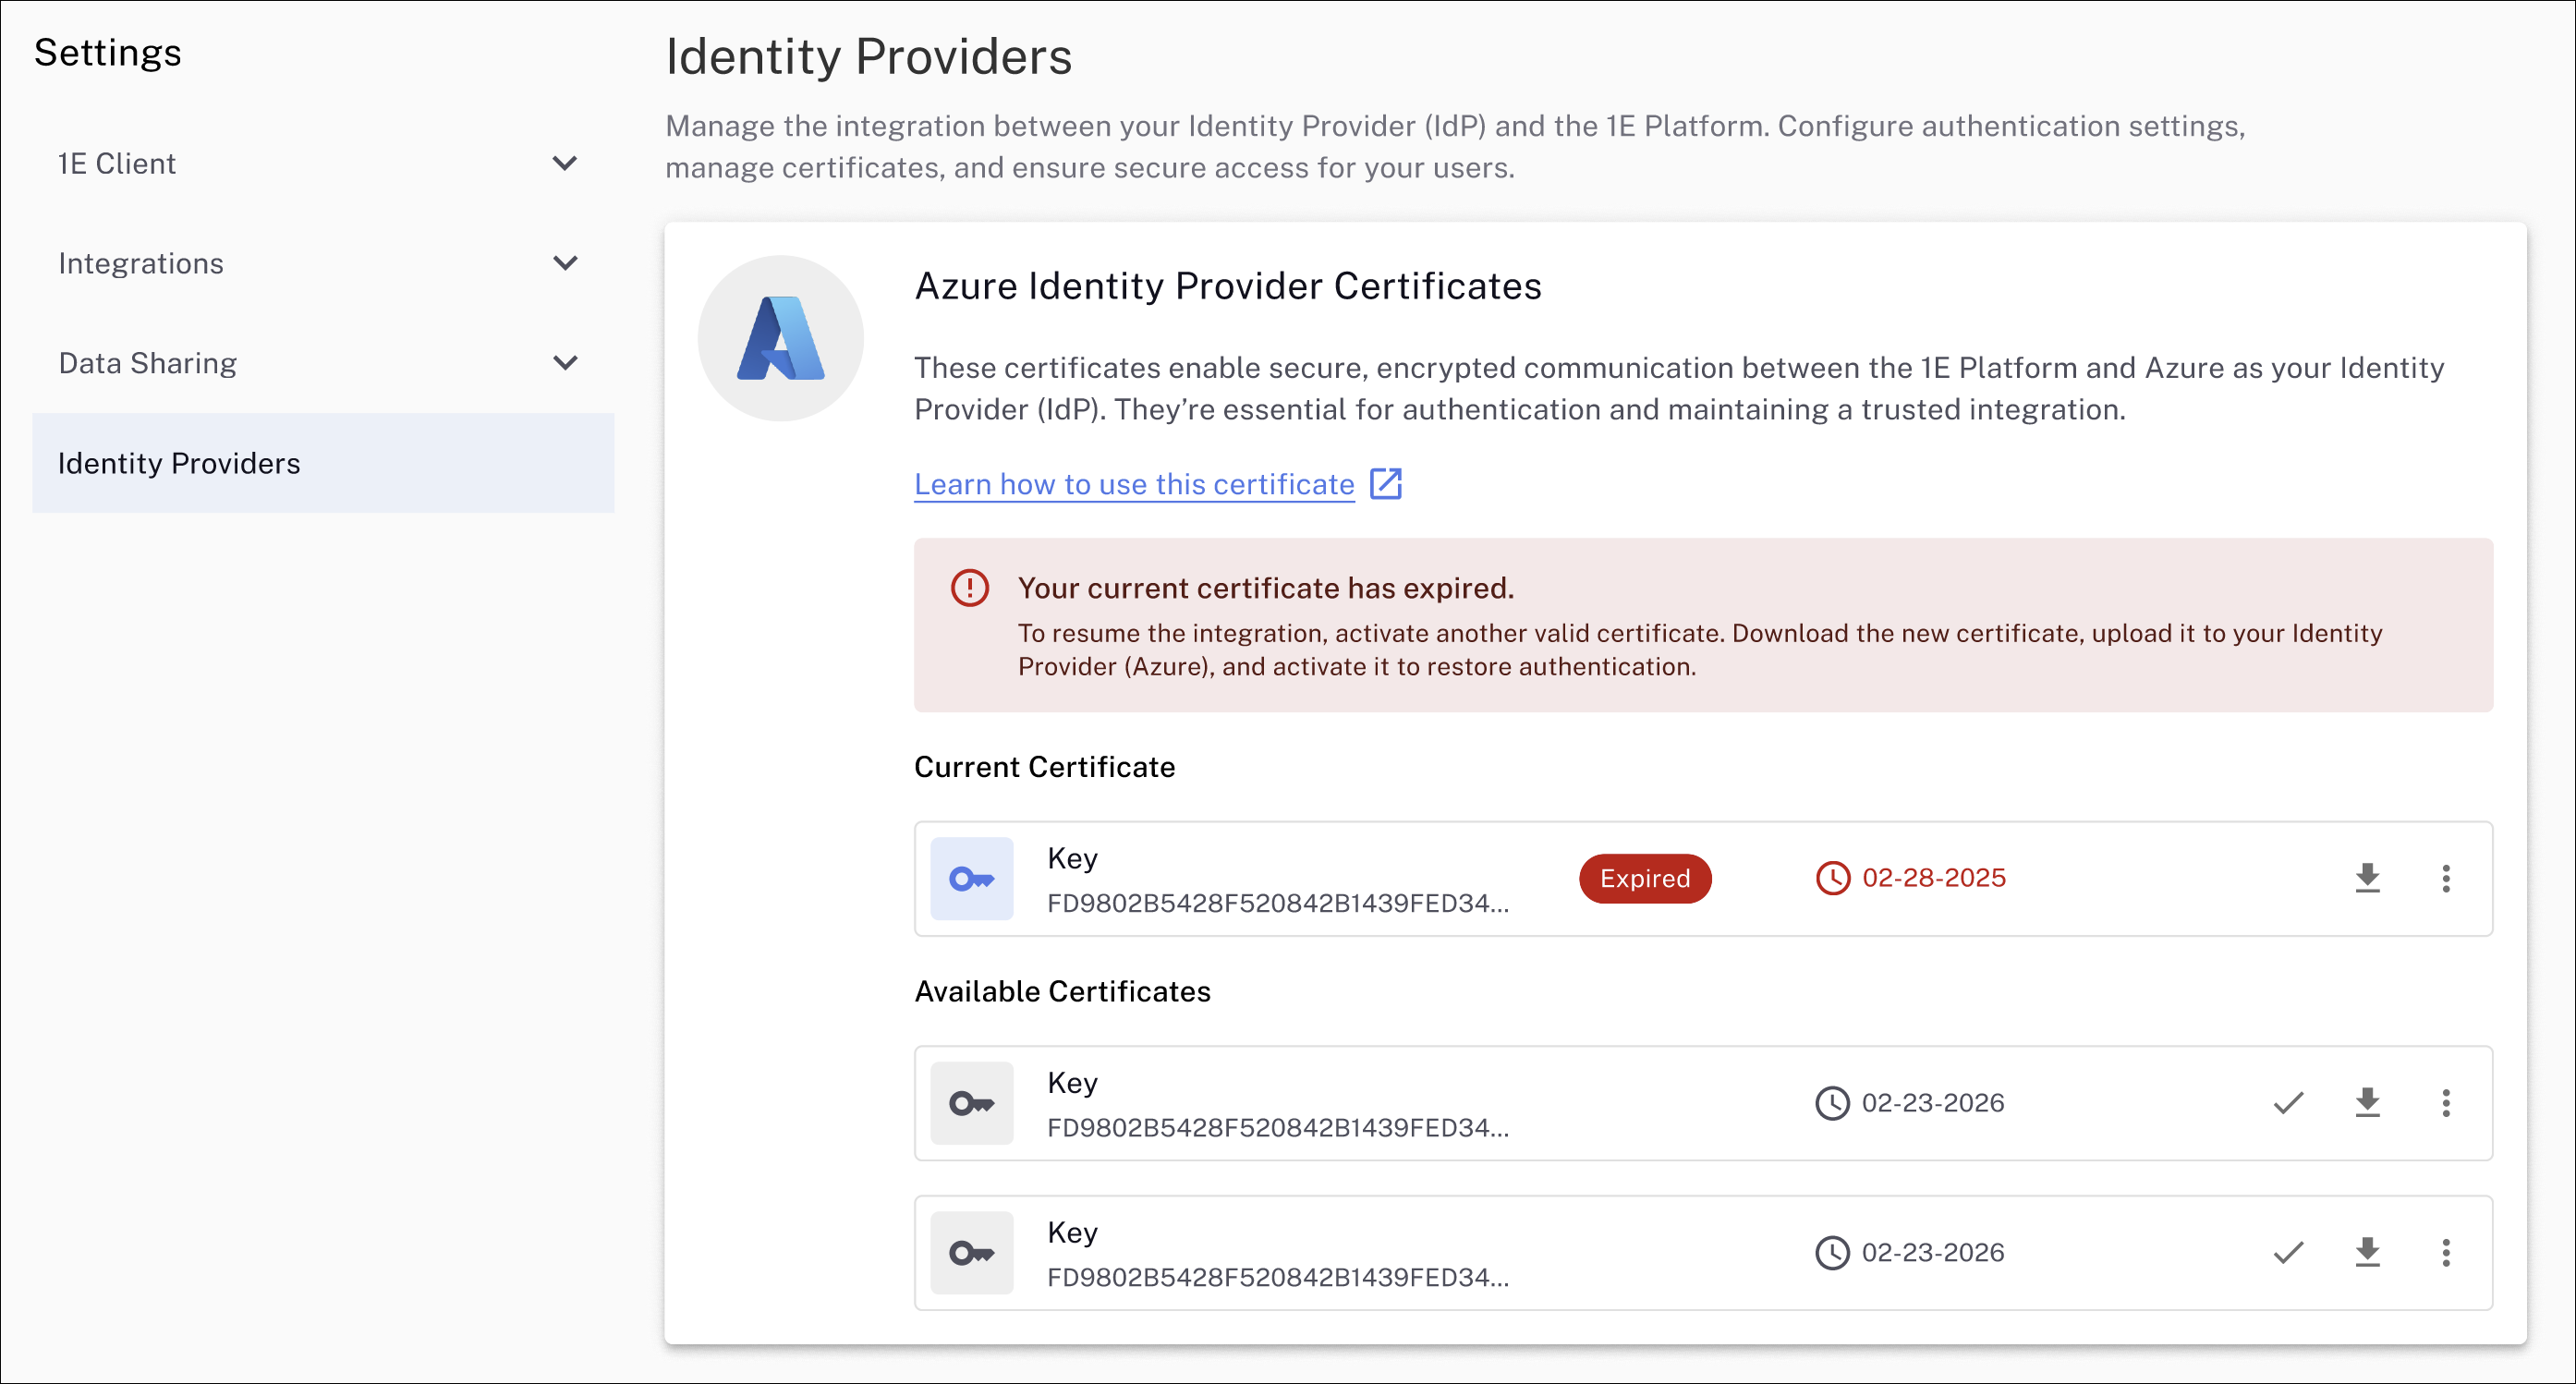
Navigate to Settings > Identity Providers to view your current, and any available certificates.
-
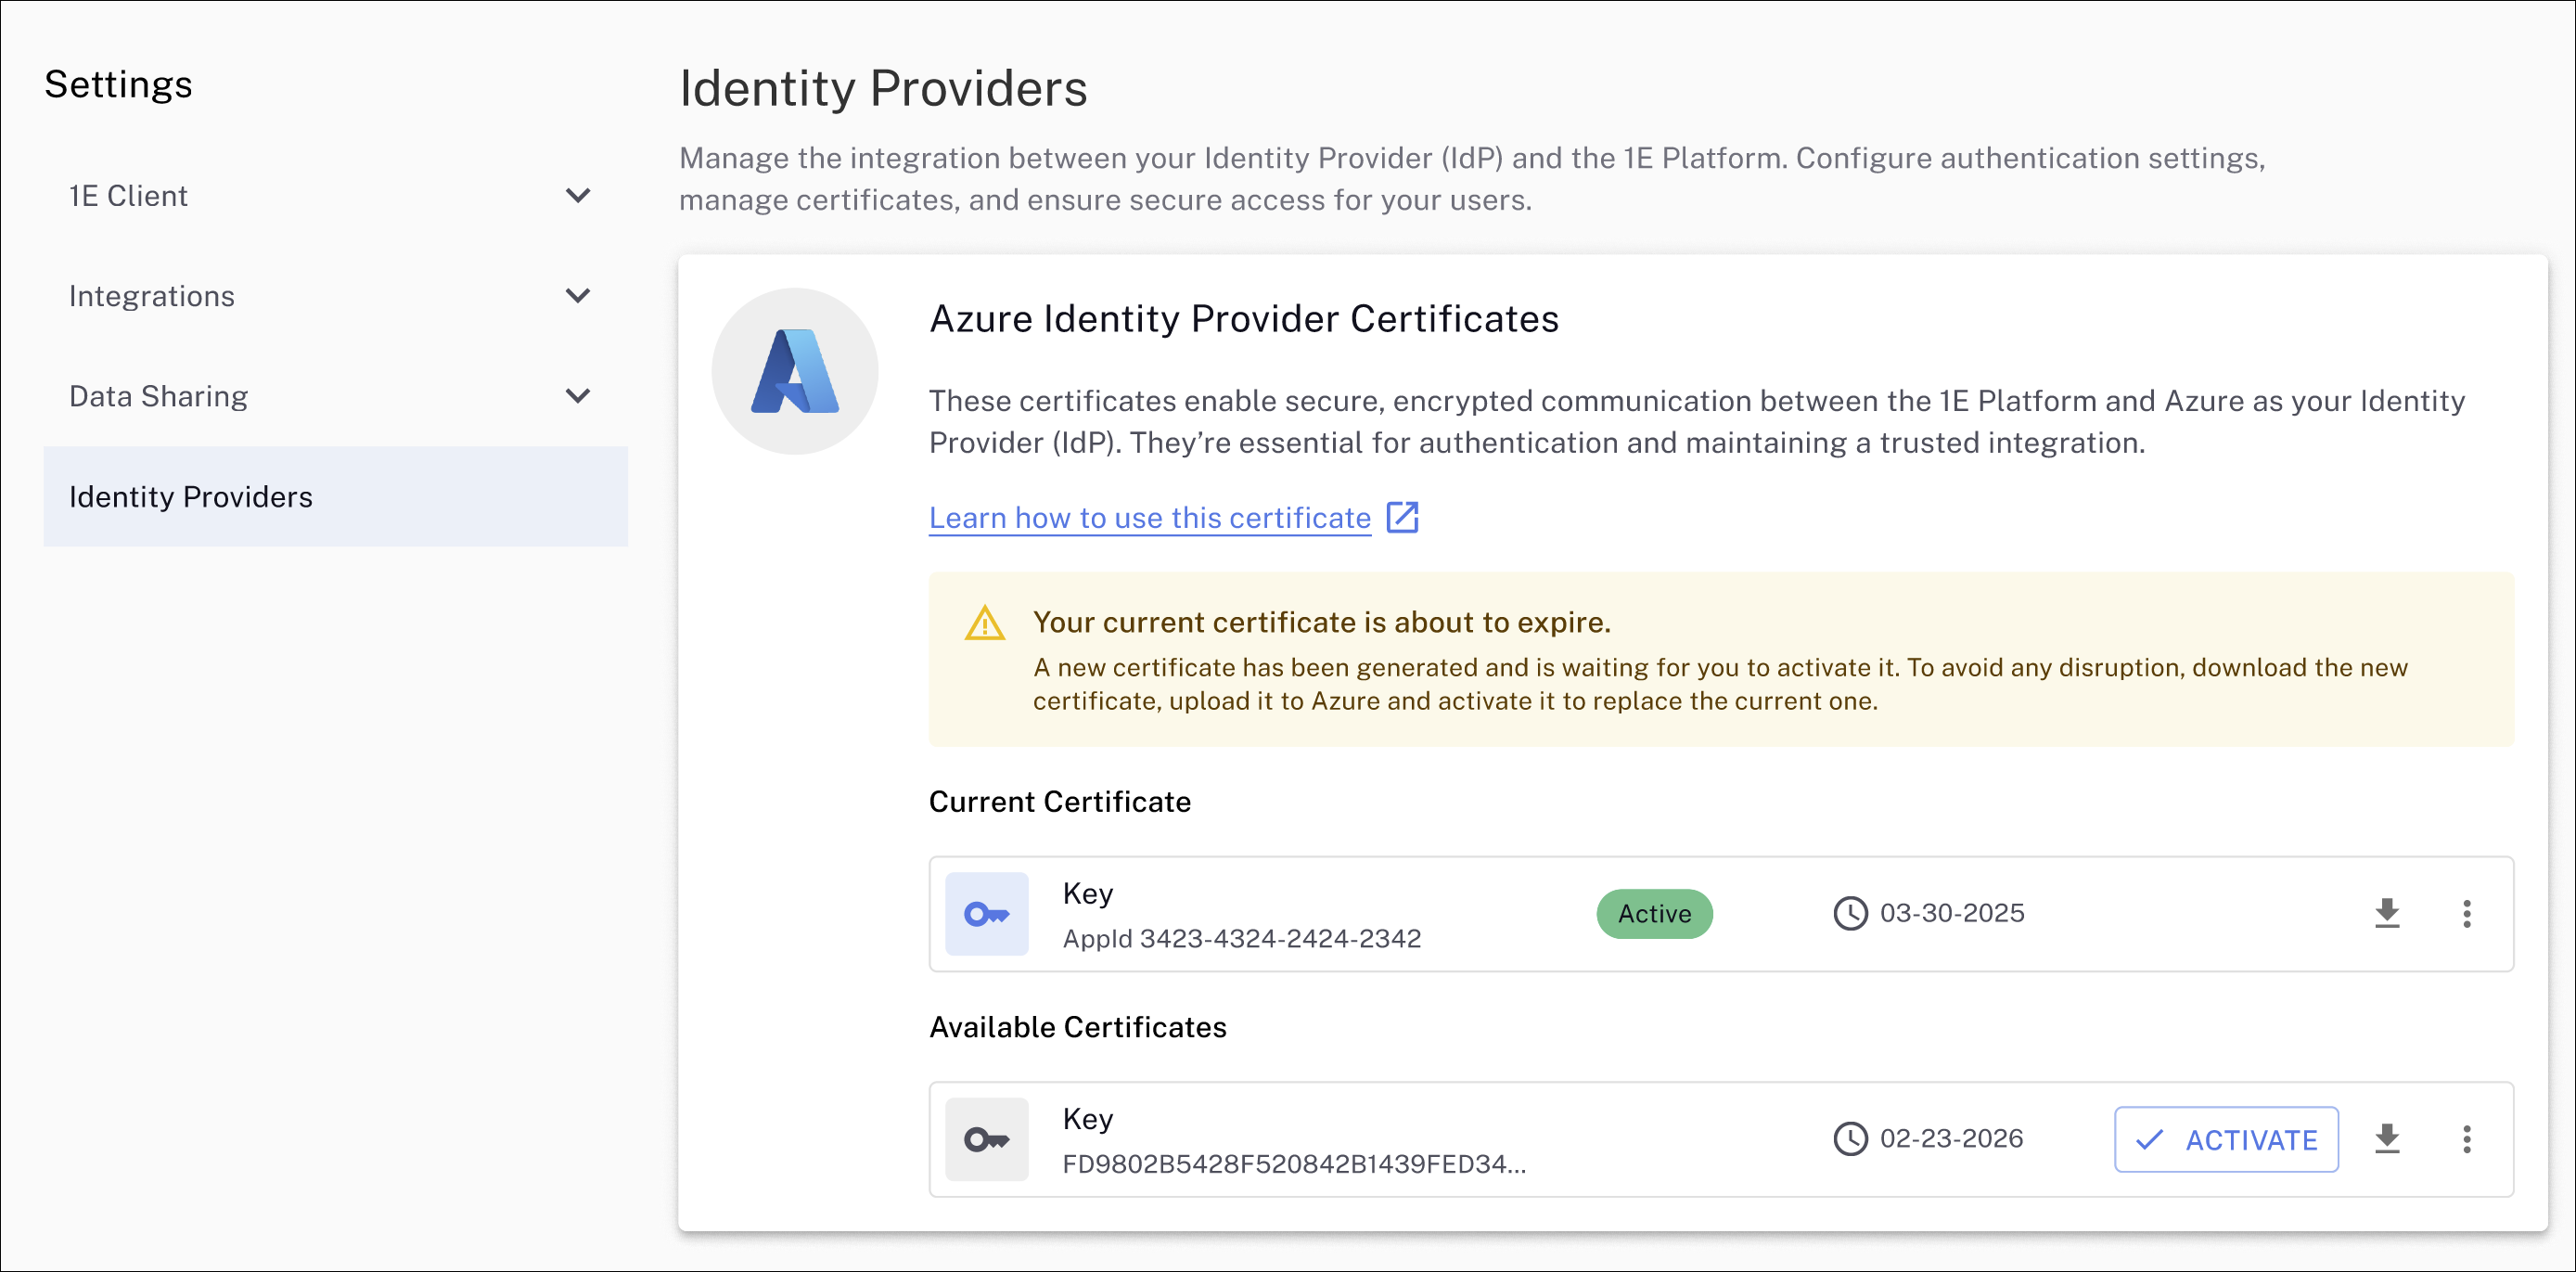
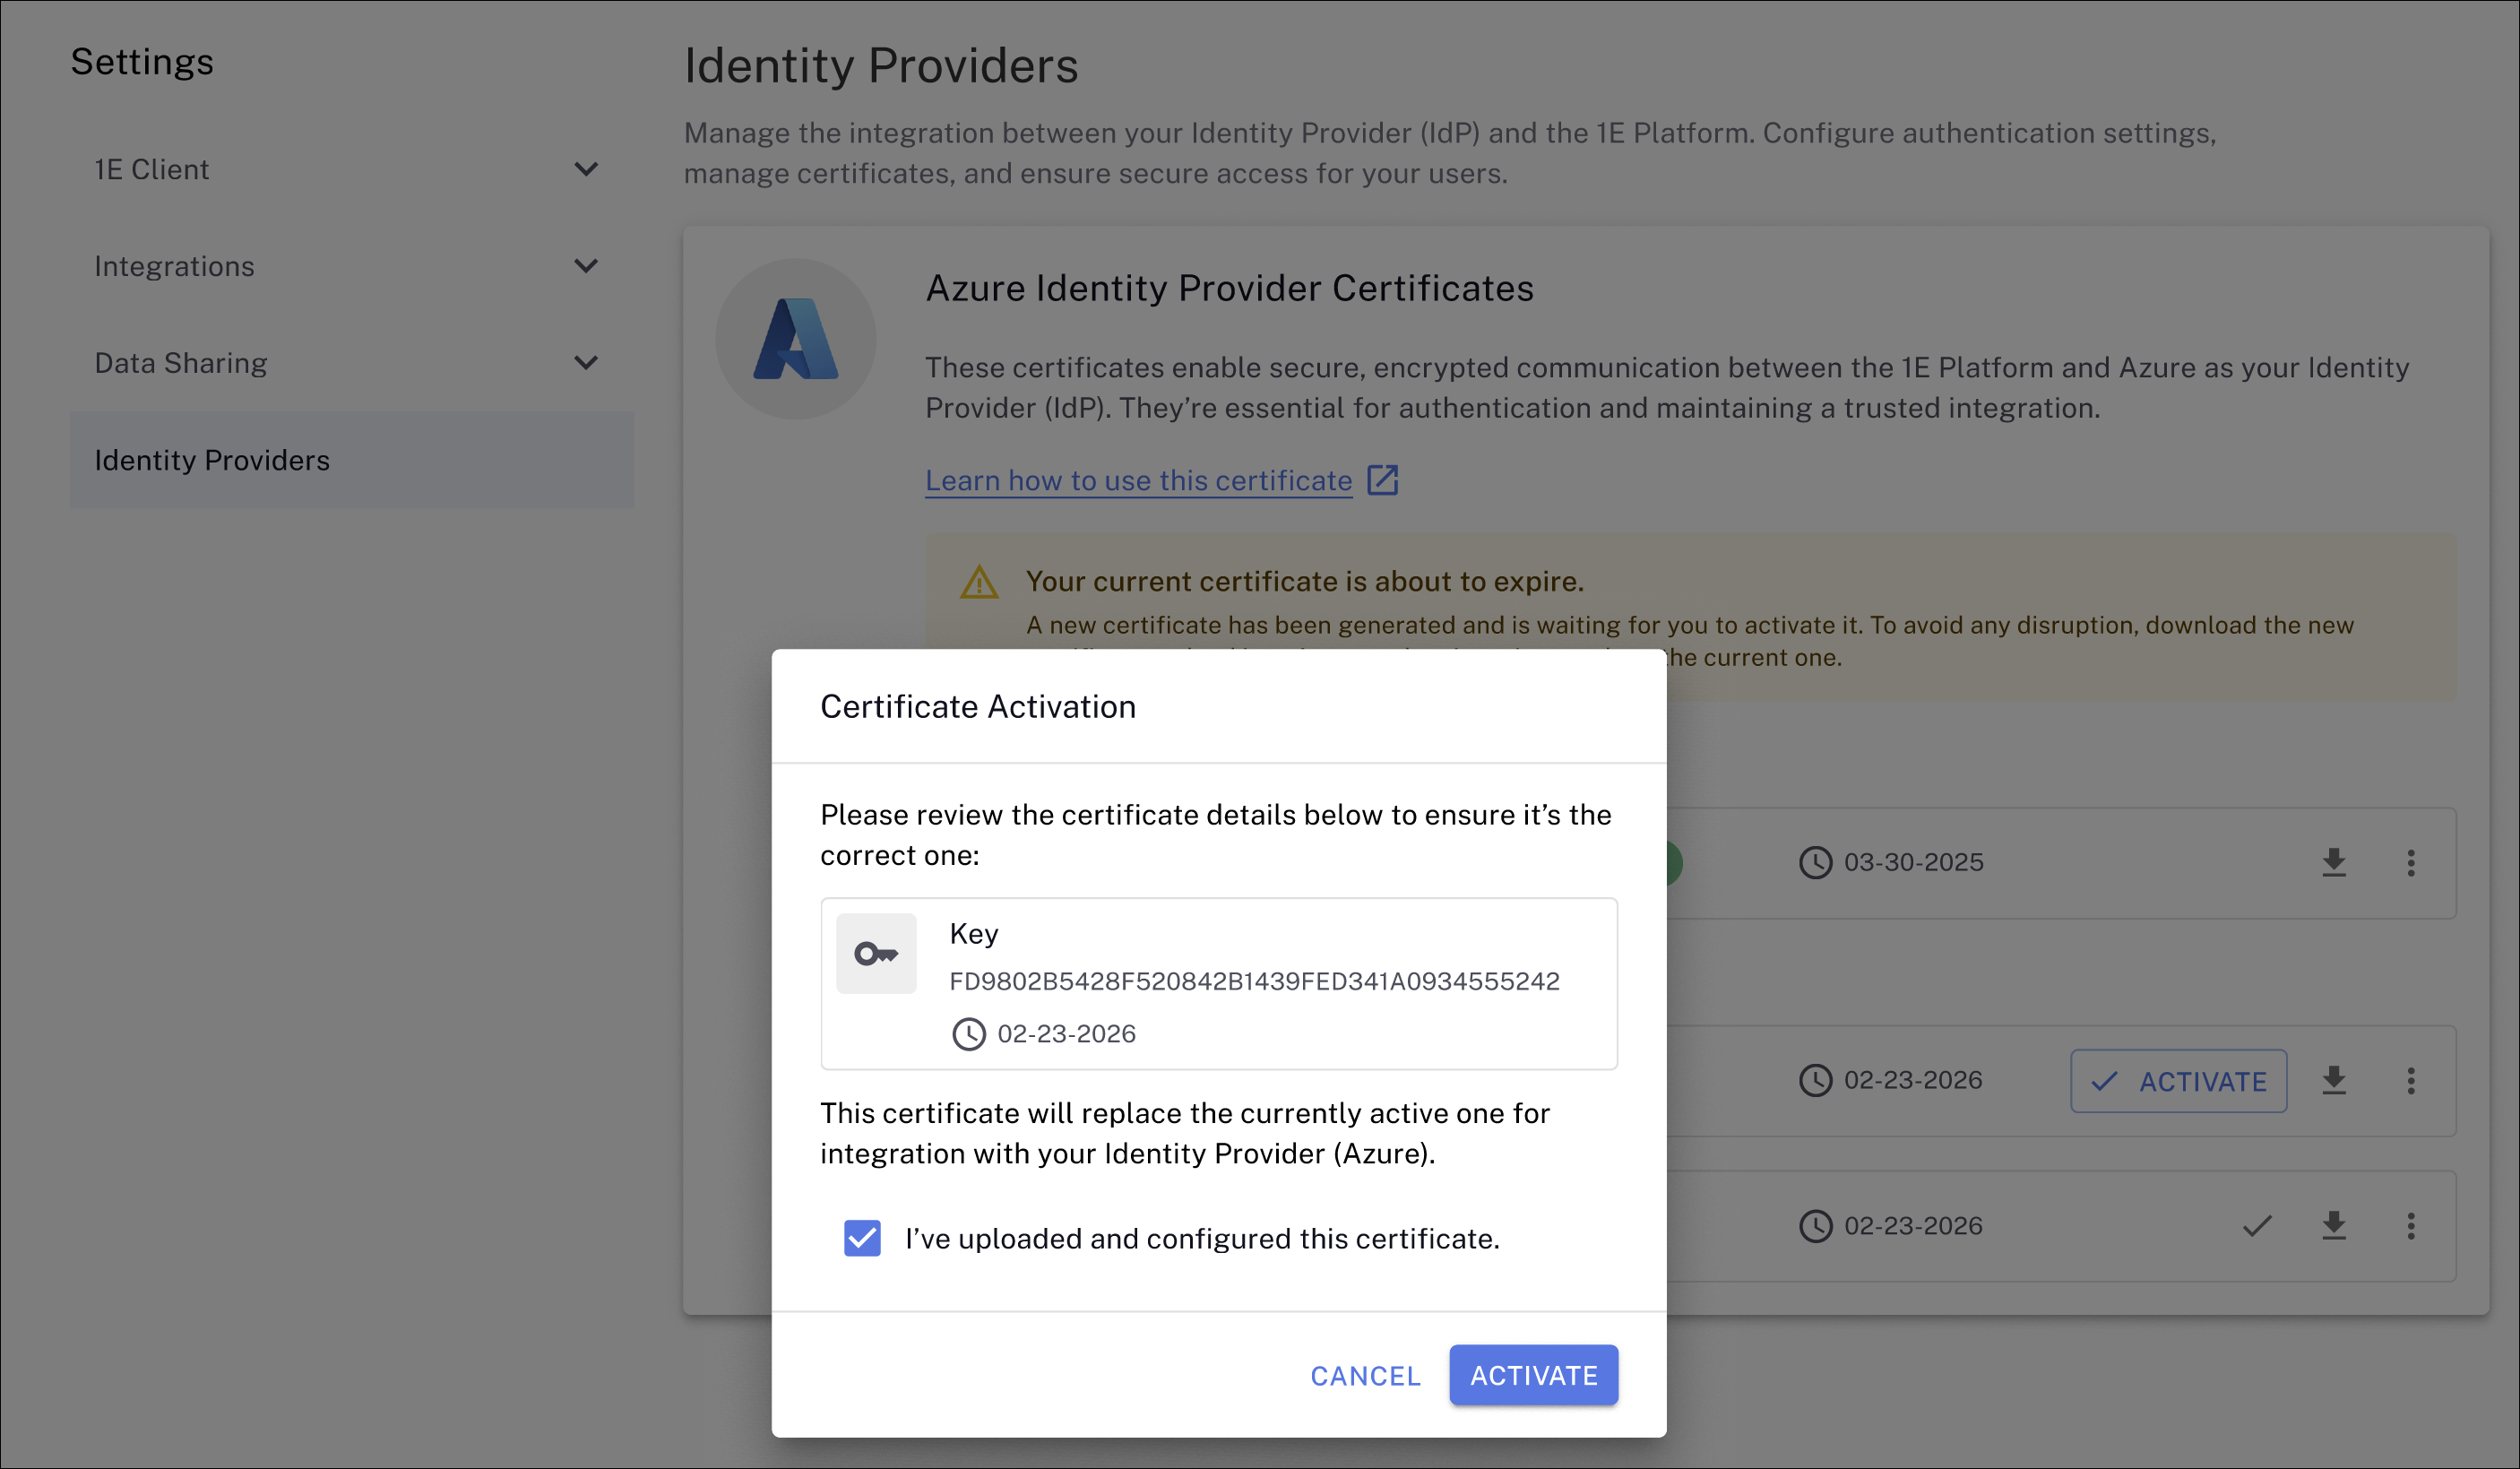
If your current certificate is about to expire, you will see a message like the one shown, along with any available certificates generated by the Platform. Your current certificate will be marked as Active in Current Certificate. Note the expiry dates for the certificates.
Activating a certificate is not required before uploading it to your IdP and verifying its validity.
If your certificate has expired, you will receive a notification similar to the one displayed. The process to download and activate a new certificate remains the same as when your certificate is about to expire.
-
Any valid certificate can be selected as your current IdP communication cert. In the example, there is one available certificate with an expiry date of 02-23-2026, which is downloaded by clicking the download arrow icon.
-
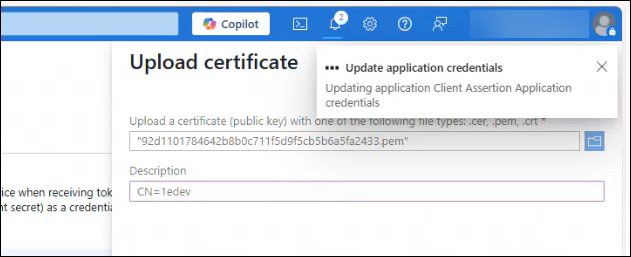
Save the generated .PEM file to your device or network location. The .PEM file will be in the format <certificate-thumbprint.pem>, for example: ccd0f21c48f8b547d5fea7fa52105699719c0b3e.pem
-
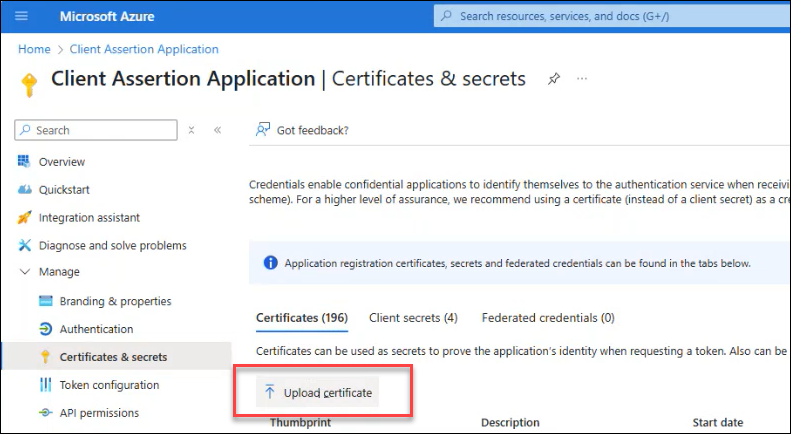
You must now update the Client Assertion Application used by Platform to perform directory searches in your IdP. Refer to AAD - 1E Client Assertion.
In our example, this is called the Client Assertion Application so the Azure admin portal the path is Azure Active Directory > Client Assertion Application > Certificates & secrets. Click Upload certificate.
-
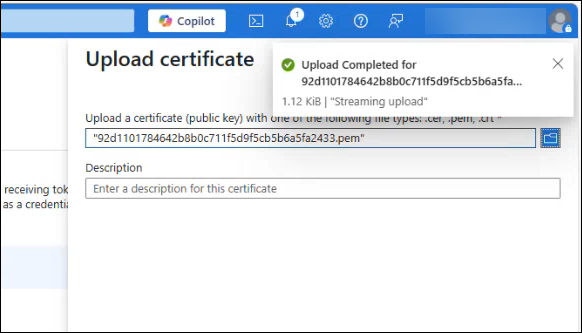
If the certificate uploads successfully, you will see messages like those shown below.
-
Once the .PEM is successfully uploaded, you can activate the corresponding Azure identity provider certificate in the Platform.
Click Activate and select I've uploaded and configured this certificate. The Platform validates that the new certificate is working and sets it to active.
-
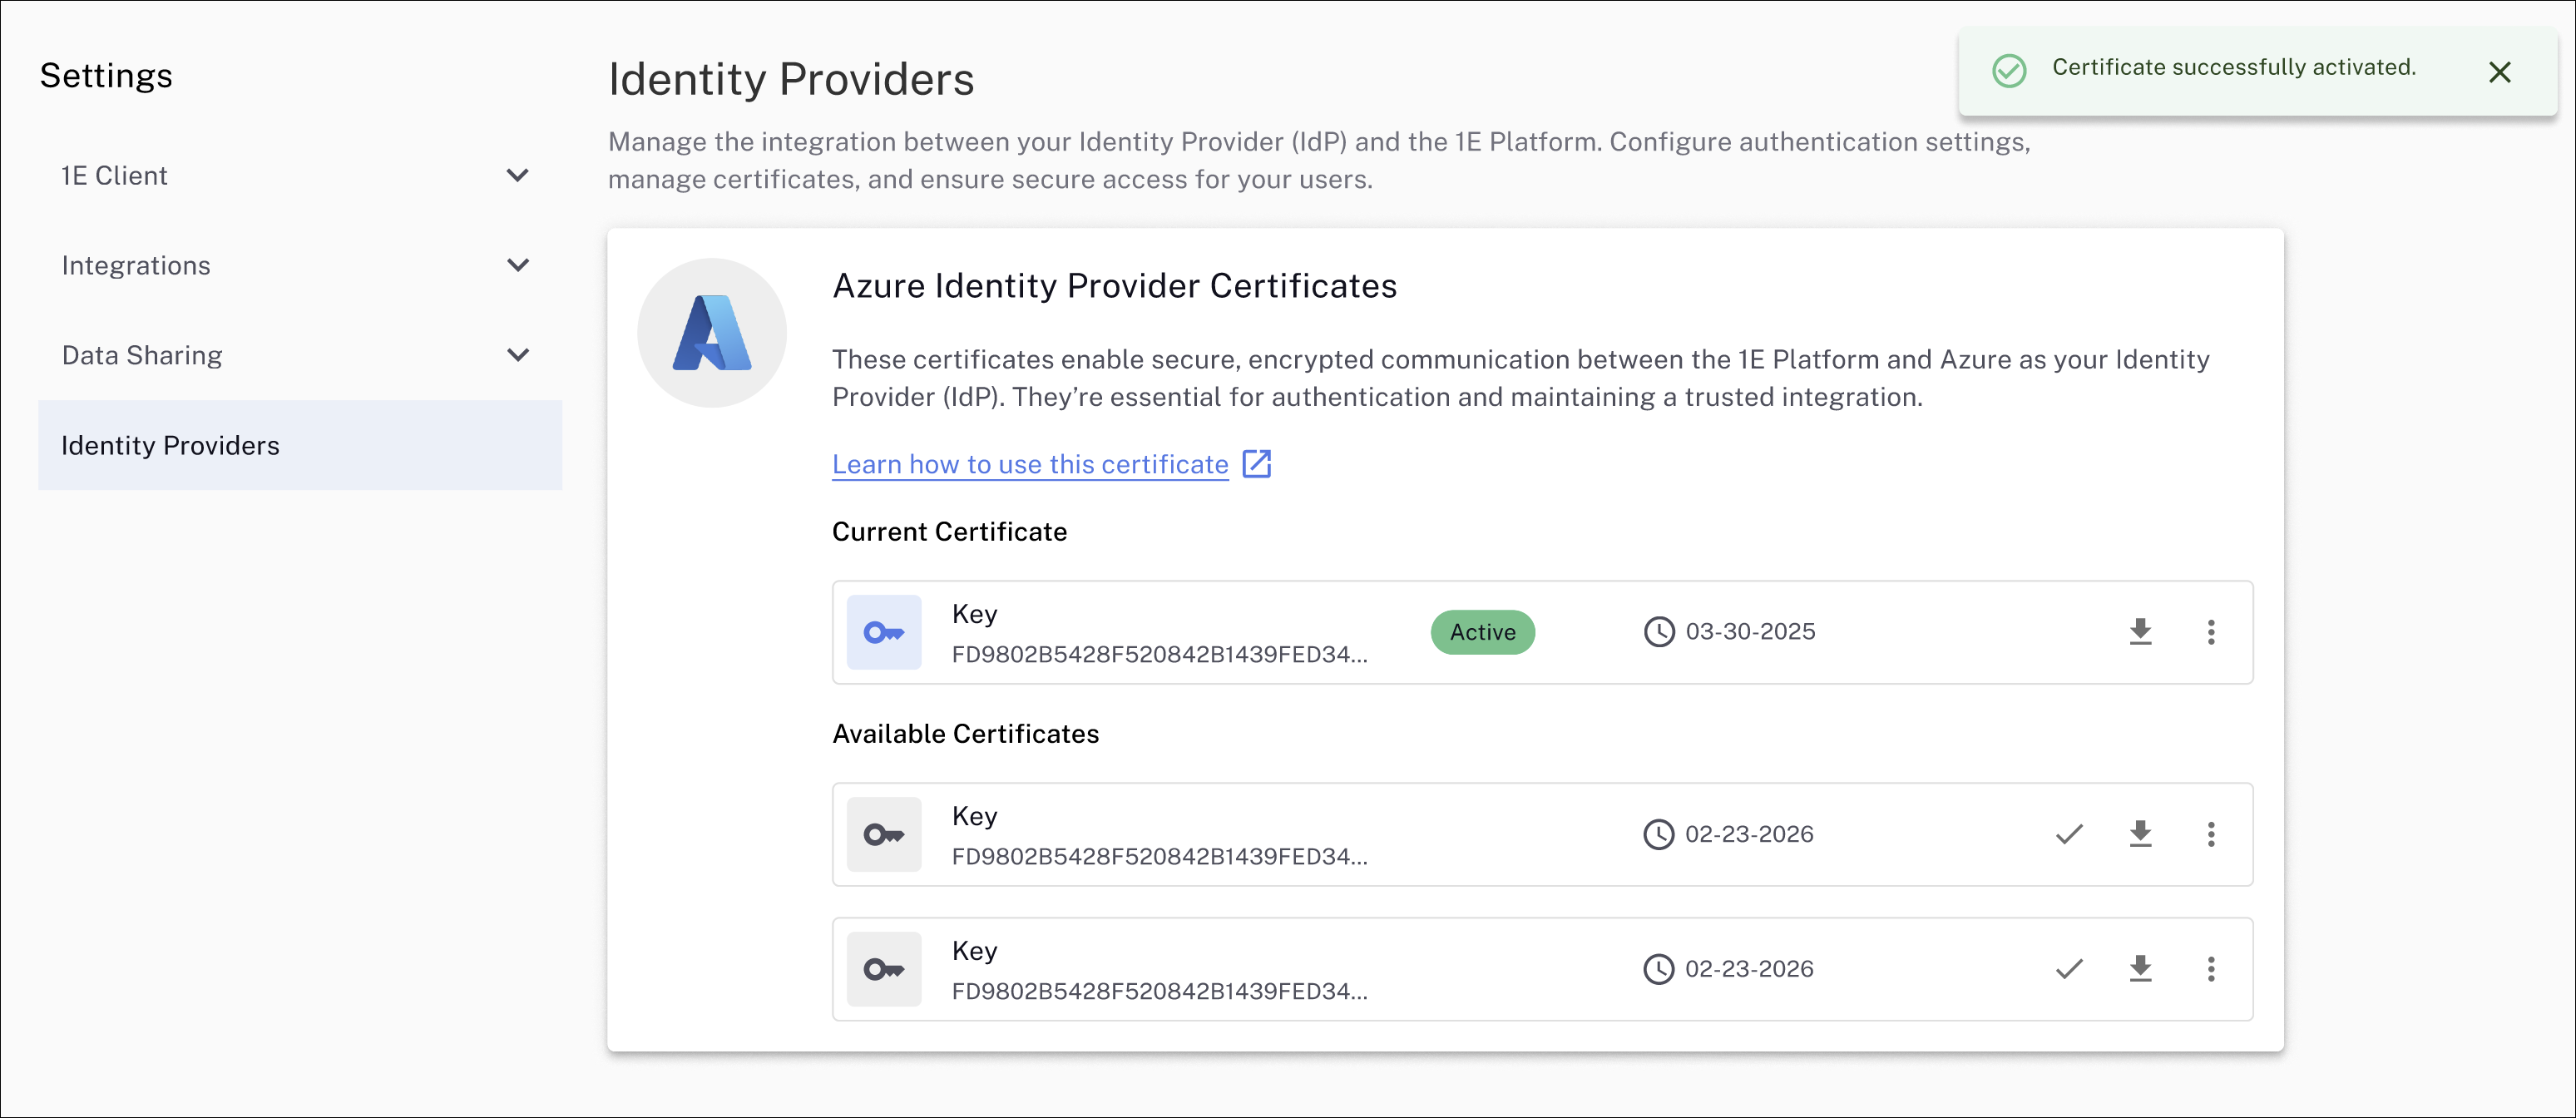
The activated certificate is now listed as Active in the Platform.

Okta IdP certificates
To renew your Okta IdP certificate, follow these steps:
-
Navigate to Settings > Identity Providers to view your current and any available certificates.
-
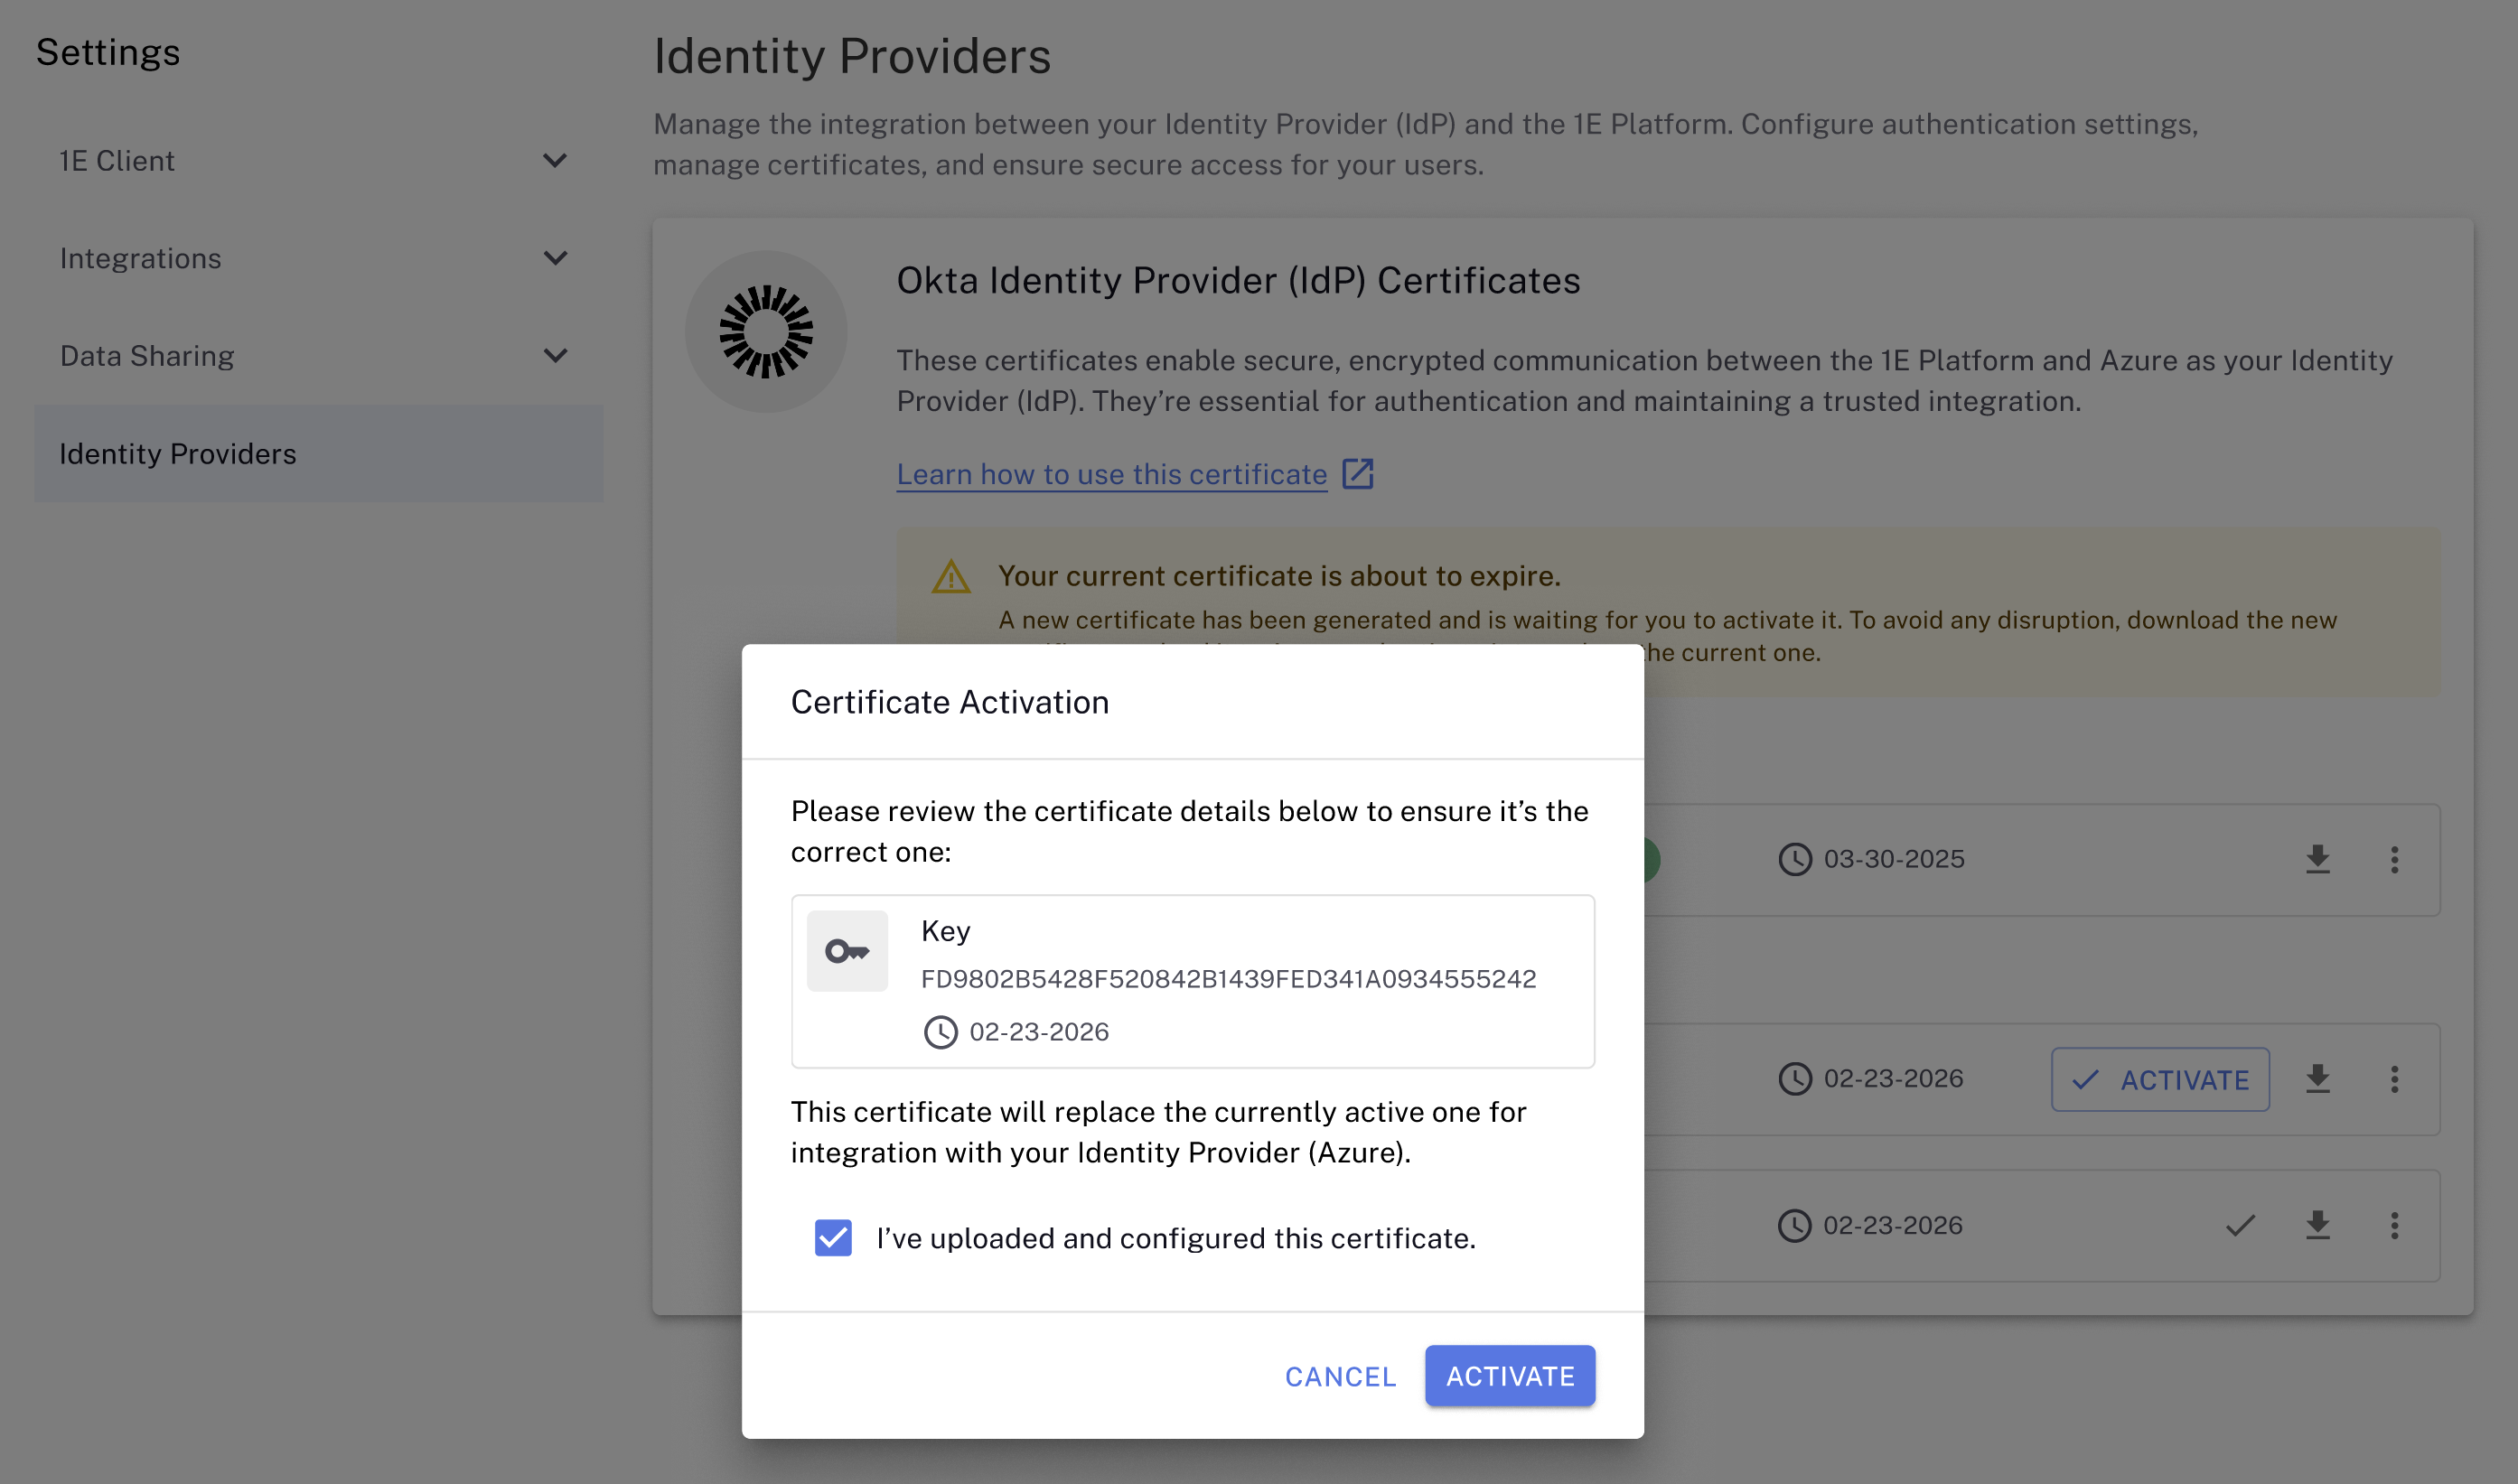
If your current certificate is about to expire, you will see a message like the one shown, along with any available certificates generated by the Platform. Your current certificate will be marked as Active in Current Certificate. Note the expiry dates for the certificates.
Activating a certificate is not required before uploading it to your IdP and verifying its validity.

If your certificate has expired, you will receive a notification similar to the one displayed for Azure. The process to download and activate a new certificate remains the same as when your certificate is about to expire.
-
Any valid certificate can be selected as your current IdP communication certificate. In the example, there is one available certificate with an expiry date of 02-23-2026, which can be downloaded by clicking the download arrow icon.
-
Save the generated .PEM file to your device or network location. The .PEM file will be in the format, <certificate-thumbprint.pem>, for example: ccd0f21c48f8b547d5fea7fa52105699719c0b3e.pem
-
You must now update the Client Assertion Application used by Platform to perform directory searches in your IdP. Refer to Okta Applications.
-
Once the .PEM is successfully uploaded, you can activate the corresponding Okta identity provider certificate in the Platform.
Click Activate and select I've uploaded and configured this certificate. The Platform will then validate that the new certificate is working and set it to active.
-
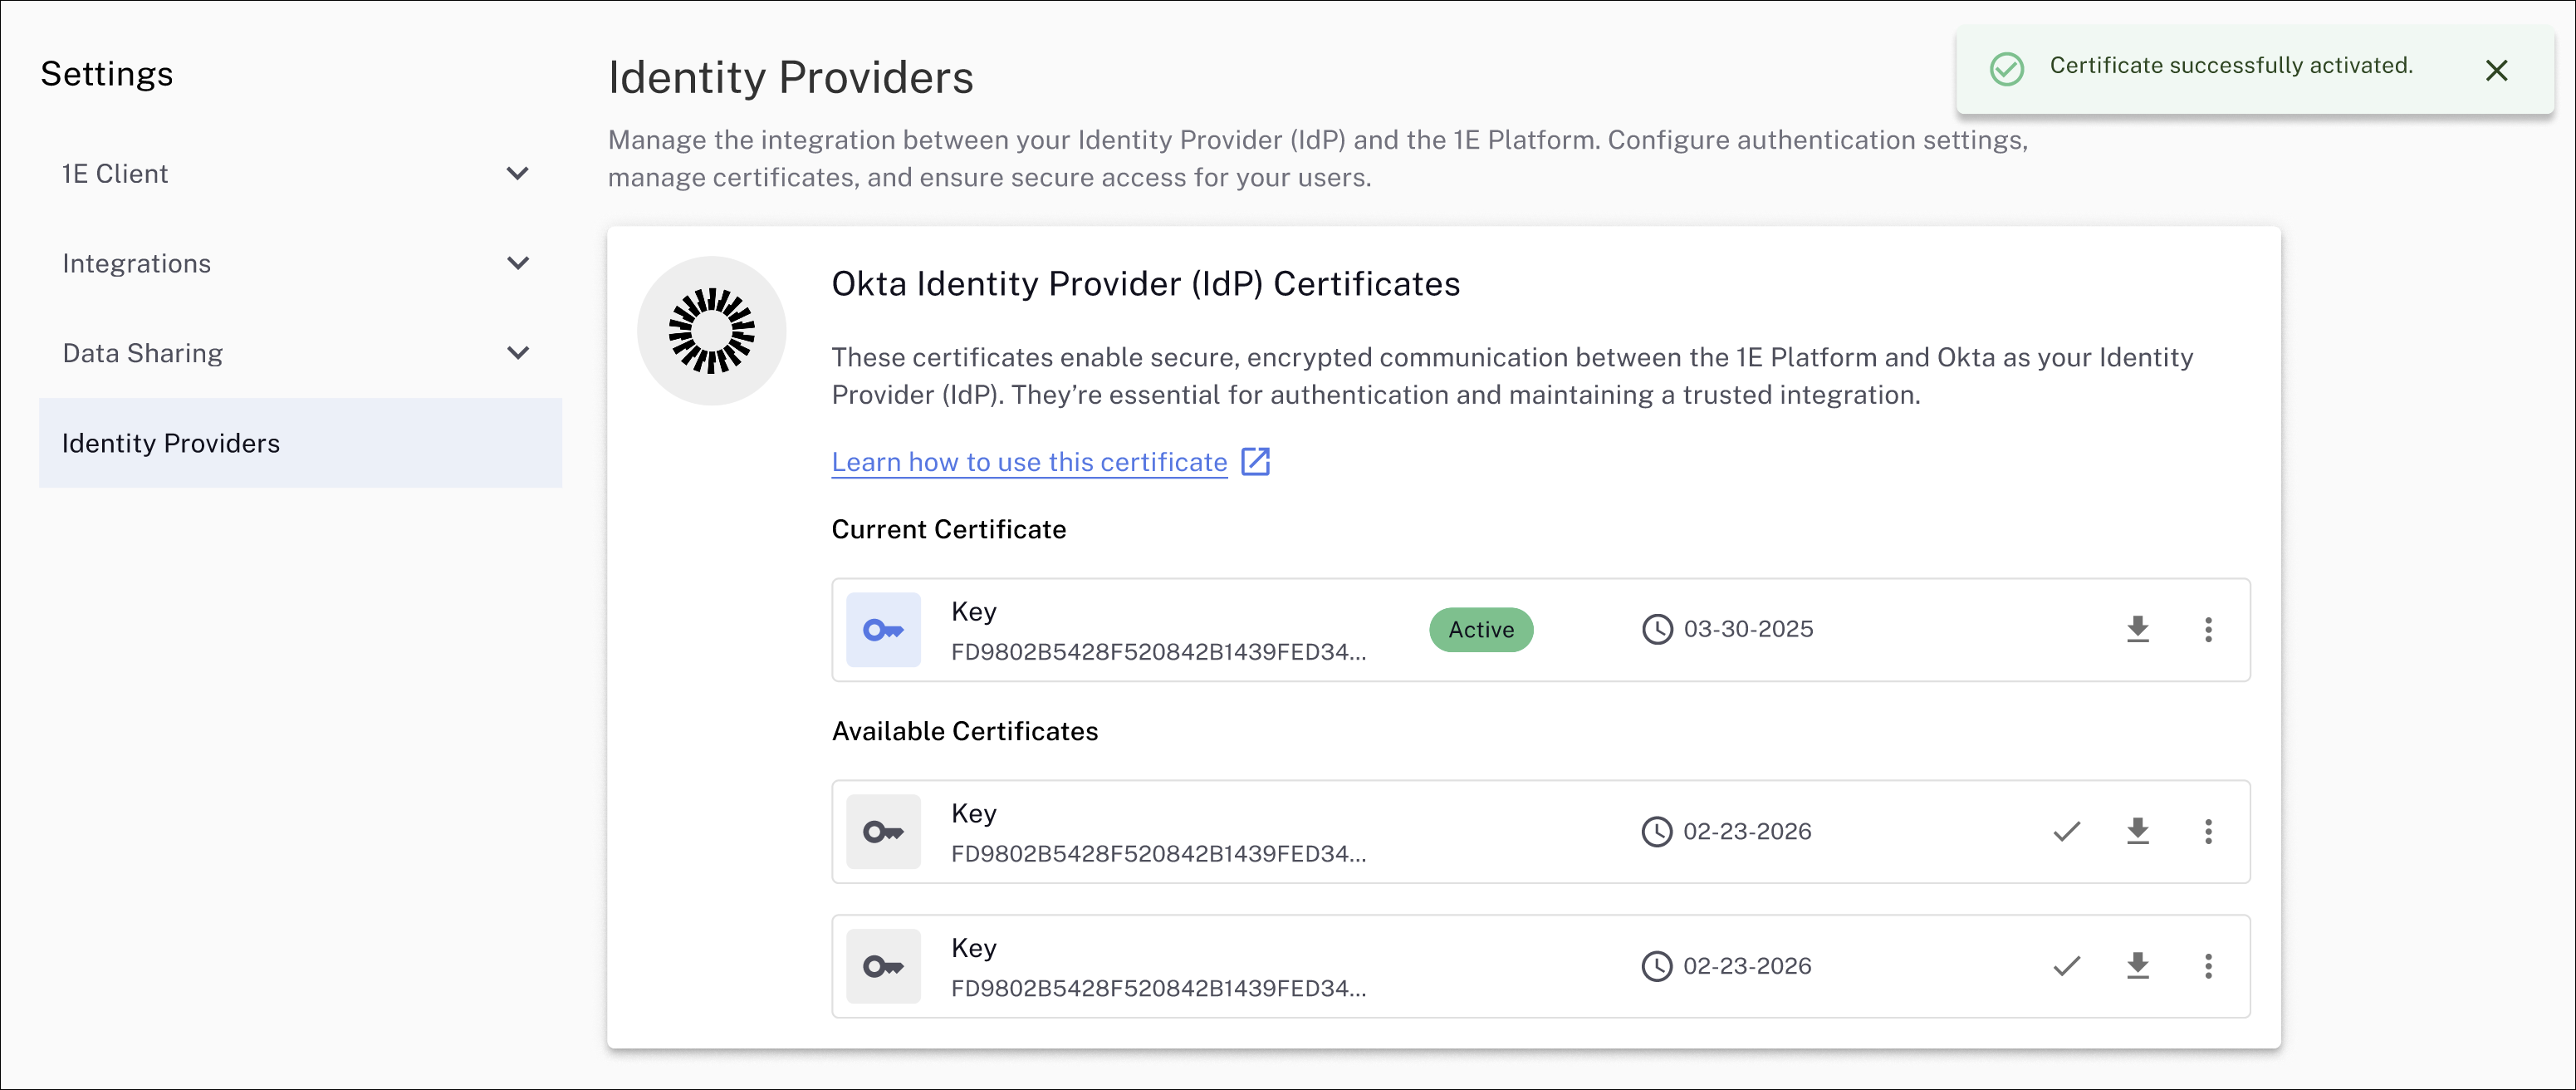
The activated certificate is now listed as Active in the Platform.
Logging and auditing
You can view logs related to certificate renewal and download them for security and audit purposes in the old UI by navigating to Settings > Monitoring > Audit Information log. The following example shows that a user downloaded an IdP certificate, and the type of event is classed as Infrastructure. Refer to Monitoring menu.