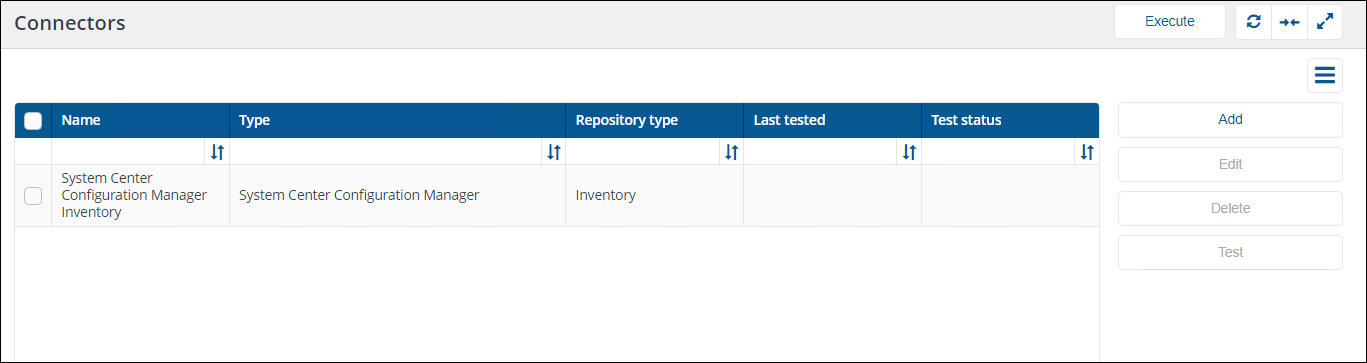
Connectors page
About connectors
Connectors are used to connect to other 1E and third-party systems, retrieve their data, and populate repositories.
1E provides the following inventory connectors to populate the Repositories page - 1E Server:
-
BigFix connector: Connects to a BigFix Inventory database server.
-
BigFixInv connector: Connects to a BigFix Inventory database.
-
File Upload connector: Uploads inventory data from a folder containing tab (TSV) and comma (CSV) separated value file(s).
-
Intune connector: Connects to an Intune application and collects inventory and usage data.
-
Microsoft Office 365 connector: Connects to an Office 365 application in InTune and pulls in inventory and usage data.
-
OpenLM connector: Connects to an OpenLM database server.
-
Oracle LMS connector: Connects to Oracle LMS and queries it for inventory information.
-
ServiceNow connector: Connects to a ServiceNow instance to import basic inventory data into SLA Platform.
-
System Center Configuration Manager connector: Connects to a Configuration Manager database and pulls in inventory and usage data.
-
1E connector: Connects the 1E and SLA components to support Management group and 1E Powered Inventory features. The 1E Powered Inventory feature uses instructions to fetch inventory data from 1E clients and is a prerequisite for Patch Success.
-
vCenter connector: Connects to a vCenter server and pulls in inventory data.
-
Windows Server Update Services connector: Connects to a WSUS database and pulls in patch data.
Use the links above to find more information about each type of connector. Refer to for more information about viewing and exporting inventory repositories. Refer to Third-party data sources below for supported versions of software used by these connectors and other prerequisites.
Additional connectors may exist for add-on consumer applications that have been installed. Consumer applications may add additional connectors to populate their repositories.
For example, AppClarity has the following connectors to populate its entitlement repository:
-
AppClarity v5.2 connector: Exports entitlements from an AppClarity 5.2 database into a tab-separated value (TSV) file, which can then be reviewed and imported into.
-
Entitlement .tsv connector: Uploads entitlements from a folder containing one or more tab- or comma-separated value files.
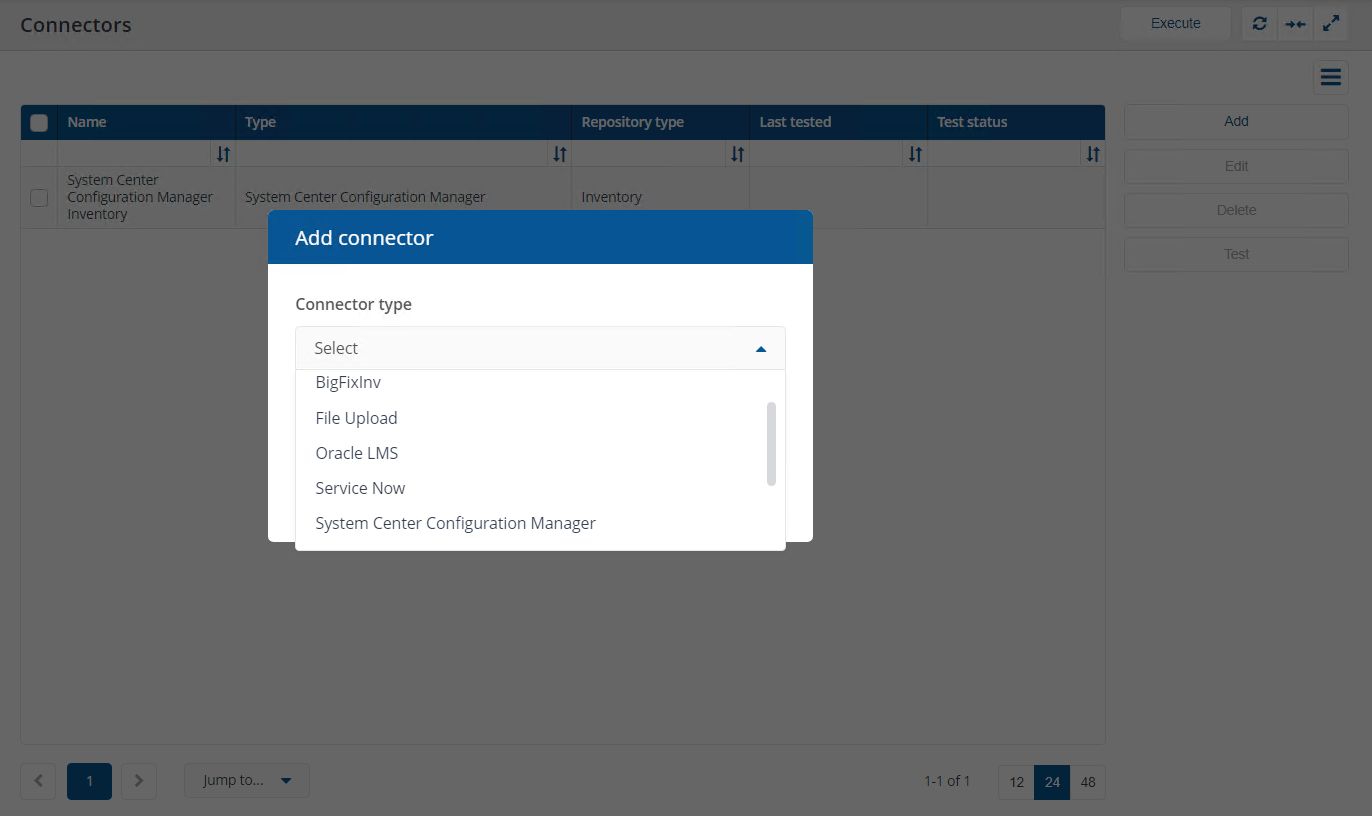
Adding a new connector
-
Navigate to Settings > Configuration > Connectors.
-
Click Add.
-
In the Add Connector pop-up window, select the required Connector type from the list.
-
Once you've made a selection, the Add connector pop-up window will show fields appropriate to the selected connector type.
-
Enter the relevant connector configuration details including Connector name.
Use a naming convention for connector names, for example, <connector type> <scope> <RCR>. Scope describes where data is coming from or what it's being used for, for example, Demo, Test, Lab, Q2 Audit. Include RCR in the name if the Run Consolidation Reports option is available and you have enabled it.
For more information about what details are required, refer to the corresponding documentation page for the connector type you are configuring.
-
Click Add, and a new connector will be added with the selected details.
When the new connector is saved, a new action is defined in 1E. This new action will have a name in the format Sync Data - <ConnectorName>. To sync the data from the connector's data source to a selected repository, you will need to do one of the following:
-
Execute a manual sync action. Refer to Executing a connector sync action.
-
Schedule a sync action. Refer to Schedules page.
Inventory connectors use consolidation actions to consolidate, normalize, and store data in inventory repositories. Select the Run Consolidation Reports checkbox if you want consolidation actions to be processed each time the Sync Data action is executed for the connector.
If you enable this on more than one connector, it can lead to unnecessary processing. The recommended method of processing consolidation actions is to schedule the action Generate Report - Basic Inventory Consolidation to execute after the Sync Data actions have run for all connectors. This will execute the remaining consolidation actions. Alternatively, select the Run Consolidation Reports checkbox on one of your connectors. You can view action processes in Settings > Process log.
Deleting a connector
-
In the list of connectors, select the checkbox of the connector you want to delete.
-
Click Delete.
-
In the Delete connector pop-up window, you will be asked if you want to proceed and delete the selected connector.
-
Click Yes, delete connector.
Testing a connector
Once you have added a new connector, you can test if the details you have entered enable you to connect to the specified data source.
-
In the list of connectors, select the checkbox of the connector you want to test.
-
Click Test.
-
The Test status column will display a clock icon
 for the connector indicating that the test has been queued for executing.
-
If the test succeeds, the Test status column will display a check icon
 , and the Last tested column will display the date and time when the test succeeded.
-
If the test fails, the Test status column will display a failed icon
 , and you'll have to check the details you entered for the connector.
If you have access to the Process log, you can see an entry for the Test action.
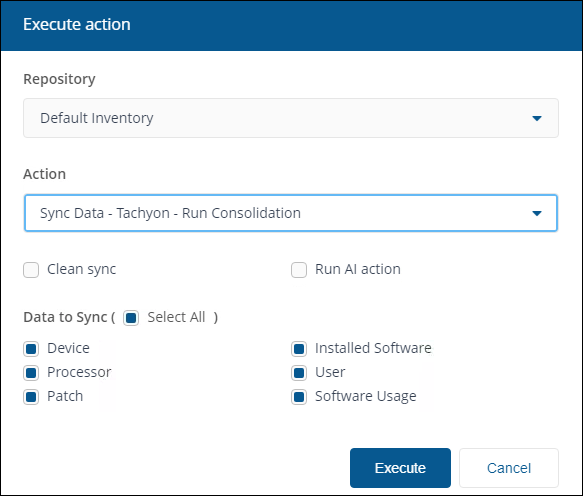
Executing a connector sync action
Execute allows you to manually run an action. To schedule an action, refer to Schedules page.
-
Click Execute.
-
In the Execute action pop-up window, use the Repository menu to select the inventory repository you want to populate.
-
Once the repository has been selected, you can select the action to run. In the case of inventory repositories, the actions will be restricted to inventory-related actions. For a connector, you will be looking for an action in the format Sync Data - <connector name>.
-
For inventory syncs (where you sync a connector), you have additional options to check:
Clean Sync causes the deletion of existing data previously imported by the selected combination of action and repository. Data imported by any other connector actions is left intact and consolidated with new data. To clear all data from a repository, refer to Repositories page - 1E Server.
If the Clean Sync checkbox is not selected, an incremental sync will occur, consolidating new data with old. An incremental sync is quicker than a clean sync.
Clean Sync will prevent the Management Groups feature and applications such as Patch Success from working until the sync is complete and new data has been consolidated. This operation should only be performed if you need a clean sync or are experiencing problems with sync times taking too long.
Run AI action will cause the AI action to run, which is only available if AI Powered Auto-curation has been enabled. The Run AI action checkbox is also available if the selected action is Generate Report - Basic Inventory Consolidation. For details on how to enable AI Powered Auto-curation, refer to AI Powered Auto-curation.
Data to Sync allows you to select some or all categories of data supported by the connector.
-
Click Execute in the Execute action pop-up window to start the sync.
-
A pop-up window appears momentarily informing you that the sync has started and you can monitor the progress in the Process log.
-
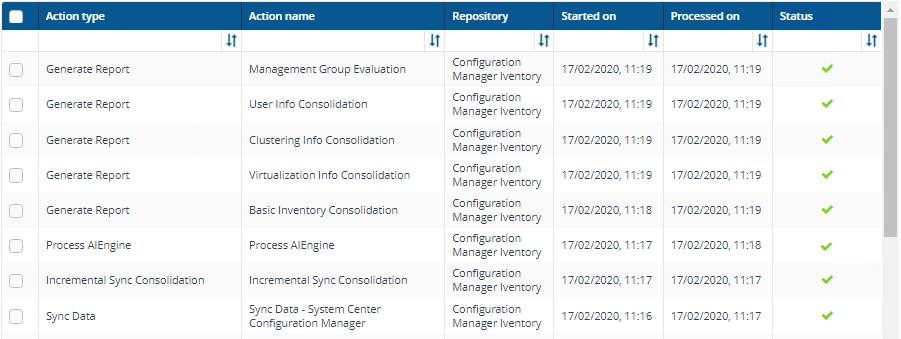
When the sync starts, a number of actions are queued to be performed on the selected repository. To check the progress of the sync actions, navigate to the Monitoring > Process log page where you can see the sequence of actions that have been queued for the selected repository related to the Sync Data action selected. When each action has finished running, you'll see a check icon
appear in the Status column if it has succeeded or a failed icon if it has failed. -
Once all the actions have succeeded, navigate to the Monitoring > Sync log page to check the results. This page displays the items that have been added to the selected repository as a result of running the sync.
Execute is also available from Process log.
Third-party data sources
The table below shows the supported versions of software used by out-of-box connectors.
|
Connector |
Product |
Prerequisites and configuration information |
|---|---|---|
|
BigFix |
BigFix |
|
|
Intune |
Intune |
|
|
Microsoft Office 365 |
Azure |
|
|
OpenLM |
OpenLM Server version 21.12 |
|
|
Oracle LMS |
Oracle LMS |
|
|
ServiceNow |
|
|
|
System Center Configuration Manager (SCCM) |
|
|
|
1E |
1E |
|
|
vCenter |
VMware PowerCLI 11.1.0 |
VMware PowerCLI 11.1.0 must be installed on the 1E Master server (where the SLA Integrate Services Agent service is hosted) before you can configure and use the vCenter connector. Earlier or later versions of PowerCLI are not supported and may cause errors. VMware PowerCLI is freeware and was previously known as vSphere PowerCLI. VMware PowerCLI supports multiple versions of VMware vCenter Server. Refer to the VMware compatibility matrix. |
|
WSUS (Windows Server Update Services) |
WSUS |